Within the Uncountable platform, Experiment Checks enhance efficiency and accuracy in quality assurance processes. Experiment Checks enable the system to automatically assess experiments against specified criteria (via Specs) and apply check tags to denote success or failure.
To set Experiment Checks, navigate to the “Specs” page by hovering your mouse over the Calculate tab of the tool bar and click “Set Spec”.
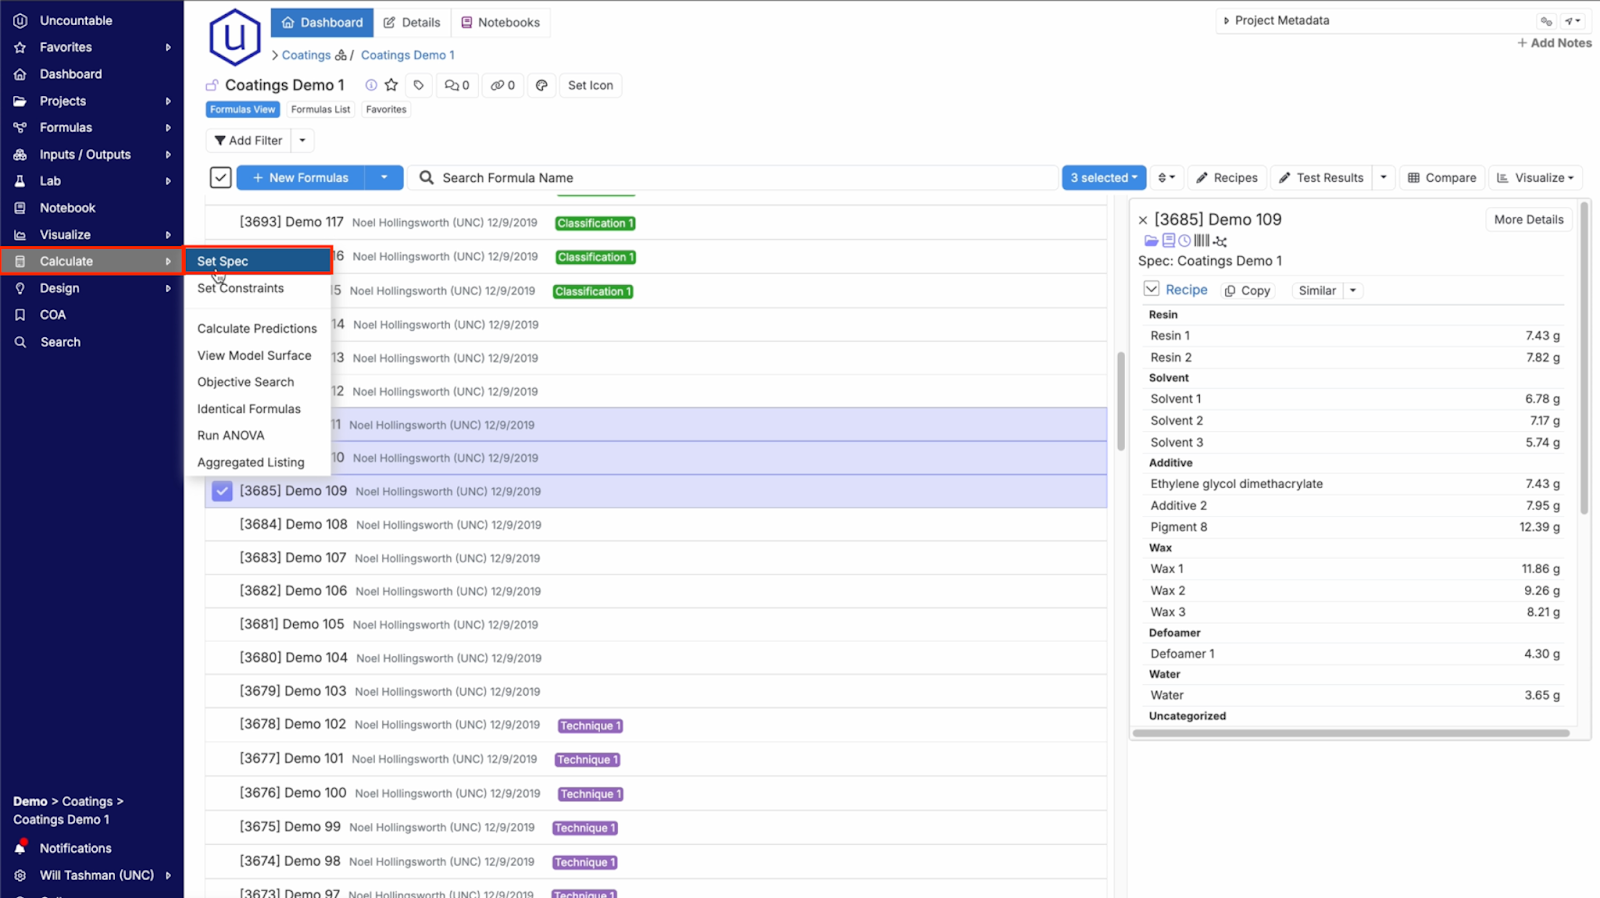
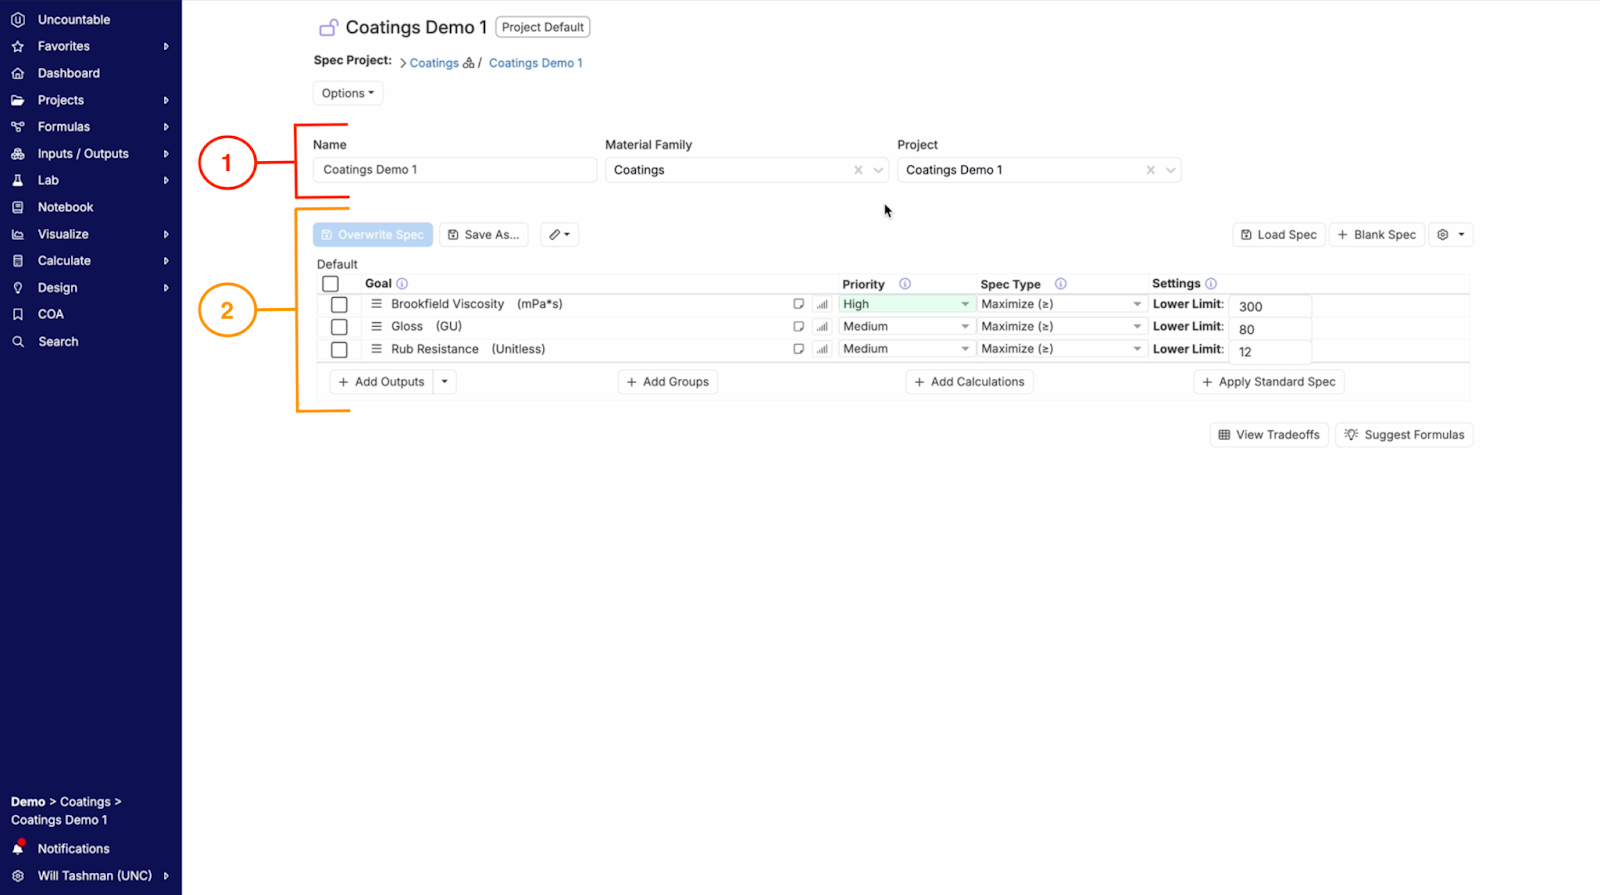
From this page, you see the Project Default spec (i.e. Coatings Demo 1). This is applied to all experiments that do that have a unique experiment-specific spec.
You have the ability to change the spec name, material family, and project by editing the top row (Object 1). Spec outputs and their priority, type, and settings can be viewed and edited below (Object 2).
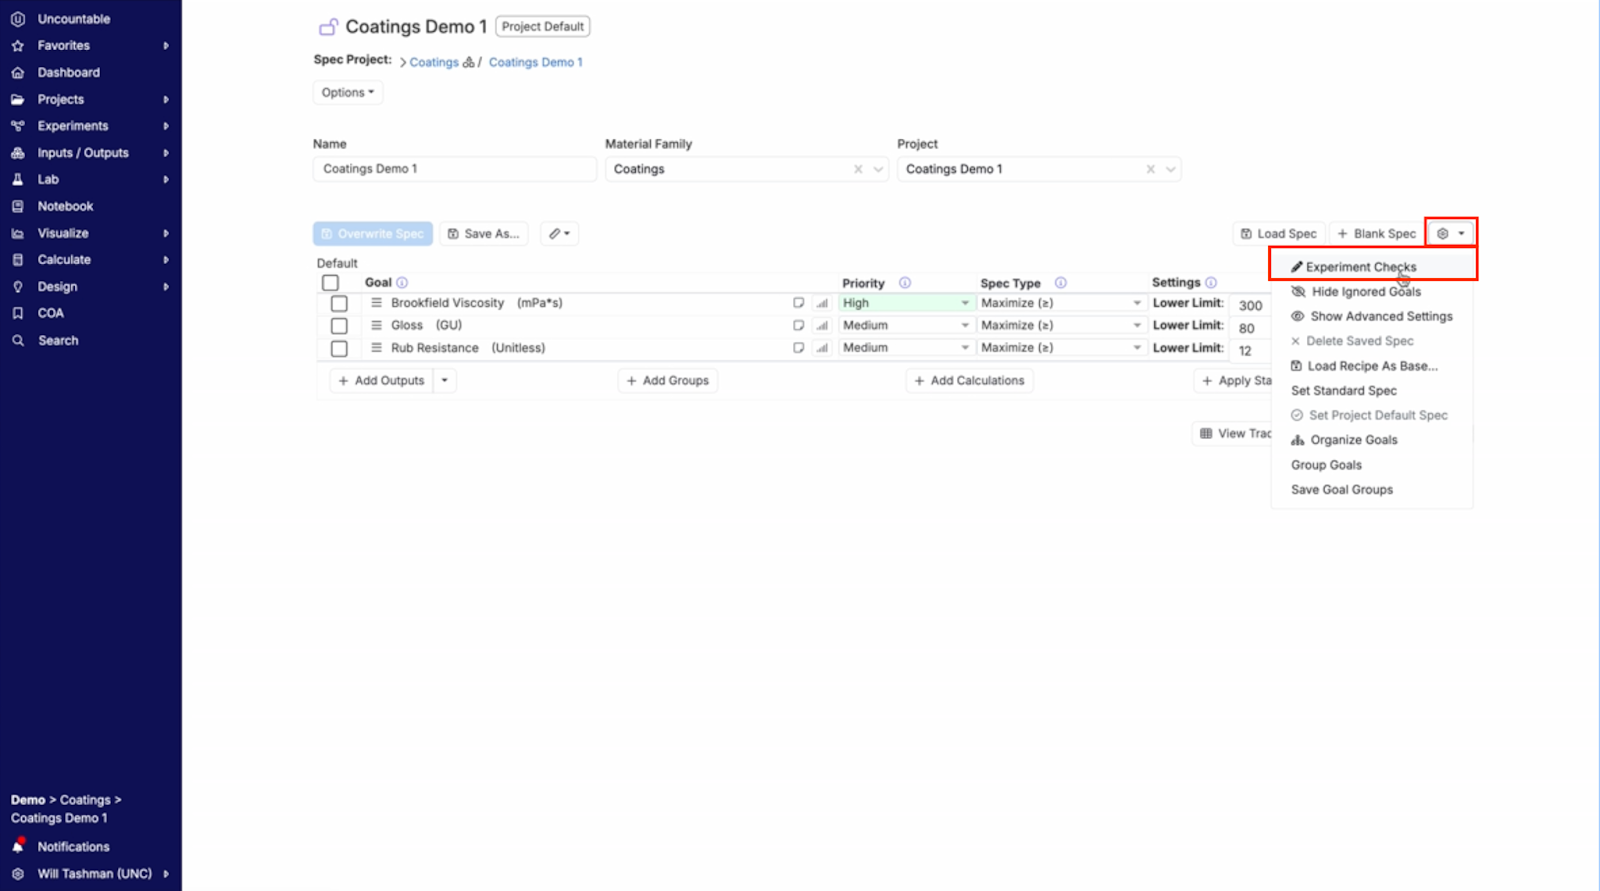
To add, delete, or edit Experiment Checks, first click on the gear icon and select “Experiment Checks”. This opens the Experiment Checks page.
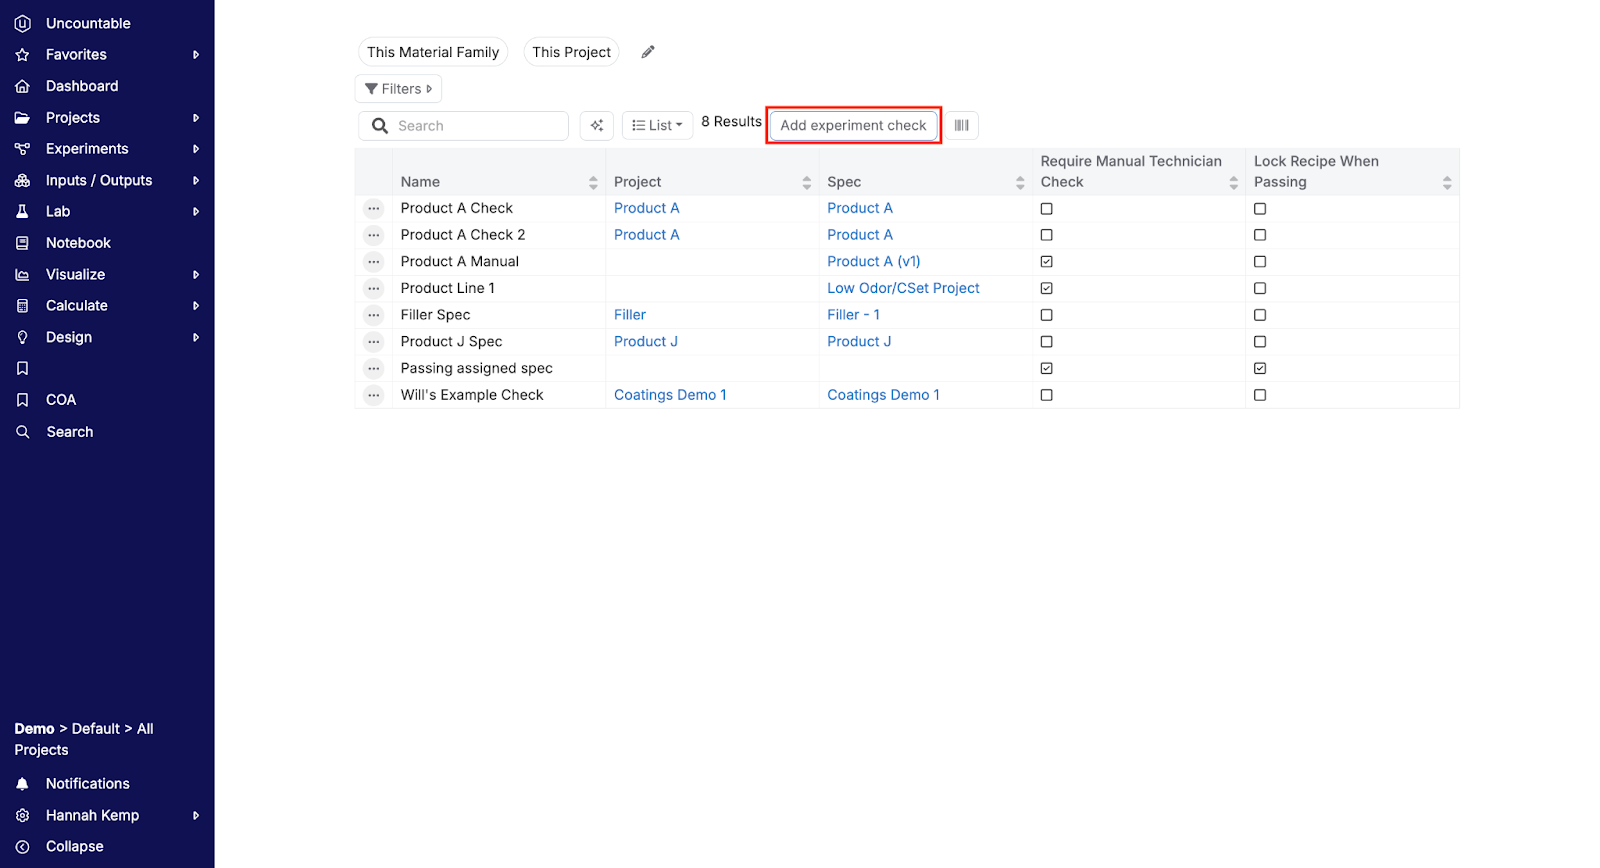
This page displays current Experiment Check, their associated project, and columns displaying the settings for each.
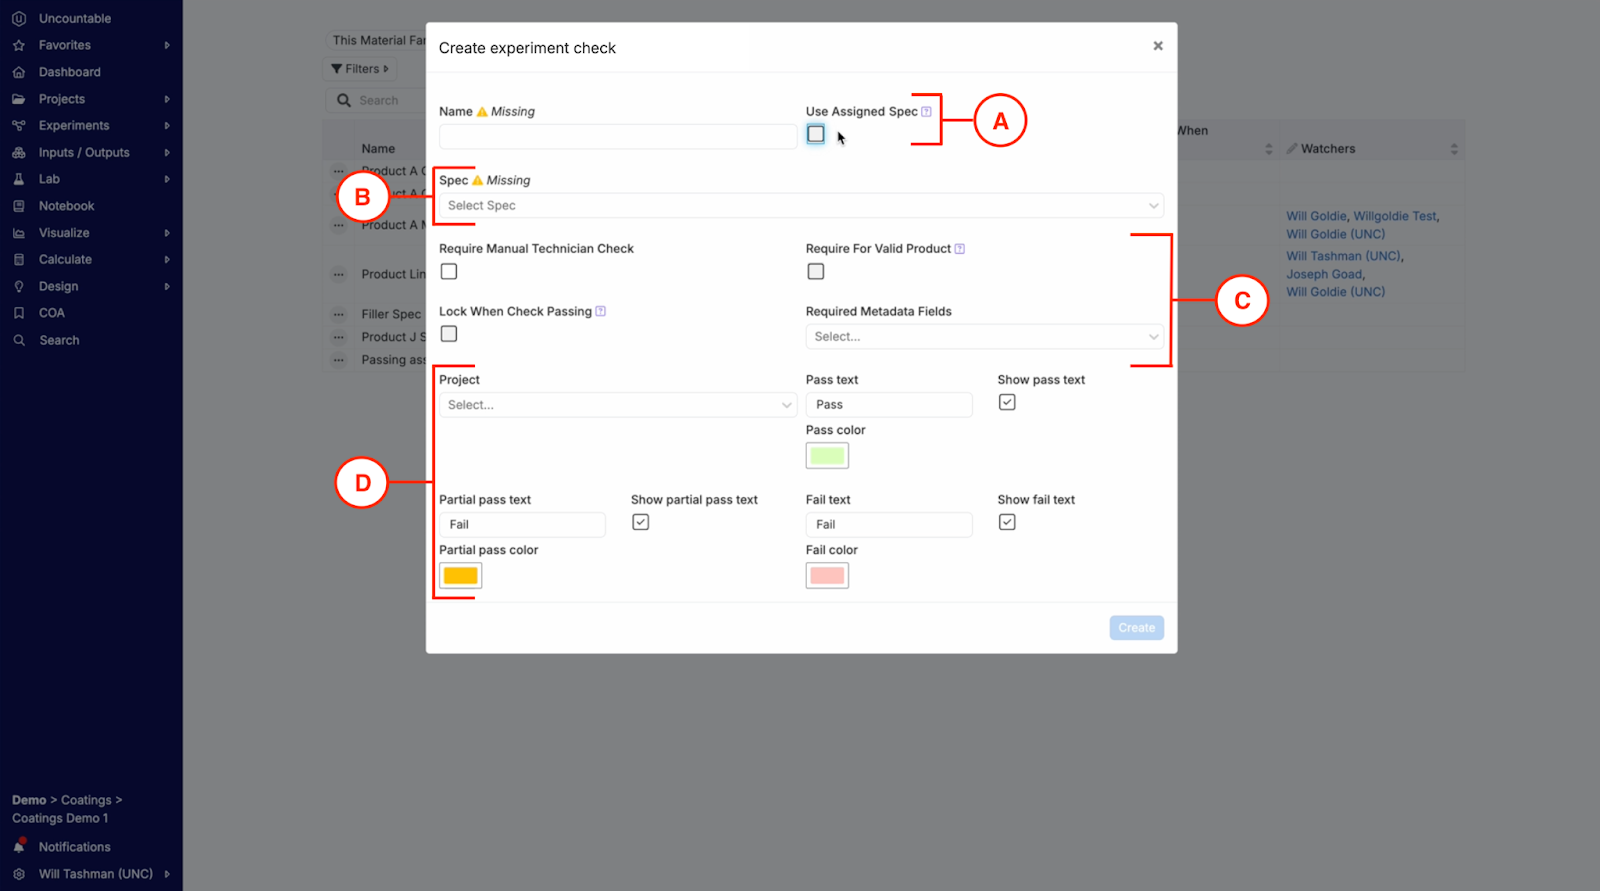
Next, open the Create Experiment Check modal by clicking “Add experiment check”.
Within this modal, you can add a new Experiment Check by using an assigned spec (Object A) or picking a default spec (Object B).
Next, define check settings (Object C) and required metadata fields. Toggling “Require Manual Technician Check” unlocks “Require for Valid Product” and “Lock When Check Passing”.
- Require Manual Technician Check: The system will not automatically determine the pass or fail status of the experiment against a spec. Instead, a technician or user must manually review the experiment.
- Require for Valid Product: The experiment will be marked as a valid product if it passes the Experiment Check.
- Lock When Check Passing: The experiment will be locked if it passes the Experiment Check.
Experiment Check results are displayed as colored tags on the dashboard view. In the last step, define these check tags in the bottom section of the modal (Object D). Here you name and decide the color of pass, partial pass, and fail check tags. You can also dictate whether or not to include pass, partial pass, and fail tests by toggling their respective boxes.
Once the new Experiment Check has been set, click the blue “Create” button to add it to the list of current checks.
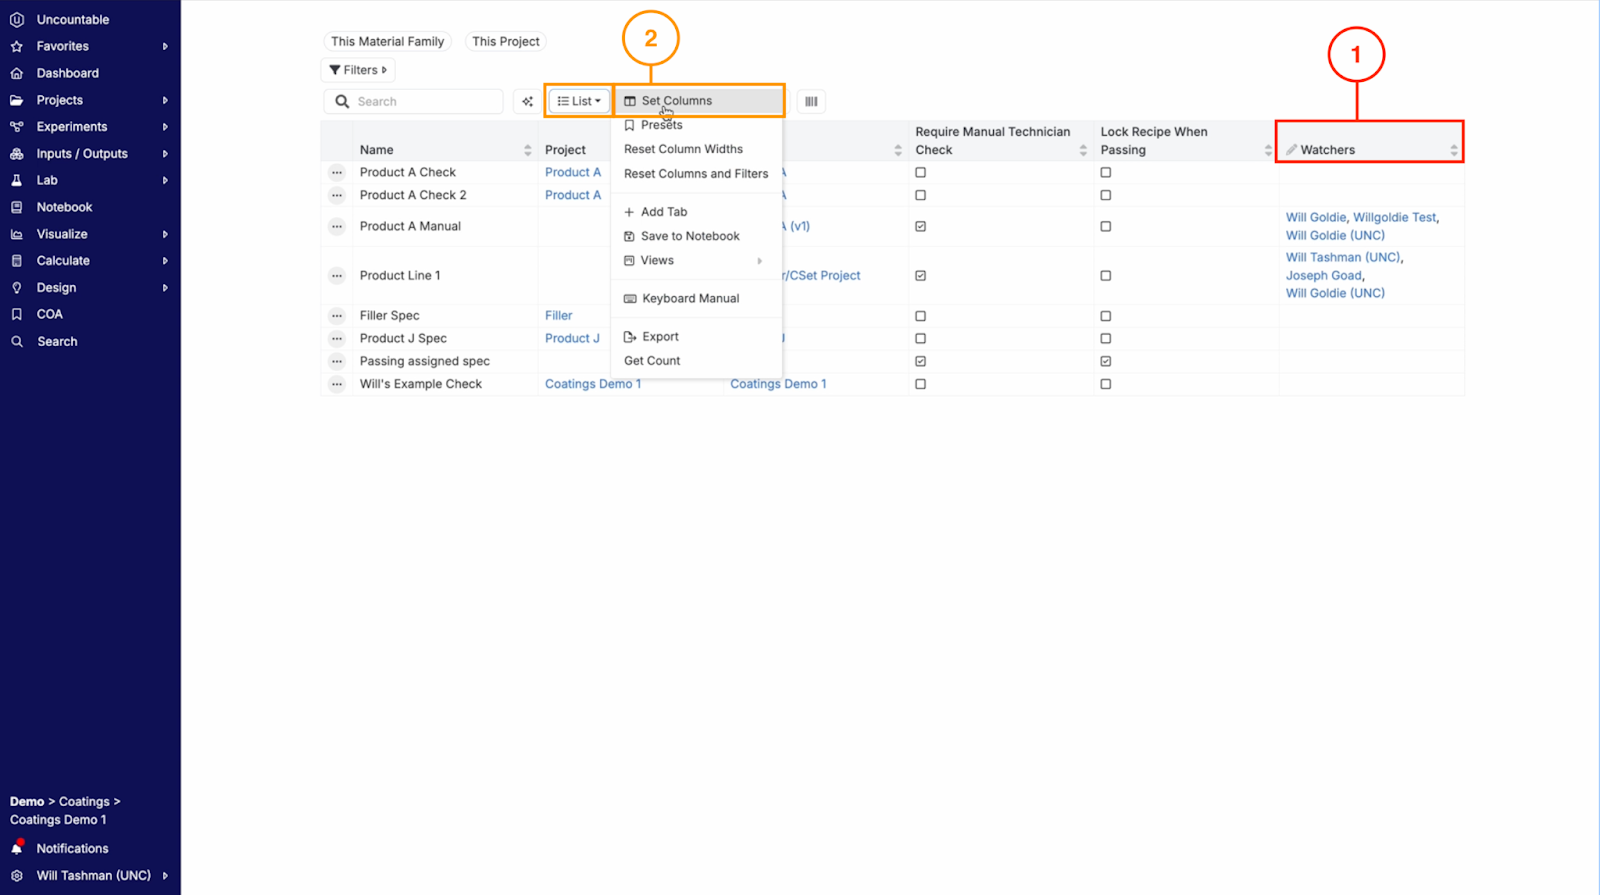
After adding a new Experiment Check, it will appear at the bottom of the current Experiment Checks list. The list is organized into a table, with columns including project name, spec, and settings.
The table also features assigned watchers (Object 1). Assigning a watcher directly alerts the respective individual about the passing or failing status of experiment for the designated Experiment Check. They can also receive a subscription style email that combines a list of failed experiments.
To add or remove columns to this table, click on “List” and navigate to “Set Columns” (Object 2).
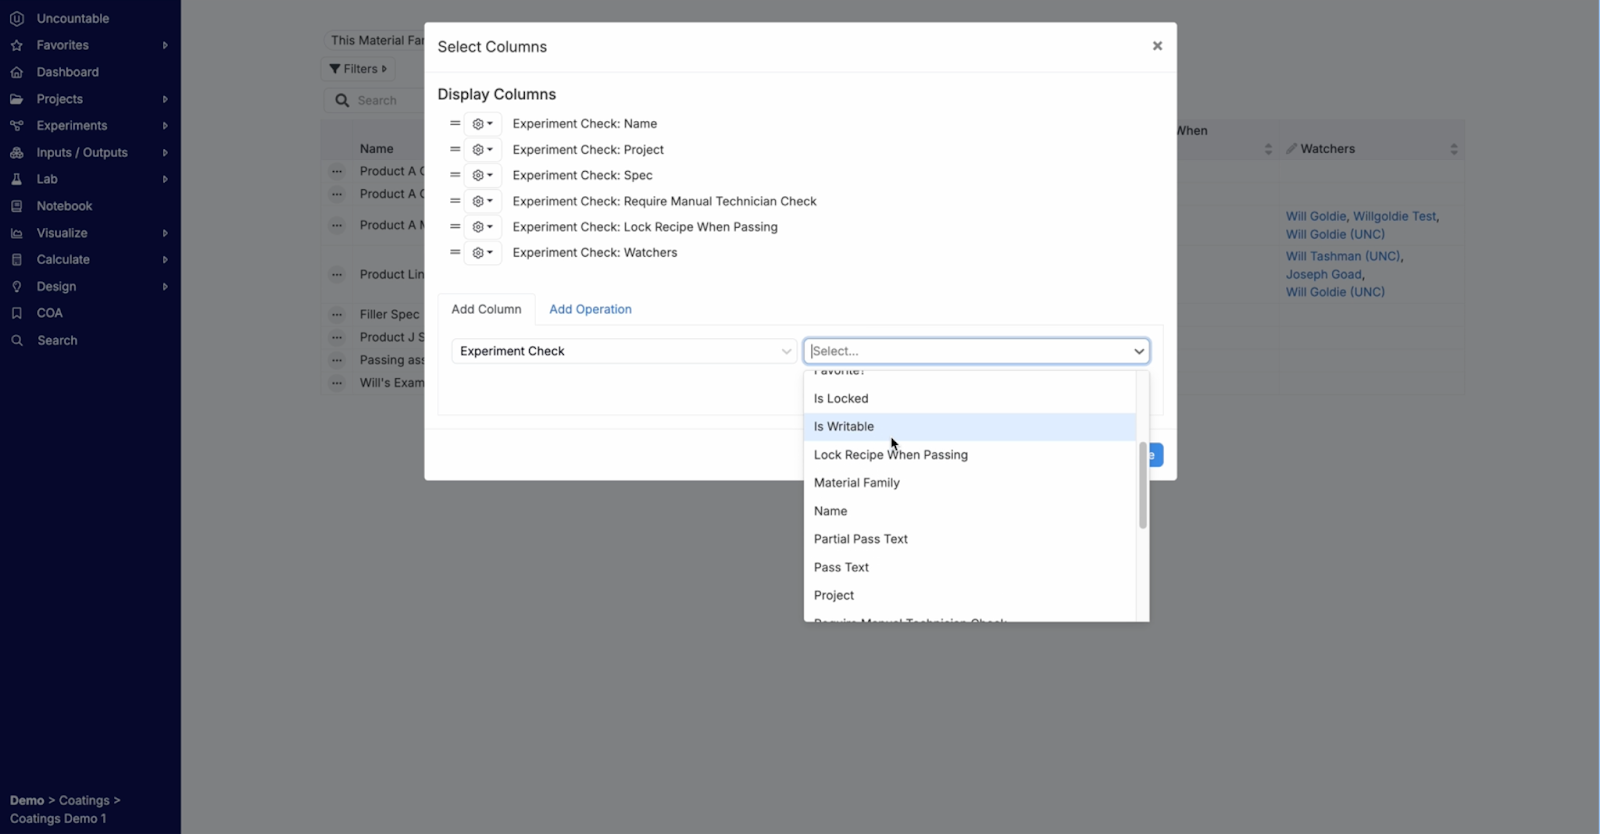
Within the Select Columns modal, you have the ability to include information such as passing text, fail text, whether or not the experiment is writable, etc. Select new columns or operations and click the blue “Save” button.
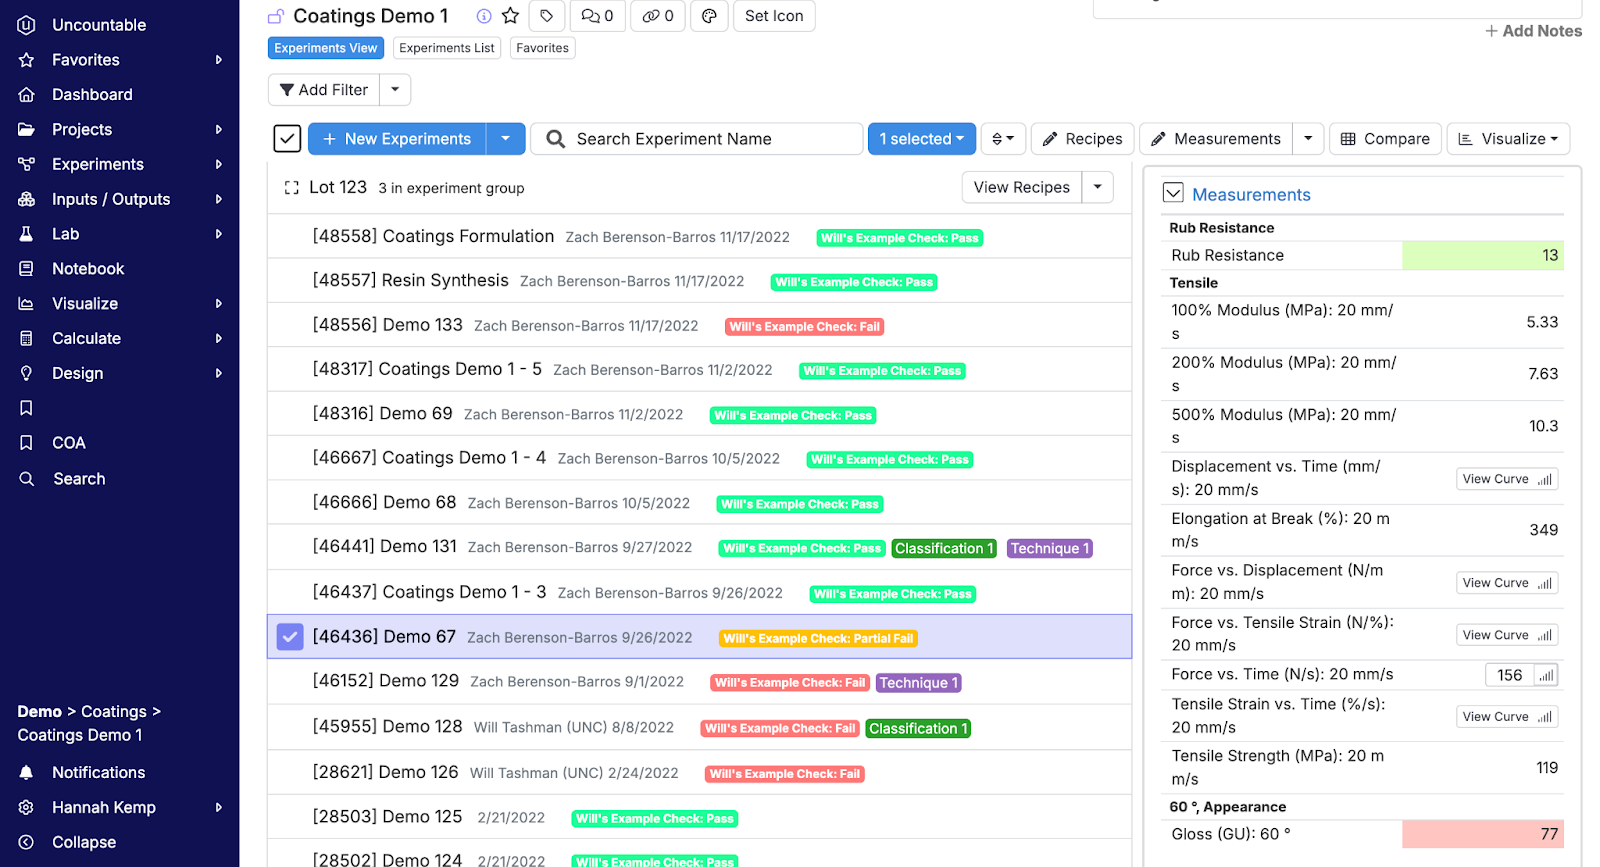
Once all necessary Experiment Checks have been added, you can return to your project dashboard by clicking “Dashboard” on the toolbar. Each experiment now has an associated tag, which displays the Experiment Check name (i.e. Will’s Example Check) and color, indicating pass, partial pass, or fail status.
In this example, a green tag denotes a successful experiment (Object A), indicating that at least one of the specified criteria was met. Conversely, a red tag indicates a failed experiment (Object B), where one or more criteria were not met. A yellow tag signals a partial success (Object C), implying that although some criteria were met, others were not.
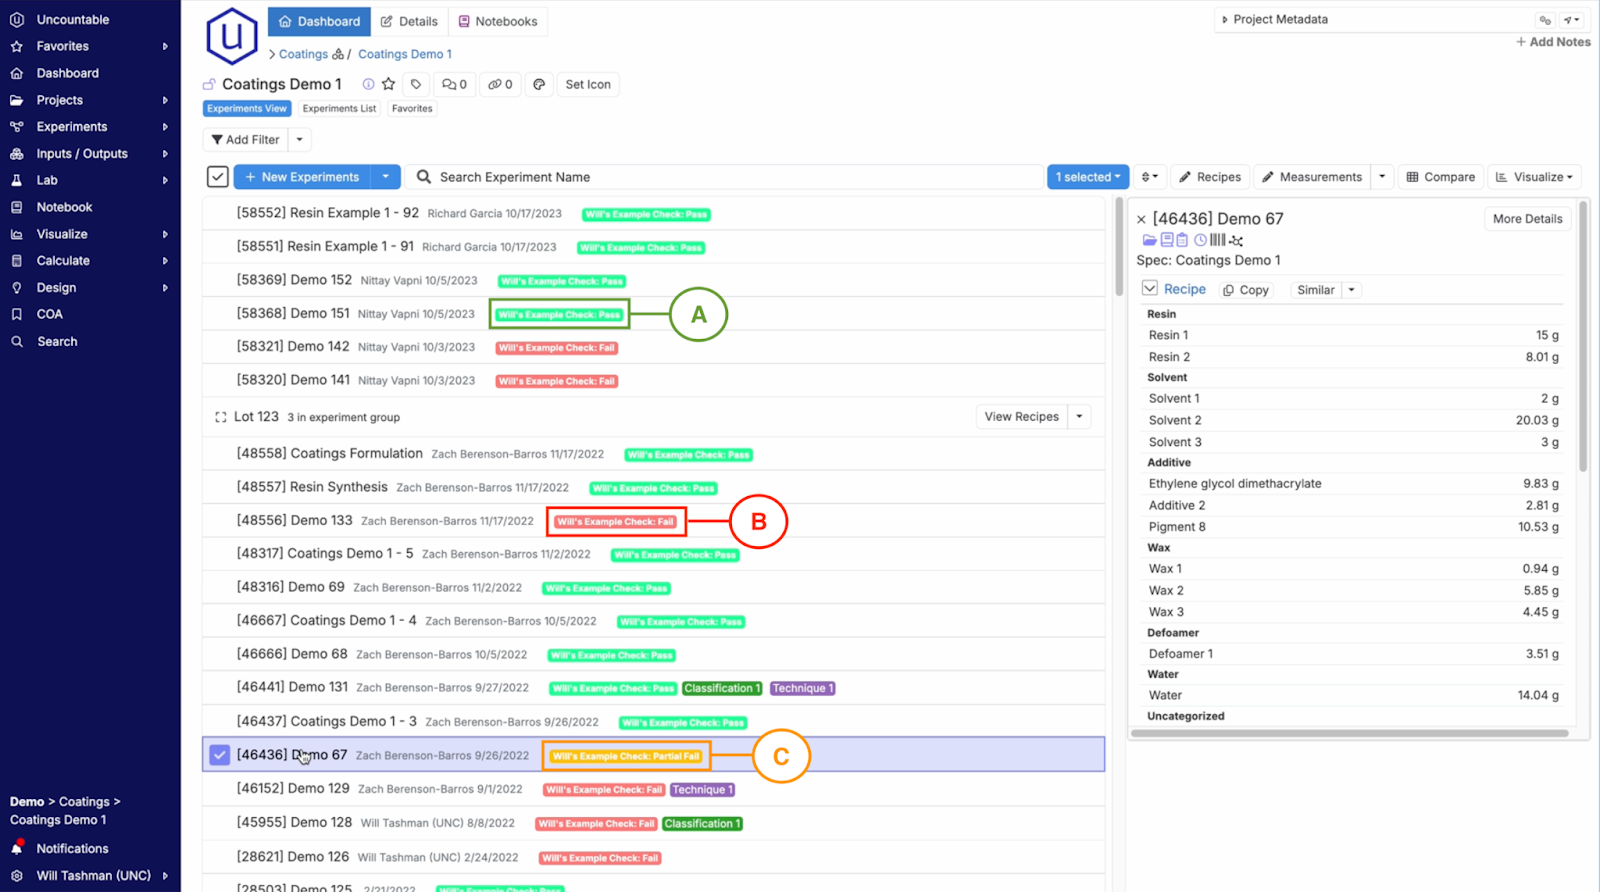
Single clicking on an experiment will open the experiment preview. In this modal, you can see which outputs passed or failed the spec. A cell highlighted in green indicates the spec was met. A cell highlighted in red indicates that spec was not met.
In the example below, the experiment was a partial success (“Partial Fail”). In the experiment preview, we see a Rub Resistance value of 13 and a Gloss of 77. Although the Rub Resistance value fell within the desired specification range, the Gloss value did not, leading to an overall partial pass outcome for the experiment.
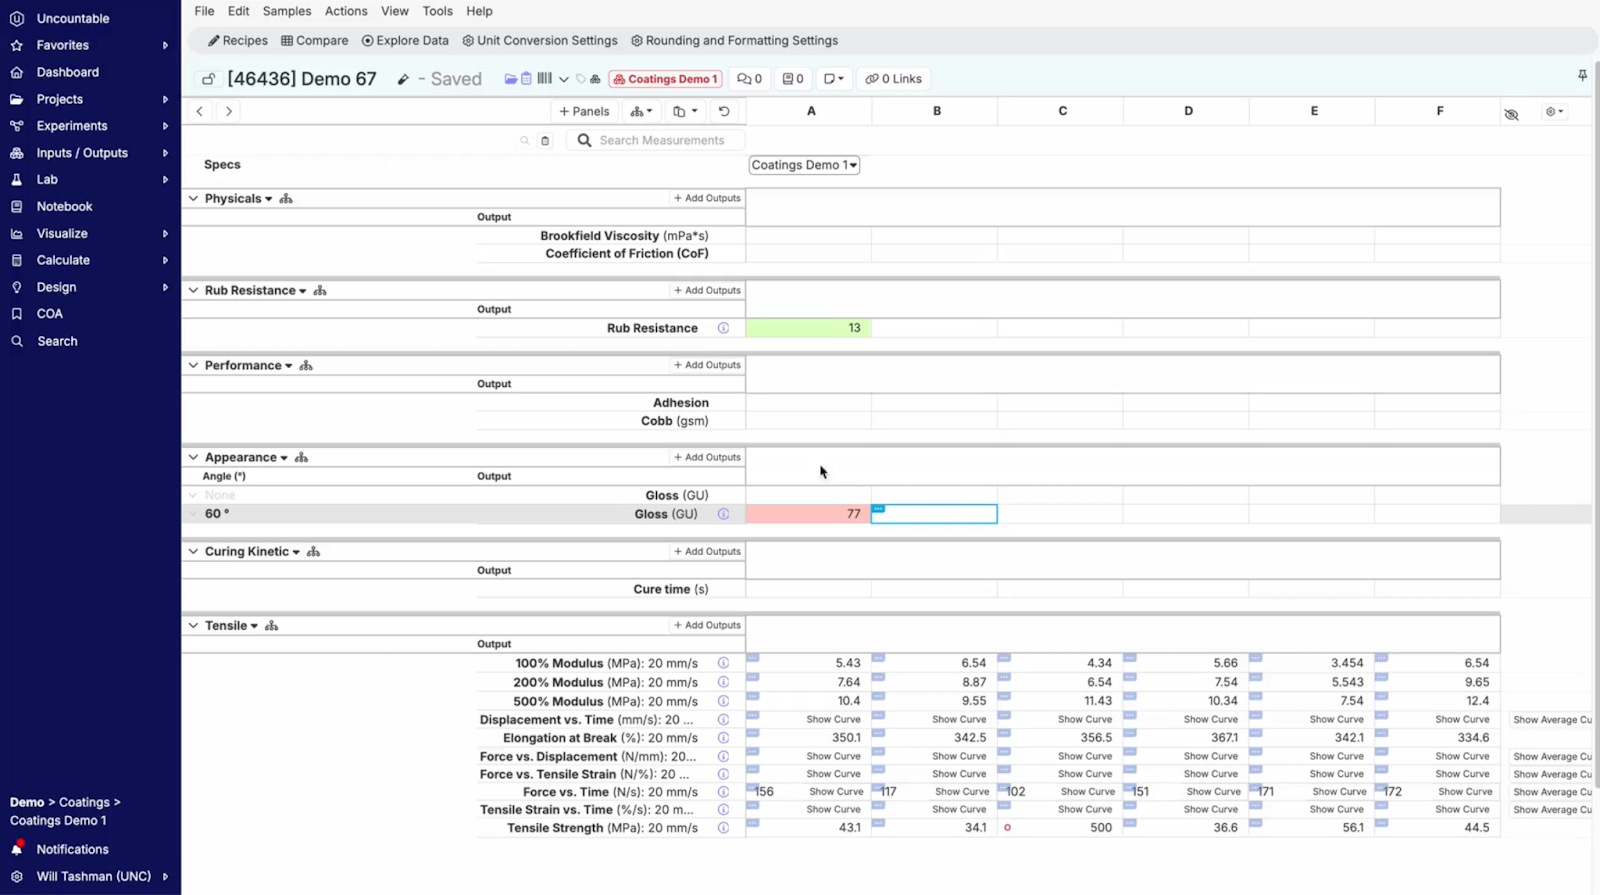
To see the results of an Experiment Check on an individual experiment in more detail, navigate to the recipe page by double-clicking on the experiment.
The utilization of Experiment Check tags in the Uncountable platform streamlines quality control processes, providing quick and clear indications of experiment compliance with specs. Experiment Check tags increase efficiency, enabling users to swiftly identify successful experiments, pinpoint areas for improvement, and maintain consistent product quality.