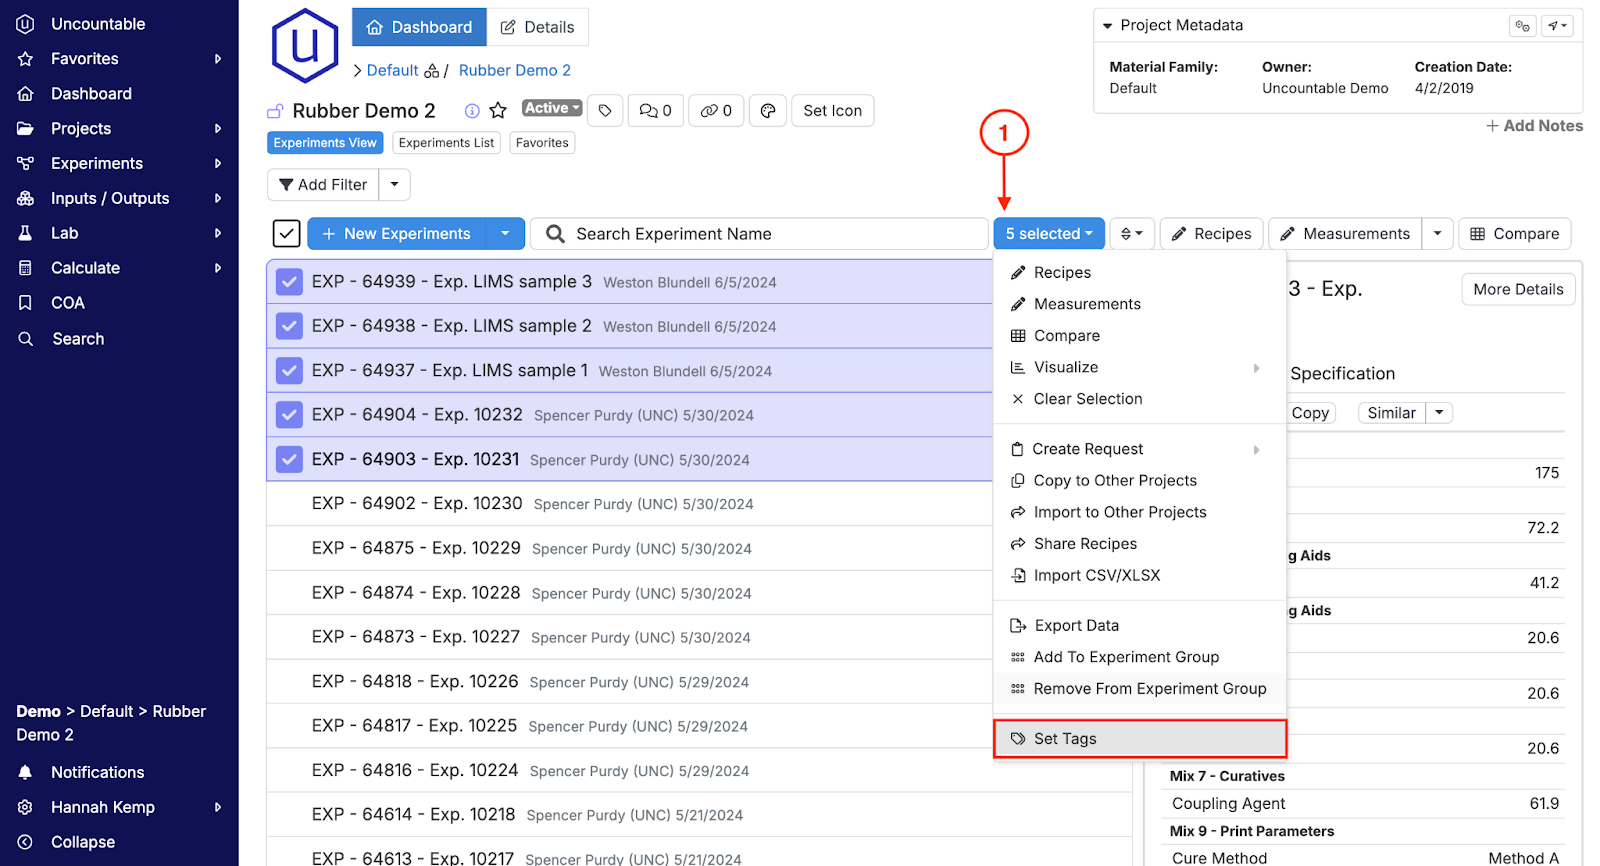
Tags can be added to help classify and organize your Experiment List. To add a tag to an experiment, select the experiment(s) by single clicking them, and open the “Set Tags” modal from the Actions and Tags dropdown menu (1), found on the right side of the Search bar.
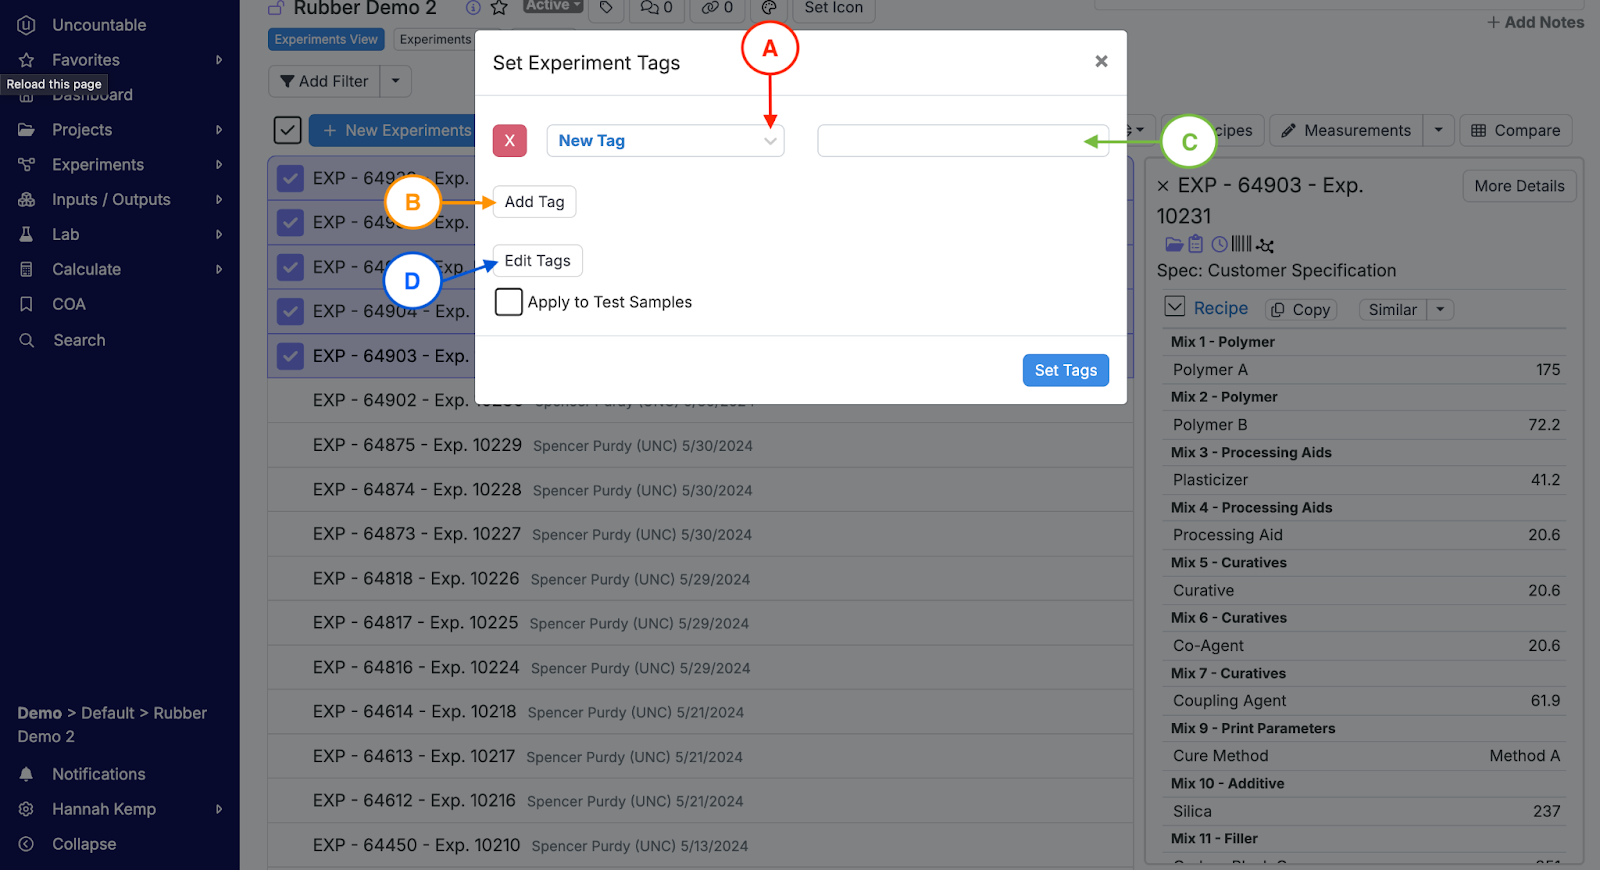
Within the Set Tags modal, you can select from existing tags from the dropdown list (A). Select multiple tags by clicking “Add Tag” (B) or create a new one by selecting “New Tag” from the list and entering a name in the box to the right (C). To access your tags library, select “Edit Tags” (D). Once tags are selected, click on the “Set Tag” button to save them to your experiments.
Within the tags library, you can view all tags within a project, including how many experiments use this tag (1). You can add (2) and delete tags (3), change tag colors (4). By dragging and dropping the reorder icon (5), you can rearrange and sort tags manually.
You can also set whether or not a tag will denote an outlier. Using an Outlier Tag (6) enables you to filter the outliers in your analysis.
