Equation columns can be used to display calculated fields directly within listings. This column type allow users to define custom formulas using other columns as variables and can be applied to both normal and aggregate column types.
Adding Equation Columns to a Listing
To add an equation column to a listing, take the following steps:
Step 1: Access the Select Columns Modal Equation tab
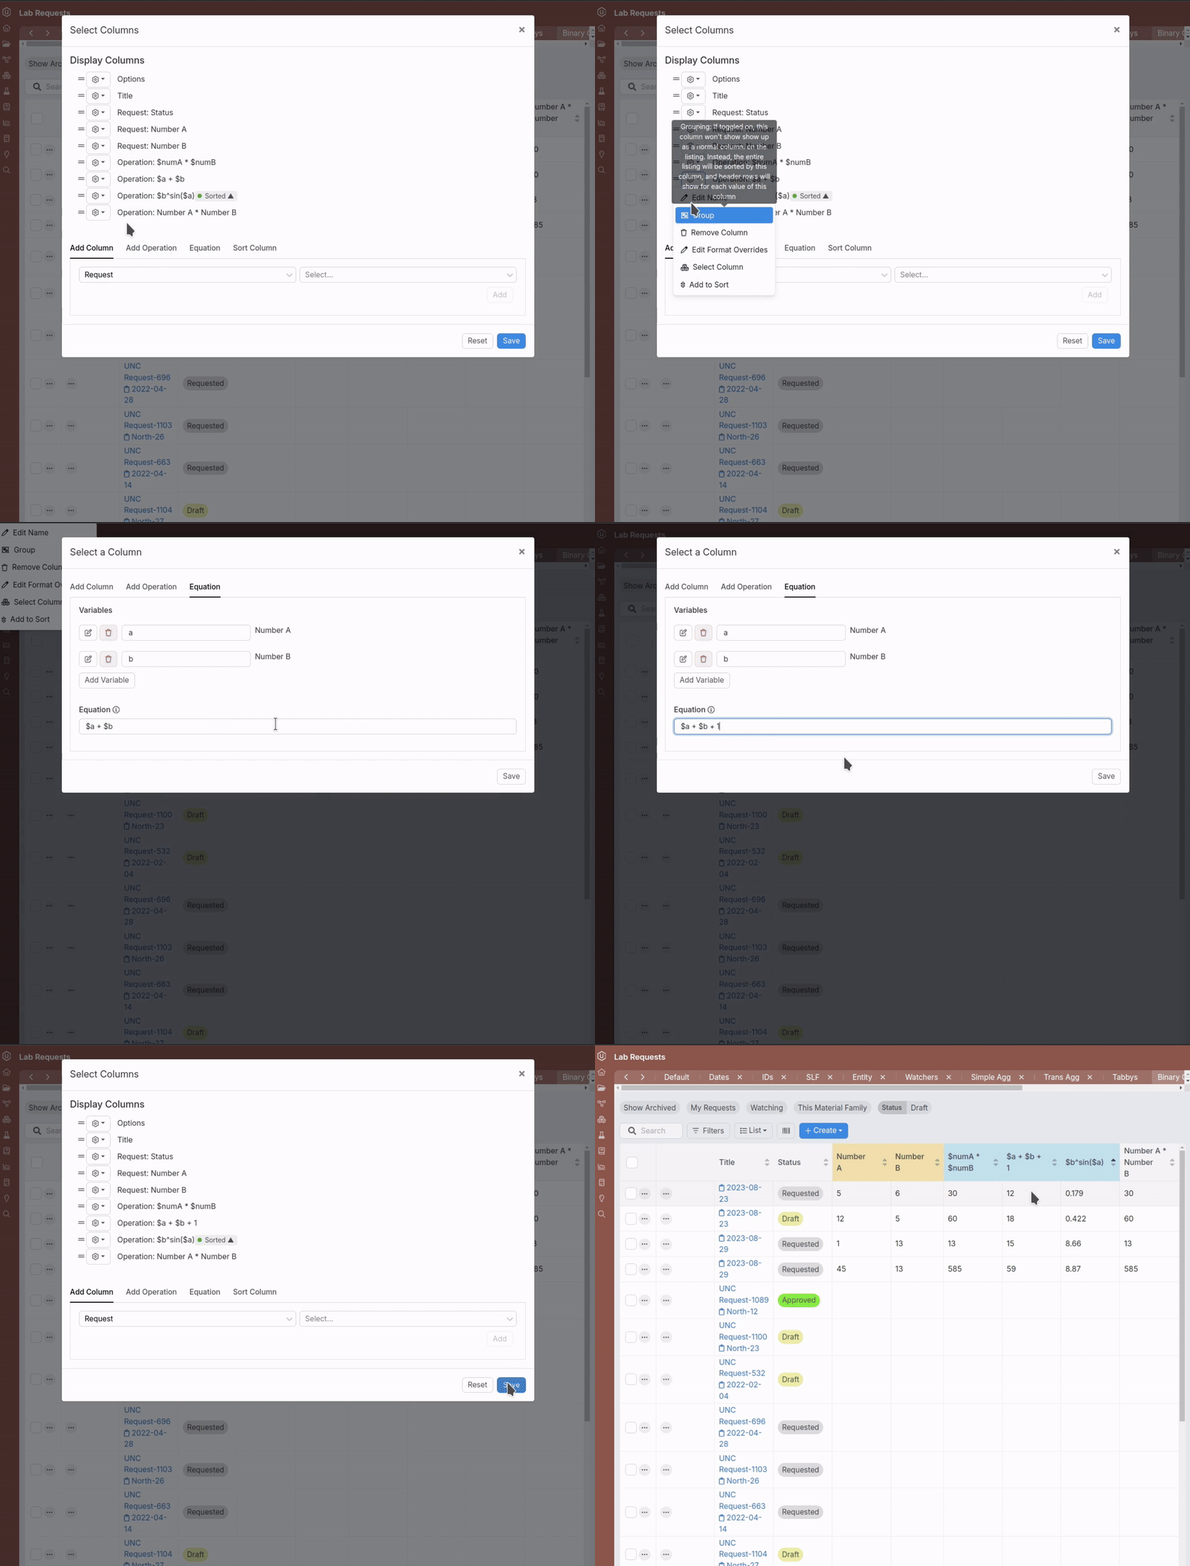
Begin by adding a column as normal. On the desired listing page, click “List” → “Set Columns”. From the Select Columns modal, open the “Equation” tab.


Step 2: Add Variables
Next, add equation variables by clicking “Add Variable” and selecting from the dropdown menu. Variables will be added as number columns on the listing. Users can also rename variables if desired.
- Example: Number A (
a) and Number B (b)


Step 3: Create the Equation
In “Equation”, create an equation using $ to reference variables.
- Example:
$a + $b

Once variables have been added and the equation has been saved, the columns will appear on the listing. In the screenshot below, note the column variables (A and B) and the new equation column (C).

Editing Equations
To edit an existing equation column, navigate to the Select Columns modal. Access the column’s settings menu, click “Select Column”. Edit the column’s variables, add new variables, or edit the equation as needed before clicking “Save”.

Date-Type Equation Columns
Equation columns also allow you to perform calculations with date-type data. Below are a few potential use case examples.
- Lifetime (A): Add a column to calculate how much time has passed since a specific date, such as when a request was created using the
datetime_difffunction to measure the difference between the current date and the creation date.datetime_diff(datetime_now(), $created) - Datetime Extract (B): Add a column which extracts date or time data in a specific format or time zone using
datetime_extractThis allows you to convert a timestamp into a format aligned with a particular timezone, such as Pacific/Apia or Pacific/Samoa.datetime_extract($created, 'Pacific/Samoa') - Deadline (C): Add a column to determine an absolute deadline for a request by adding a specific number of days to an existing date. Using
date_add_days, you can extend a “desired end date” by a set period (i.e. 7 days).date_add_days($desired, 7)


Adding Equation Columns to an Aggregated Listing
Equation columns are also compatible with aggregates, allowing users to perform calculations on aggregated data. The difference is that in these cases, the variables used in the equation are aggregate columns instead of standard columns.
To add an equation column to a listing with aggregates, follow the standard setup process. First, access the Select Columns modal, and navigate to the Aggregate Columns Equation tab.

Next, add your variables by clicking “Add Variable” and adding an aggregate column.

Then, use added variables (A) to define the equation (B).

Once saved, the aggregate columns and associated equation column will be added to the listing.

Header Customization
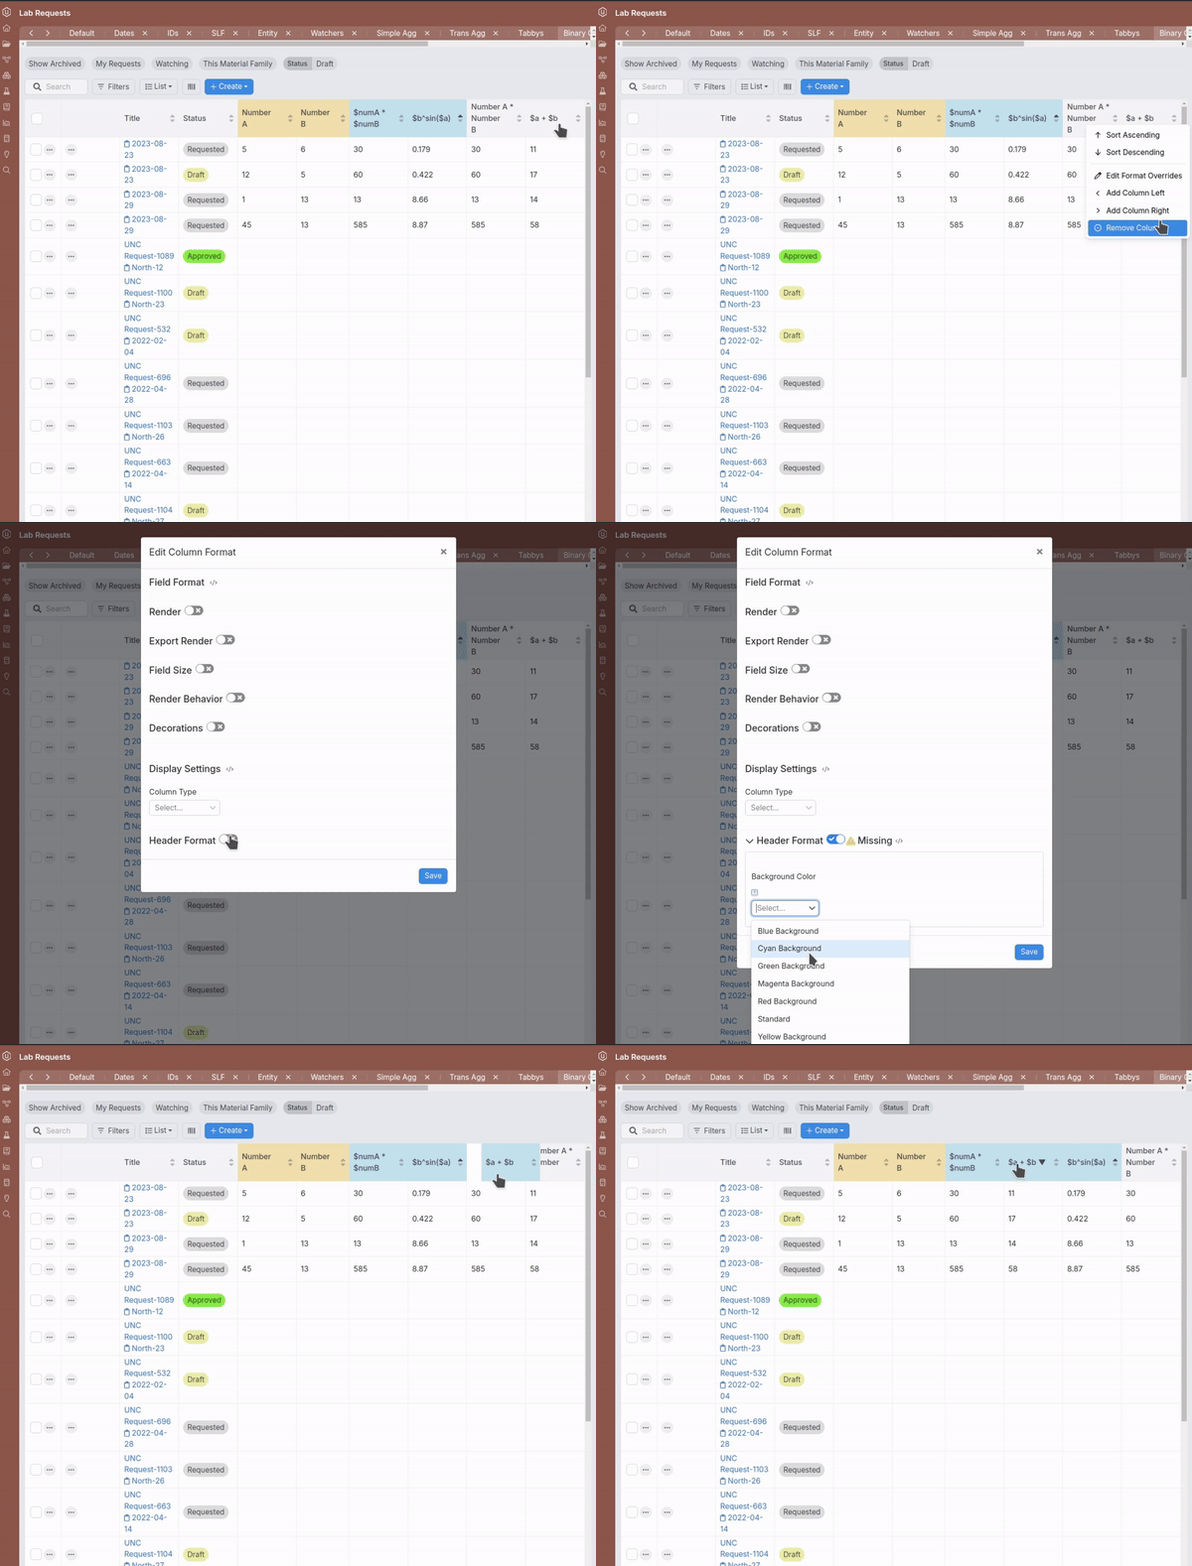
To change header colors in order to distinguish between variables and equations, access the columns dropdown menu and select “Edit Format Overrides”. Enable “Header Format” and select a new background color.

