Phase workflows provide a structured way to model the lifecycle of an entity by defining a set of phases it progresses through and the transitions between them. These workflows can be tailored to match the real-world processes of a lab, team, or organization. On an entity, phase workflows appear as a bar on the top of the page. To advance between phases, users can click the blue arrow to the right of the bar or click on a phase directly to transition to it.

Within the Phase Workflow tab of the Form Admin page, admin users can create workflows using a React Flow diagram. Workflows can have many phases and transitions between phases as needed. Admins can add additional styling and configuration settings such as colors, reviewers, constraints and actions.

Phase Workflow Examples
Phase workflows can be added to any definition in the platform. However, they are especially useful for definitions such as lab requests and approvals, which represent stepwise processes or require structured review.
Additional examples include:
- A Product Release workflow with the following phases:
Initiation→Safety Review→Marketing Review→Production QA→Release

- A QA workflow with the following phases:
Initiated→Received→In Progressfollowed by two potential transitions to eitherApprovedorRejected

Creating a Phase Workflow
To create a new phase workflow, take the following steps:
Create a New Phase Workflow: Navigate to the Phase Workflows tab of the Form Admin page and click the “Create New” button.

Edit the Workflow Name: New phase workflows have an automatically generated name. To edit the name, click the pencil icon next to it in the right sidepanel. Input a new workflow name and hit the Enter key to save.

Edit Phase Names: The new phase workflow will have an Initial and Final phase added by default. You can rename any phase by first selecting it the diagram. In the sidepanel, locate the name under Phase Name, hover the mouse over it, and select the pencil icon. Input a new name and click the Enter key to save changes.

Add New Phases: Add additional phases by clicking the blue Add Phase button in the bottom corner of the diagram window. Click and drag phases to move them to your desired location within the diagram.
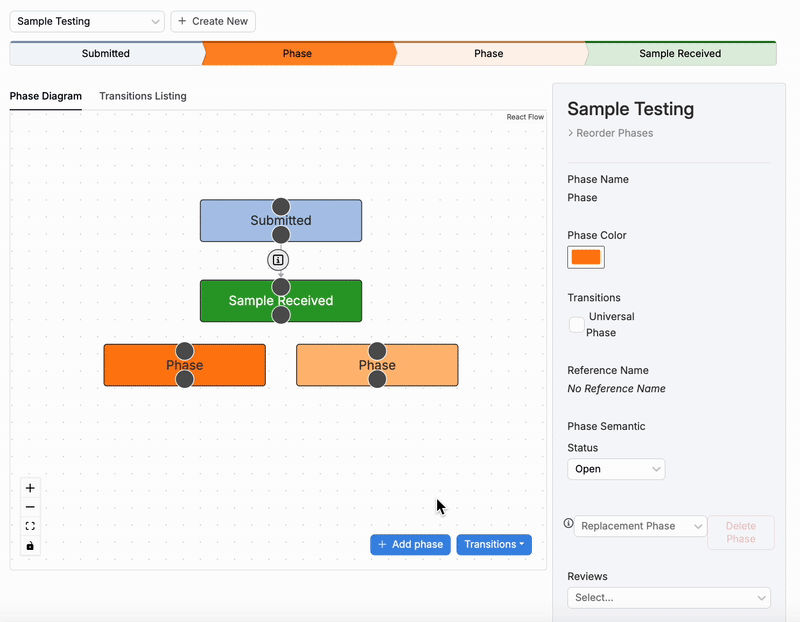
Add Phase Transitions: Each phase has two points, one on the top and one on the bottom. Clicking and drag between a line between two phase points to to create a transitions. Note that a phase can be linked to multiple other phases via multiple transitions.
Reorder Phases: By default, phases appear sequentially in the bar based on the order they were added to the workflow. To make changes, expand the Reorder Phases section beneath the workflow name. Then click and drag a phase to change its position relative to other phases.

Change Phase Color: To change the color of a phase, select it from the diagram. In the sidepanel, click the box beneath Phase Color and select from the color wheel.
Configuring Phases
By selecting an individual phase from the diagram, admin users can add additional configuration settings using the sidepanel. Options include:
- Phase Name (A): Adjust the phase name.
- Phase Color (B): Change the phase color.
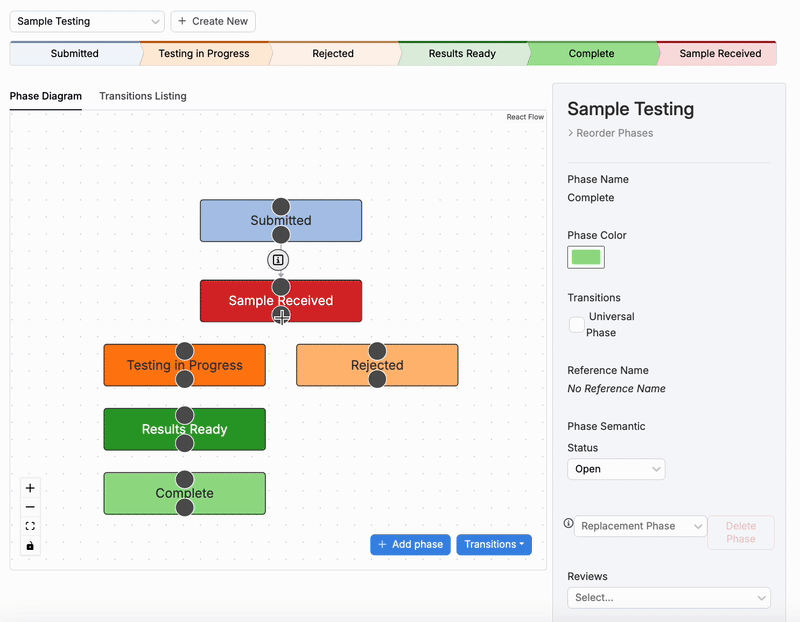
- Universal Phase (C): By default, an entity must pass through each phase sequentially. Enabling this setting makes the phase “universal”, meaning that users can advance to the phase at any point, without having to move through previous phases first. In the example below, the “Results Ready” phase is set as universal. Therefore, users can advance to the Results Ready phase from the “Sample Received” phase, without moving through the “Testing in Progress” phase first.

- Reference Name (D): Add an optional reference name.
- Phase Semantics Status (E): When defining a phase within a phase workflow, each phase can optionally be assigned a semantic status: Draft, Open, or Terminal. These semantics help the platform interpret what the phase means in a broader context, and can influence how the entity behaves or is displayed.
- Draft: Used for early, preparatory stages of a workflow.
- Open: This is the default for most active phases. It indicates that the entity is “in progress”.
- Terminal: Marks the endpoint of a workflow. Once an entity reaches a terminal phase, it’s considered “done,” “closed,” or “resolved.” This can affect filtering, display in summary views, or how completed work is grouped.
- Delete Phase (F): In order to delete a phase, users must first select a Replacement Phase.
- Reviews and Reviewer Groups (G): Assign individual Reviewers or Reviewer groups to a phase. Learn more about Reviews.
- Phase Constraints (H): Add optional phase constraints. These constraints specify what conditions must be met before advancing from that phase. For example, certain fields may be set as required or prompted for before transitioning to the next.

Configuring Transitions
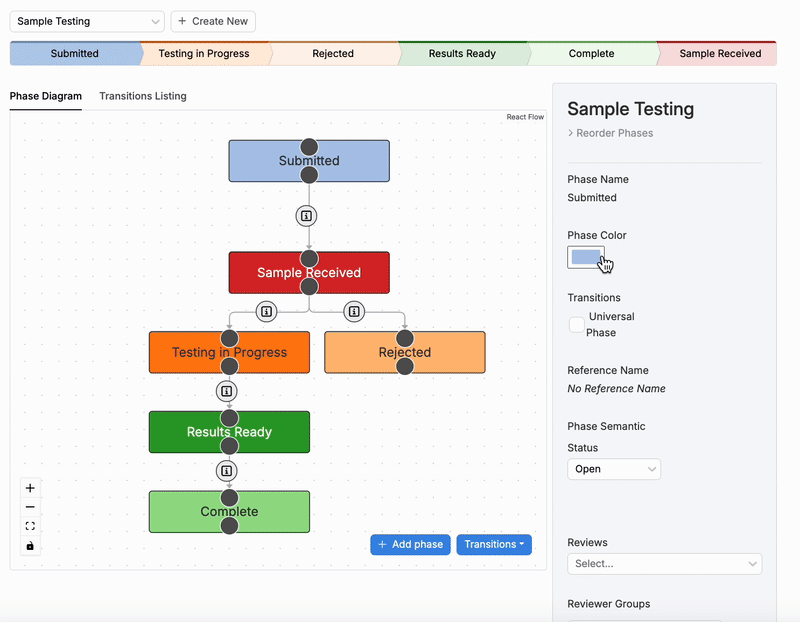
Additional configuration settings can also be applied to individual transitions. To do so, click the “i” icon on the desired transition, then selecting the transition. Within the sidepanel, admin users can adjust the following:
- Name (I): Add an optional name for the transition.
- Phase Constraints (J): Add optional phase constraints. These constraints specify what conditions must be met before transitioning between phases.
- Actions (K): Add optional actions, which will be triggered automatically when transitioning between the two phases.
- Respects Form Constraints (L): By disabling this setting, we can allow users to advance between phases via this transition, even if the constraints set on the transition have not been met.
- Delete Transition (M): Delete the transition.

Associating a Definition with a Phase Workflow
Once a phase workflow has been properly configured, it can be linked to any definition within the Uncountable platform. To do so, take the following steps:
- Navigate to the Definitions tab of the Form Admin page.
- Search for an open the definition you want to associate the phase workflow with.
- On the definition, access the Settings tab.
- Within the Settings tab, locate the Phase Workflow field.
- Click the pencil icon to set or swap the definition’s phase workflow.
- Within the modal, select from the New Phase Workflow dropdown menu.
- Click Submit.


Once submitted, any entity created using that definition will feature the phase workflow. In the example below, the Sample Testing phase workflow has been added to the Sample Lab Request definition and appears on all requests generated using that definition.
