In Uncountable, the Advanced Screening Design enables users to create multilayer recipes or multi-coat paint panels on a large scale (aka coating systems or system buildups). For instance, if one needs to create a series of samples with three different substrates, primers, base coats, and topcoats, this tool provides the means to do so efficiently.
With this feature, users can define multiple layers, each potentially compromising recipes (coatings produced during the process that are layers to the coating system/multi-layer panel), substrates (underlying materials to which coatings or layers are applied), and process parameters (i.e. temperature, humidity, application methods, drying times).
Templates for these recipes or panels can also be customized and stored as a “Design,” ready to be reused by either an user or a group of users at any future point.
Getting Started
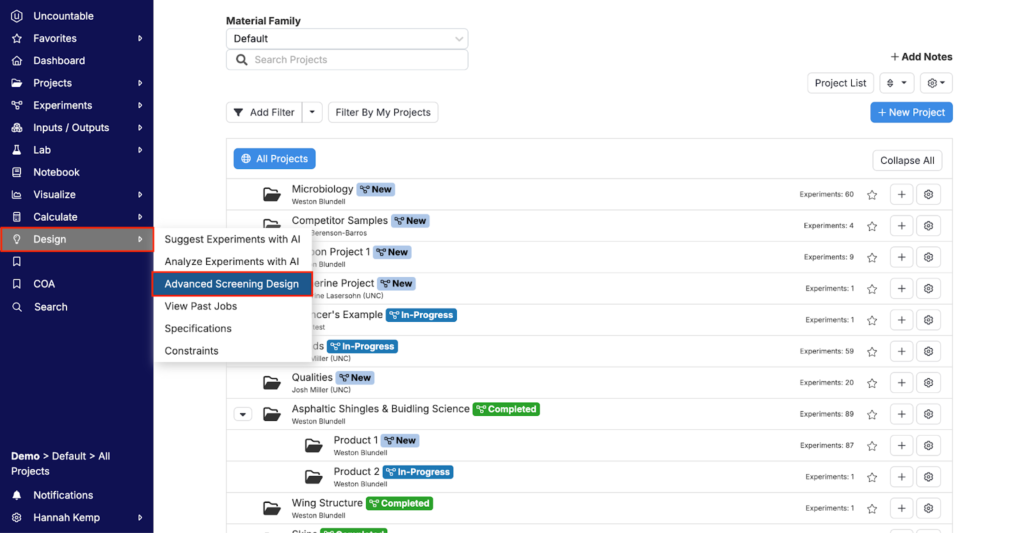
To use the Advanced Screening Design Tool, click on “Design” within the blue toolbar and select “Advanced Screening Design”.
Selecting a Workflow
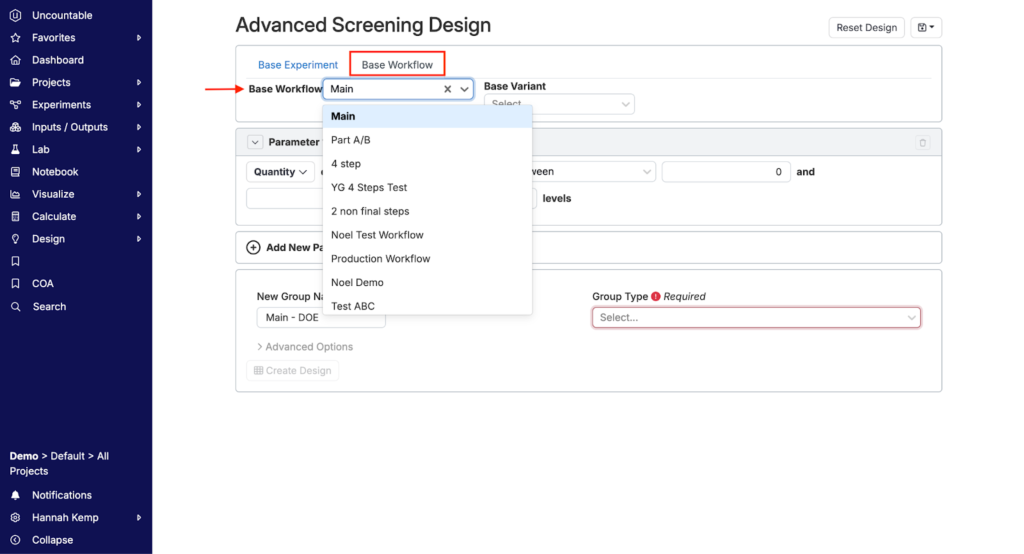
From the Advanced Screening Design page, the user will be prompted to make a few selections to set up their project or experiment.
First, open the “Base Workflow” tab and select a panel workflow from the dropdown menu. The panel workflow contains the steps and layers for your experiment. It outlines the overall framework for the type of multi-layer recipe or panel you are looking to create, including the main processes and their order of execution.
From here, you can also select a base variant. The base variant is an optional step that allows you to specify a version of your experiment within the chosen workflow. If you have different variations of your experiment, you can select a base variant that aligns with it.
Workflows can be set up in collaboration with your Uncountable Scientific Implementation Manager or Account Manager. For more on this process, please reach out to your Uncountable representative directly.
Loading a Previously Saved Design Template
Once a panel workflow has been selected, the next step is building the design. Designs serve as structured templates enabling users to generate new sets of panels or multi-layer recipes. They define the precise sequence and operations involving intermediates, process parameters, or substrates required to craft the desired multi-layer recipe or panel.
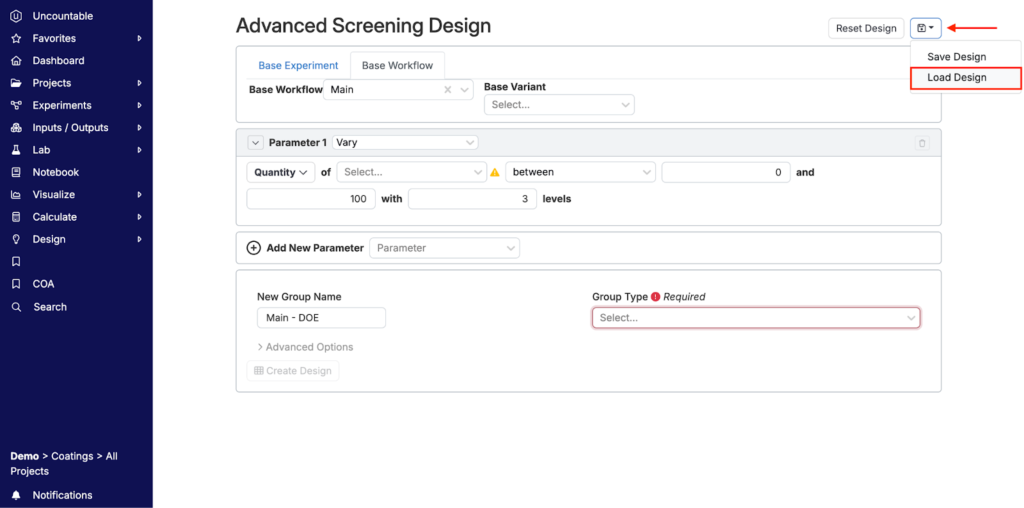
You can either create a new design or load a previously saved design. To load a previously saved design, select the blue floppy disc icon in the top right and click “Load Design”. You can then select a design template from the “Load Saves” dropdown menu.
Once selected, the design will populate the page. Adjust design parameters as needed by using the text boxes and dropdown menus.
Creating a New Design Template
If not using a previously saved design template, Uncountable users have the ability to create new design templates. To do so, add and adjust desired parameters using the textboxes and menus.
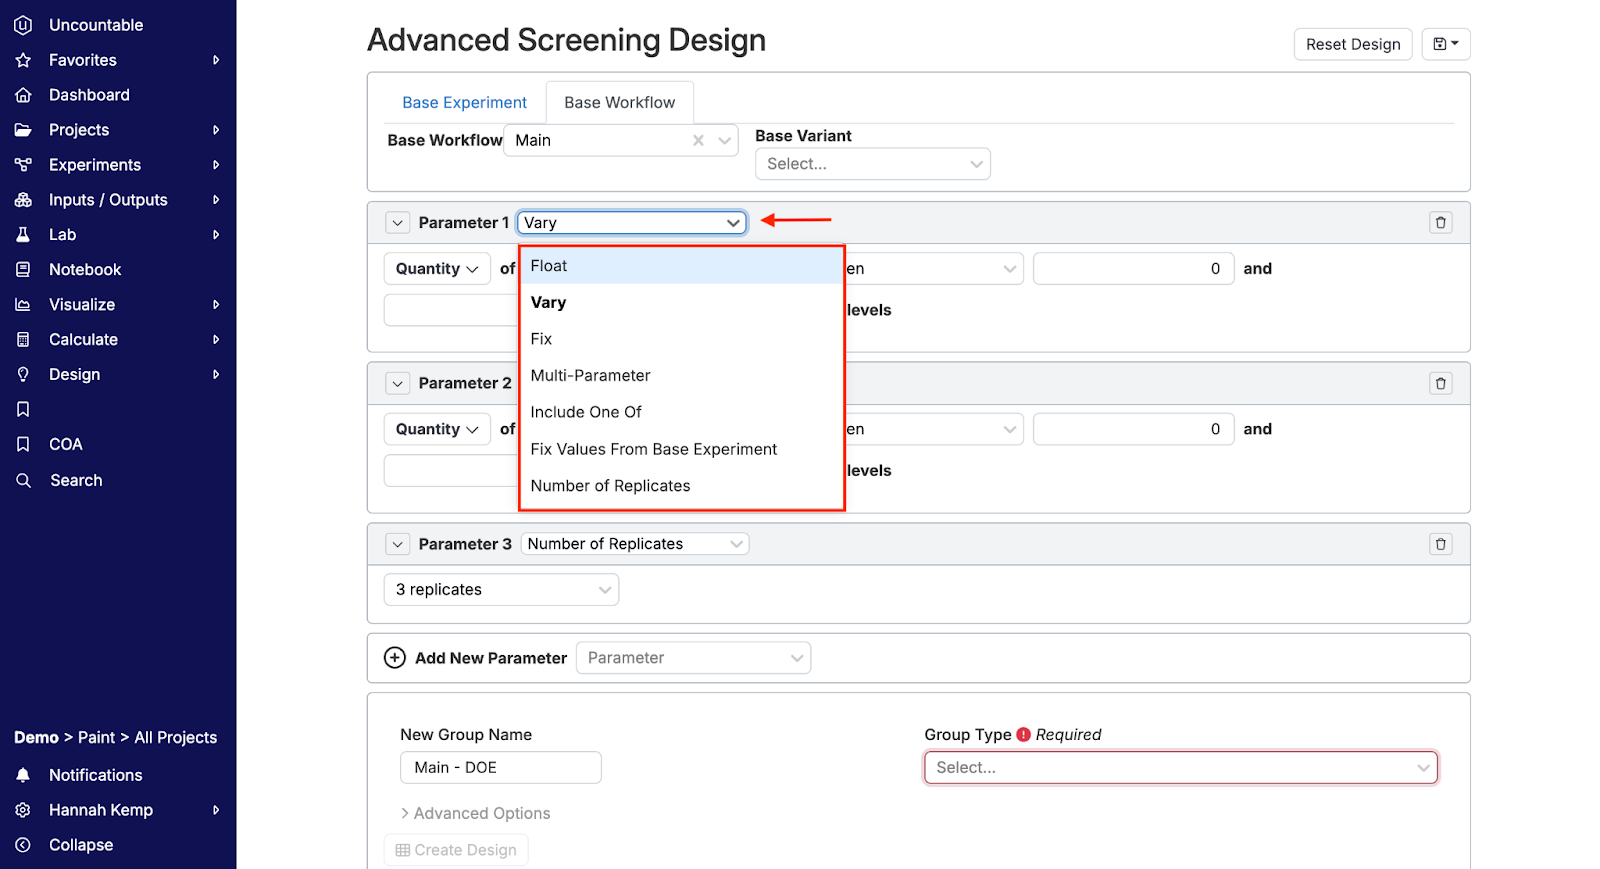
First, select the state of Parameter 1 from the dropdown menu. Parameter states include “fix”, “vary”, “float”, “include one of”, “multi-parameter”, and “fix values from base experiment”.
- Fix: A parameter that is kept constant during the experiment.
- Vary: A parameter that is deliberately changed or adjusted to observe its effect.
- Float: A parameter that is allowed to change freely within a certain range during the experiment (This parameter is not used in panel making, more often it is used for chemical formulations where certain components, like water or solvents, can remain floating or unchanged).
- Include one of: A choice where one option from a set of possible parameters or conditions is selected for the experiment.
- Multi-parameter: An experiment involving multiple parameters that may be varied or studied simultaneously (i.e. varying both humidity and drying time to observe their combined effect on the panel’s properties).
- Fix values from base experiment: Using the values of certain parameters as determined or fixed in a previous or baseline experiment.
Next, determine the ingredients the parameter will be applied to. Ingredients can be coatings (i.e. primer, topcoat, binder, solvent, etc.) or process parameters (i.e. film thickness, application method, drying time, etc.).
Add new parameters by clicking the “+ Add New Parameter” button at the bottom of the page. Delete unwanted parameters by clicking the garbage icon in the upper right corner of the associated parameter box.
Once all desired parameters have been defined, clarify the number of replicates and group type. The number of replicates are the number of identical panels/recipes that should be created. The group type is the type of panel/multi-layer recipe you want to create.
Design Template Examples
To better understand Advanced Screening Design, let’s consider a few example scenarios.
Scenario 1: A user aims to determine whether Top Coat 1 or Top Coat 2 is a better coating layer for a formulation with a film thickness of 50 µm.
First, we will design Parameter 1 to pick either Top Coat 1 or Top Coat 2.
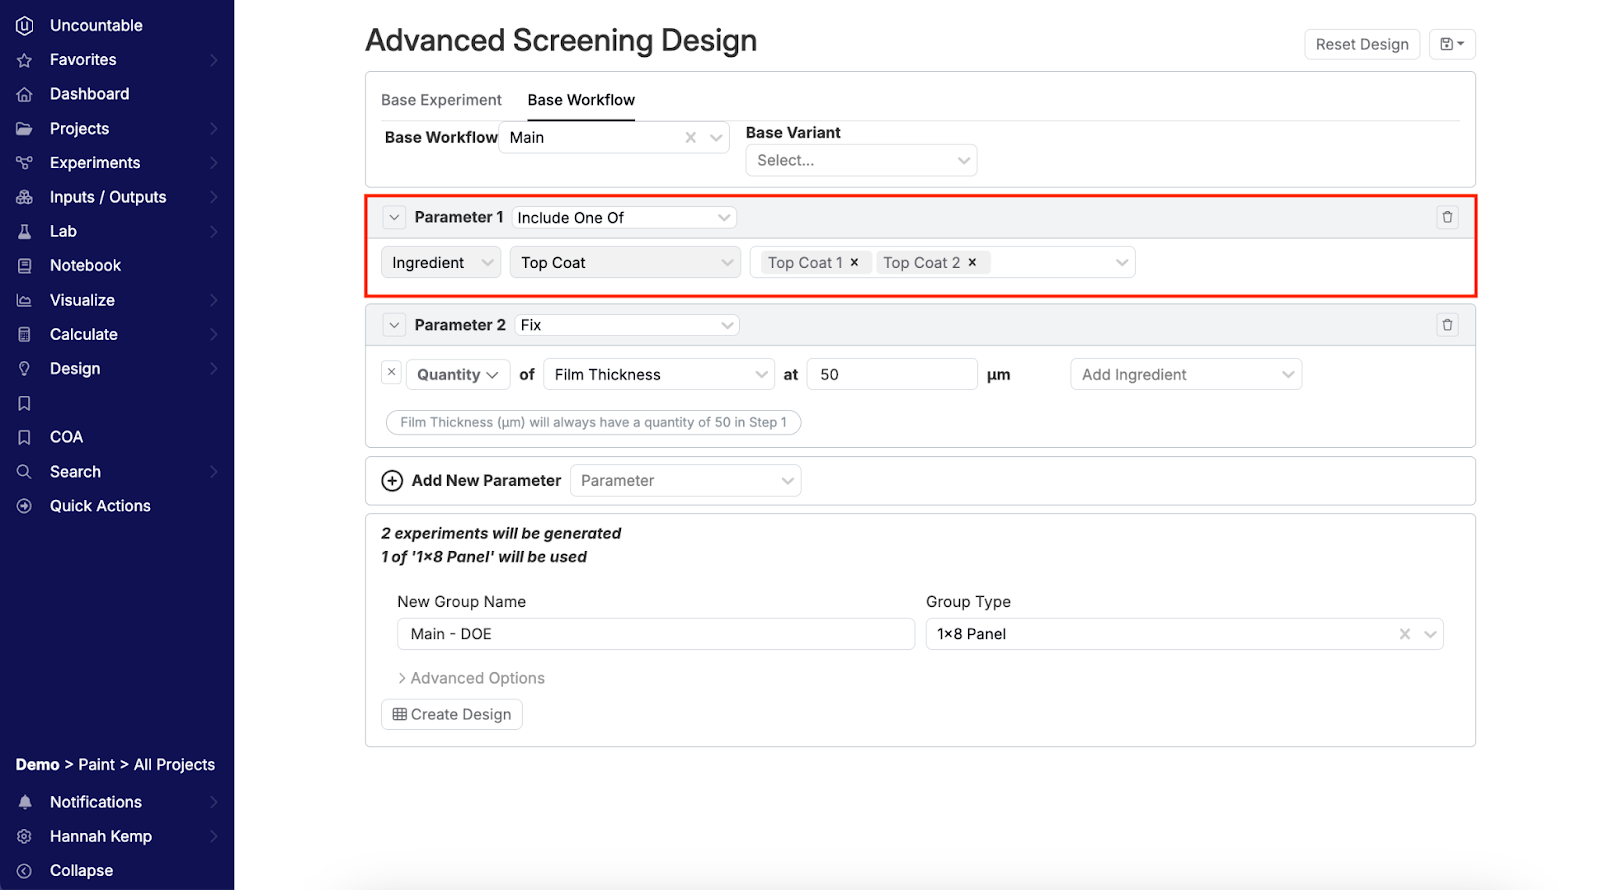
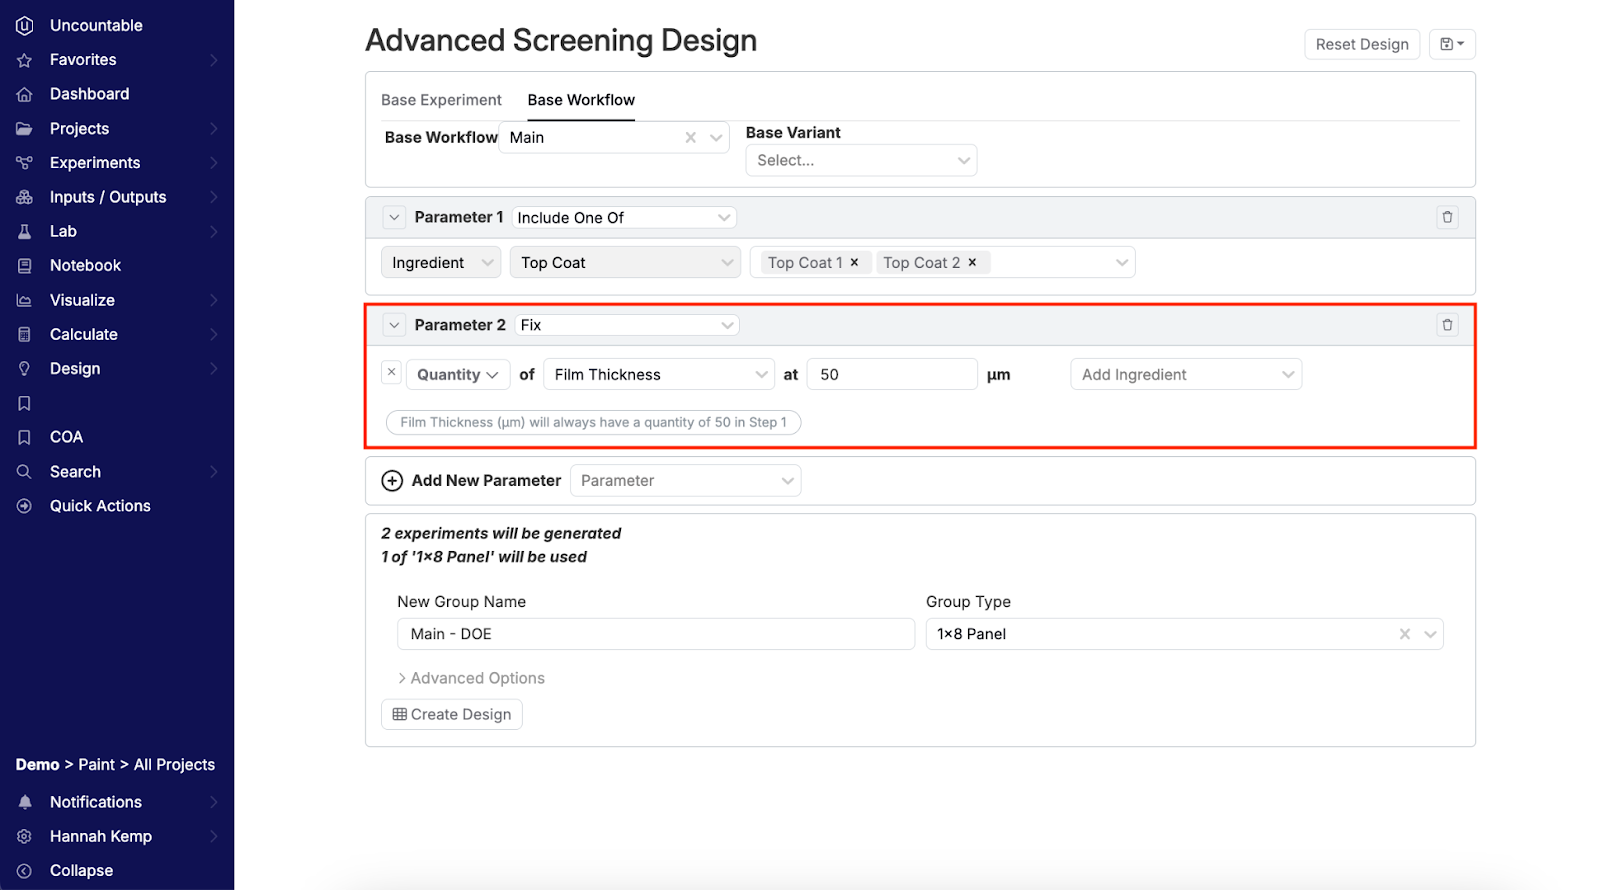
In Parameter 2, we will fix a film thickness of 50 µm.
Finally, we will define a 1×8 panel group type.
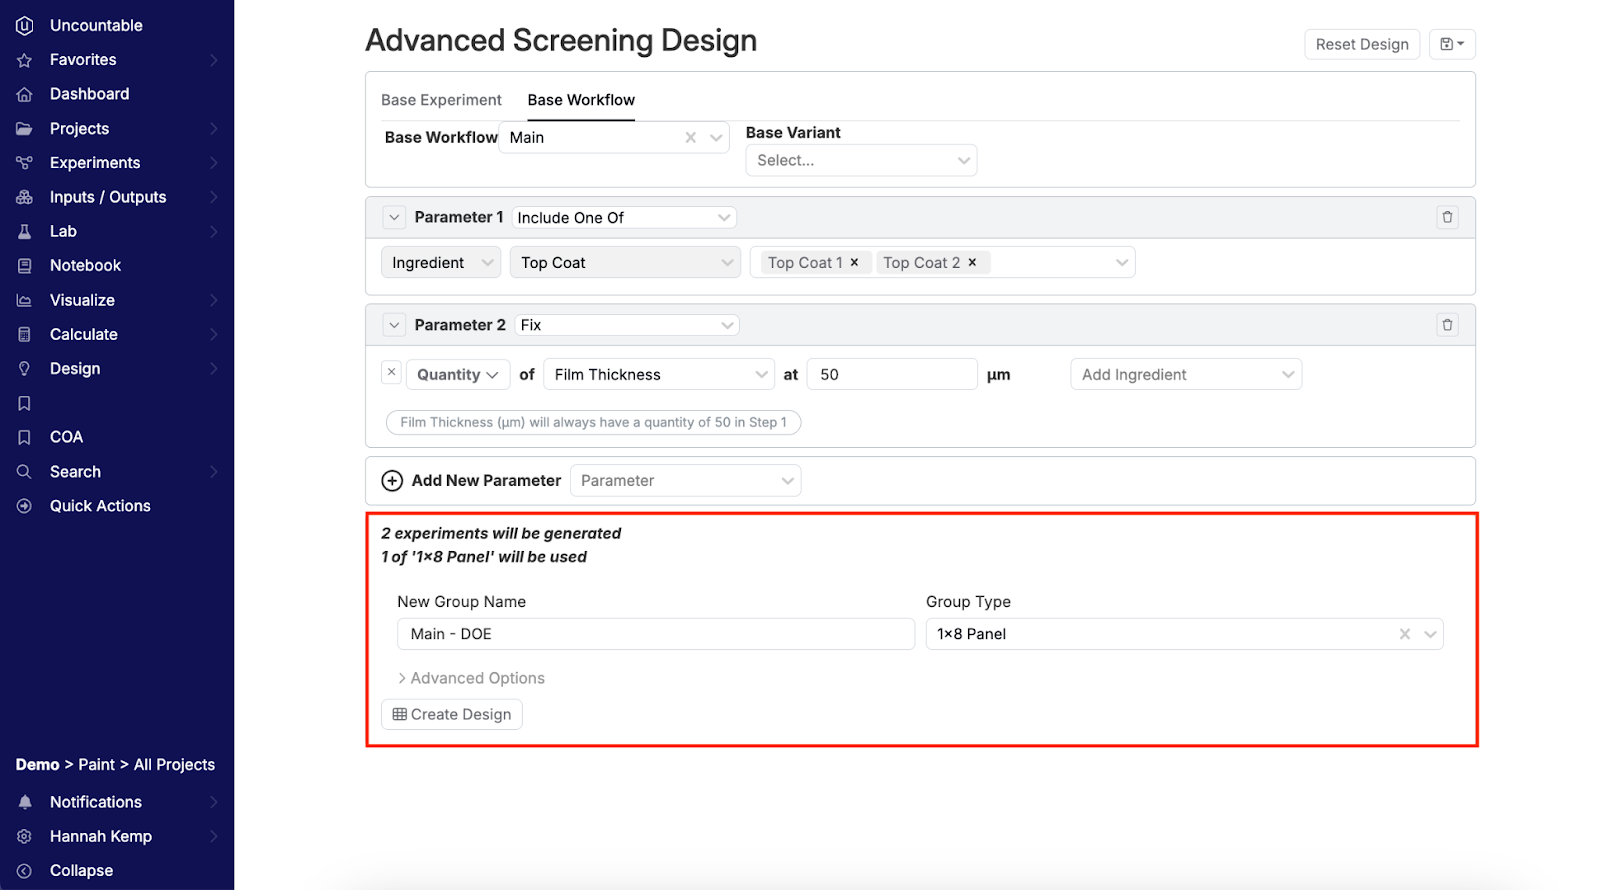
After clicking “Create Design” in the lower left corner, you will be taken back to the Enter Recipe page where each of your panels will show up as individual experiments. From there, you can then make further adjustments to or record measurements.
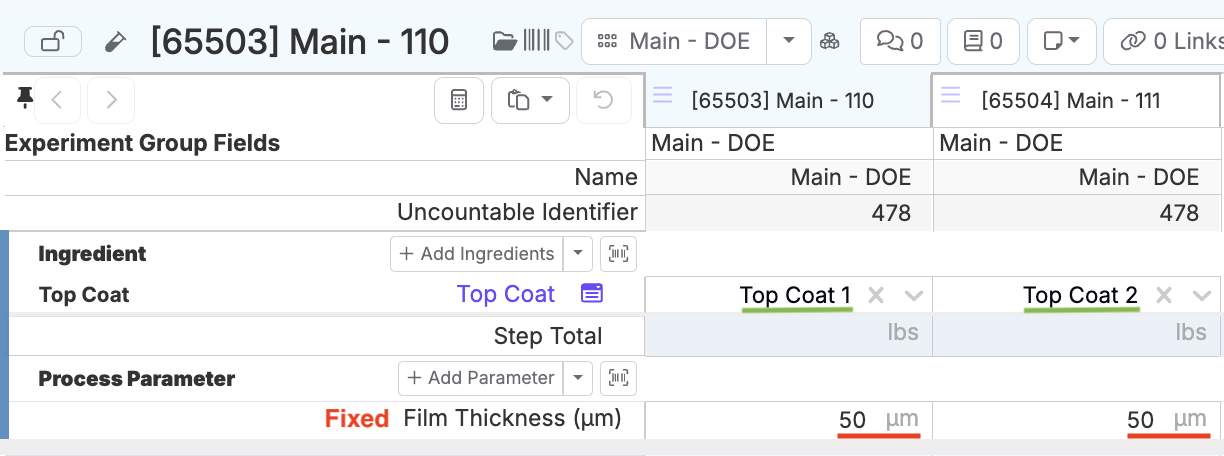
In the image below, notice how one panel includes Top Coat 1 and the other includes Top Coat 2 while both panels have a fixed film thickness of 50 µm. This advanced screening design set up would enable users to compare measurements of both top coats to determine which is the optimal coating layer.
Scenario 2: A user wants to determine the optimal drying conditions for a new paint material with a film thickness of 50 µm.
First, we will design Parameter 1 to vary the overcoat interval (drying time) between one to five hours with three steps. This means that in Step 1, the effect of a one, three, and five hours drying time will be examined.
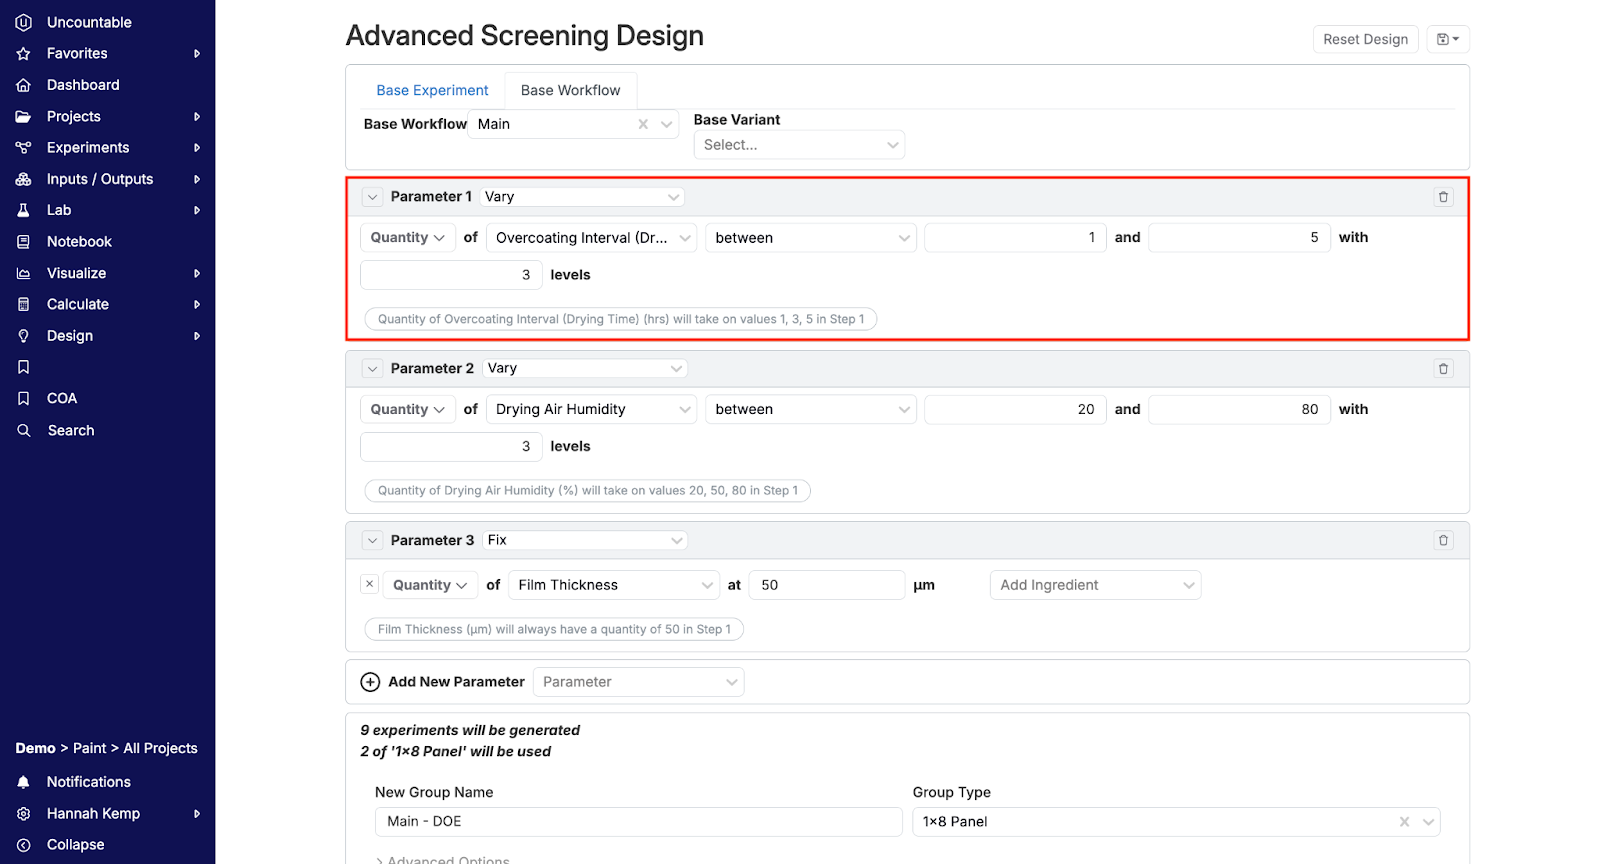
Parameter 2 will vary drying air humidity between 20 and 80% with three levels. That means that during Step 1, drying air humidity will take on values of 20%, 50%, and 80%.
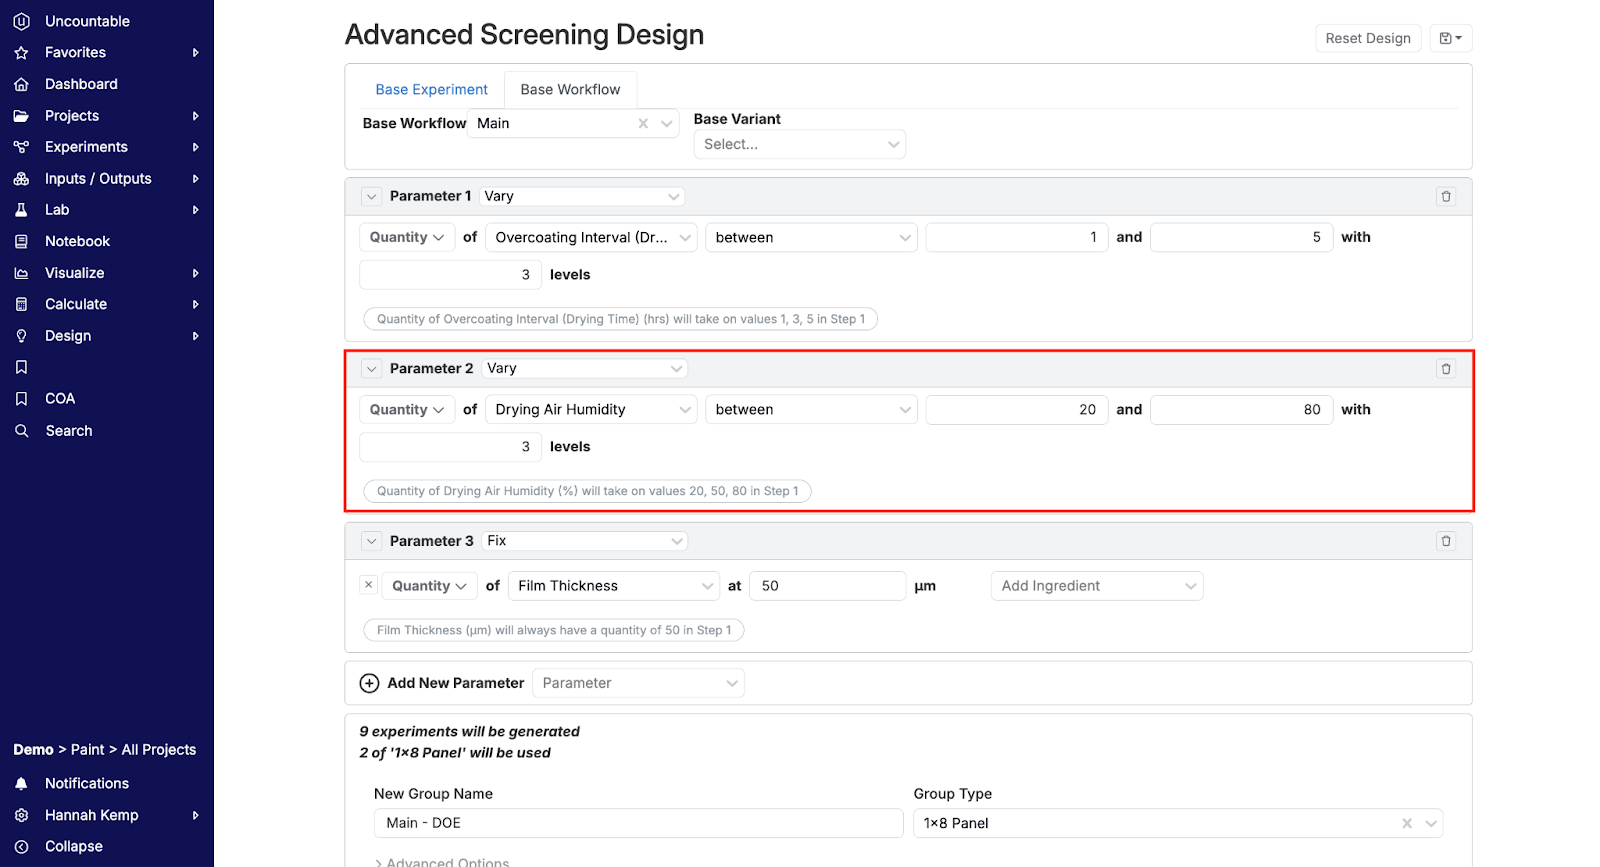
Parameter 3 will fix film thickness at 50 µm.
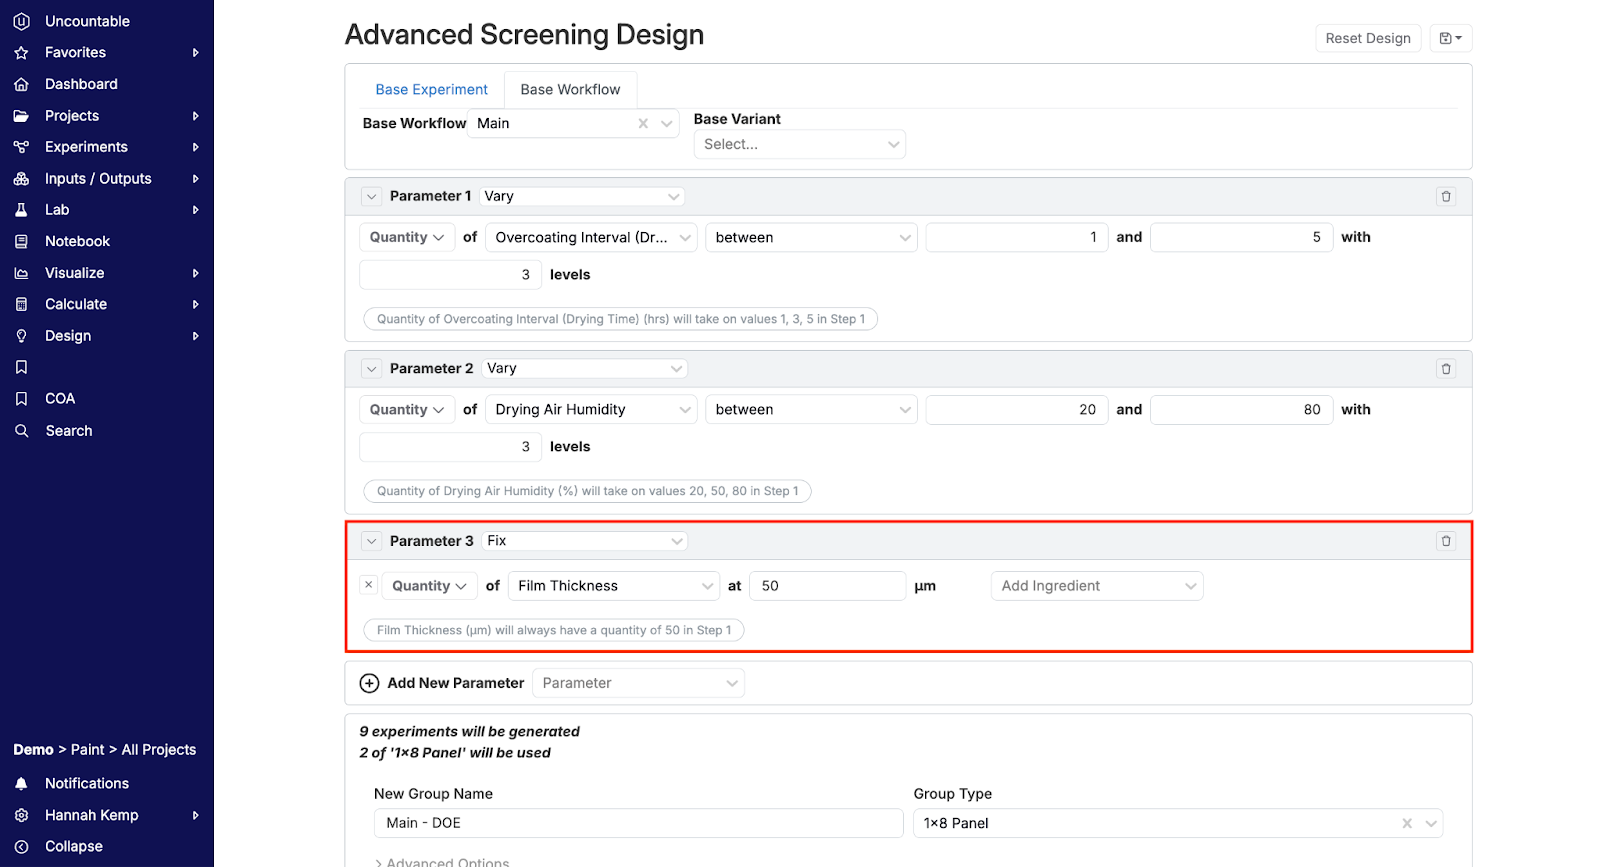
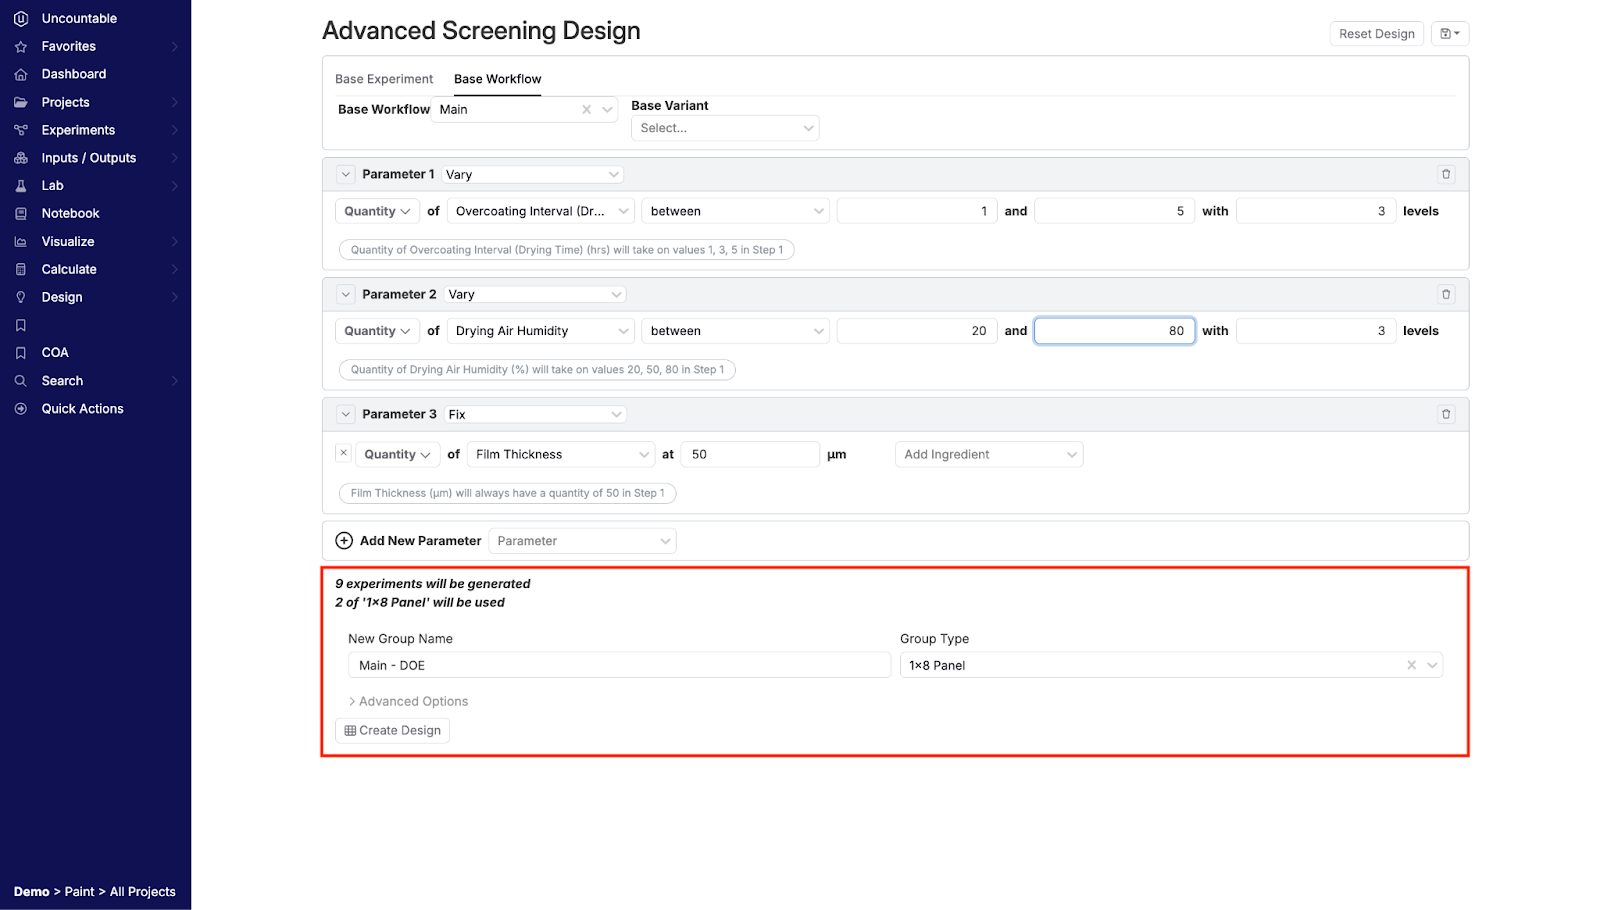
In the last step, we will establish that experiments will be generated in a 1×8 panel before clicking “Create Design”.
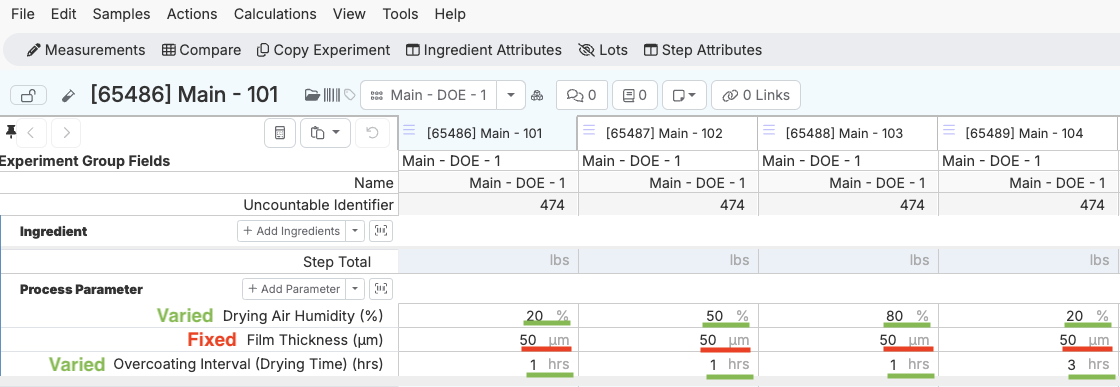
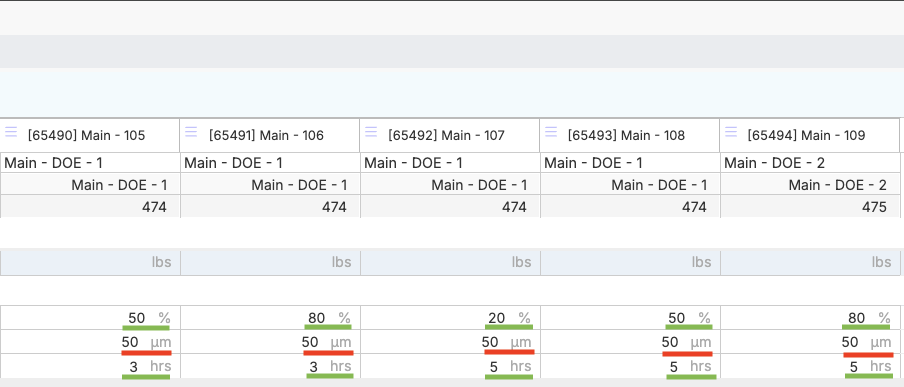
In the images below, you can see how drying humidity and drying time are varying between panels while film thickness is remaining fixed at 50 µm.
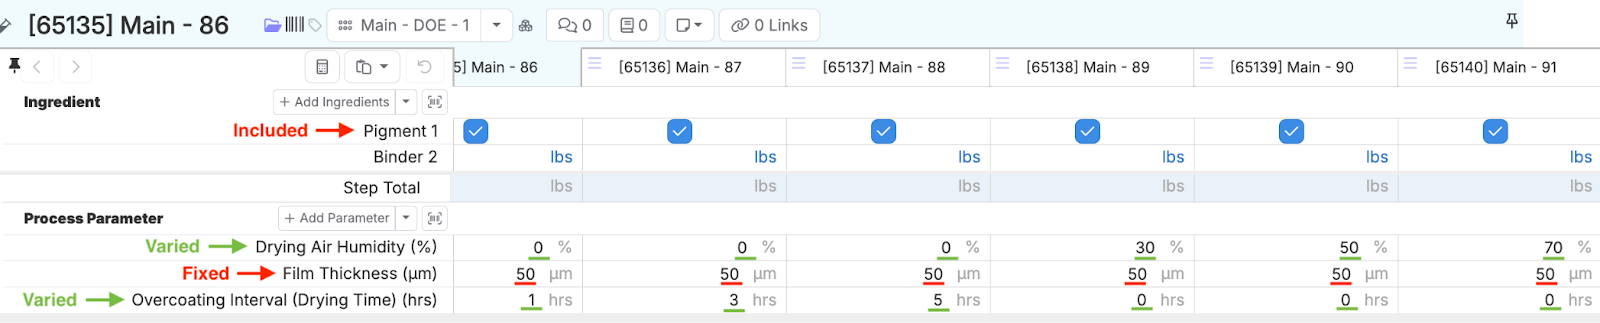
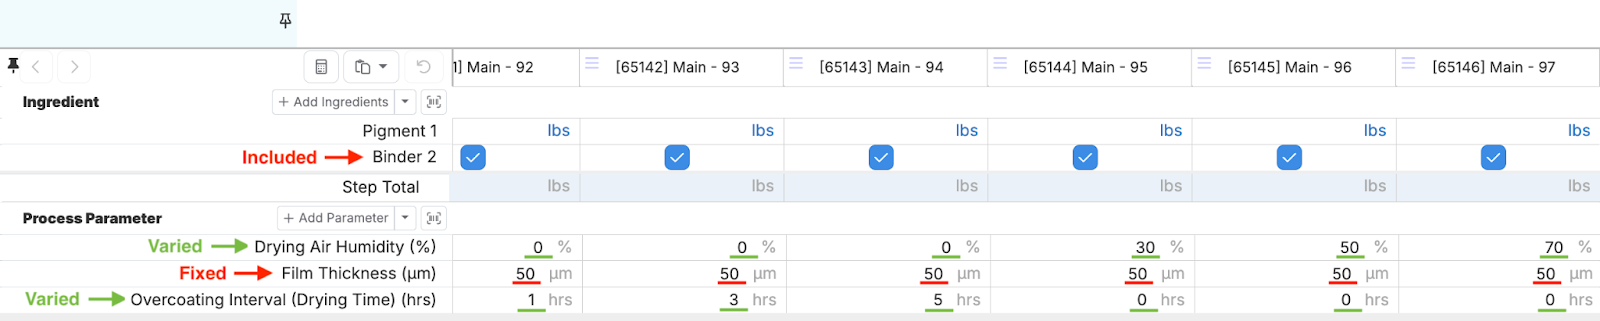
Scenario 3: A user wants to determine the optimal formulation for a paint that includes one of pigment 1 and binder 2, has a film thickness of 50 µm, and uses a multi-parameter to vary drying time and humidity.
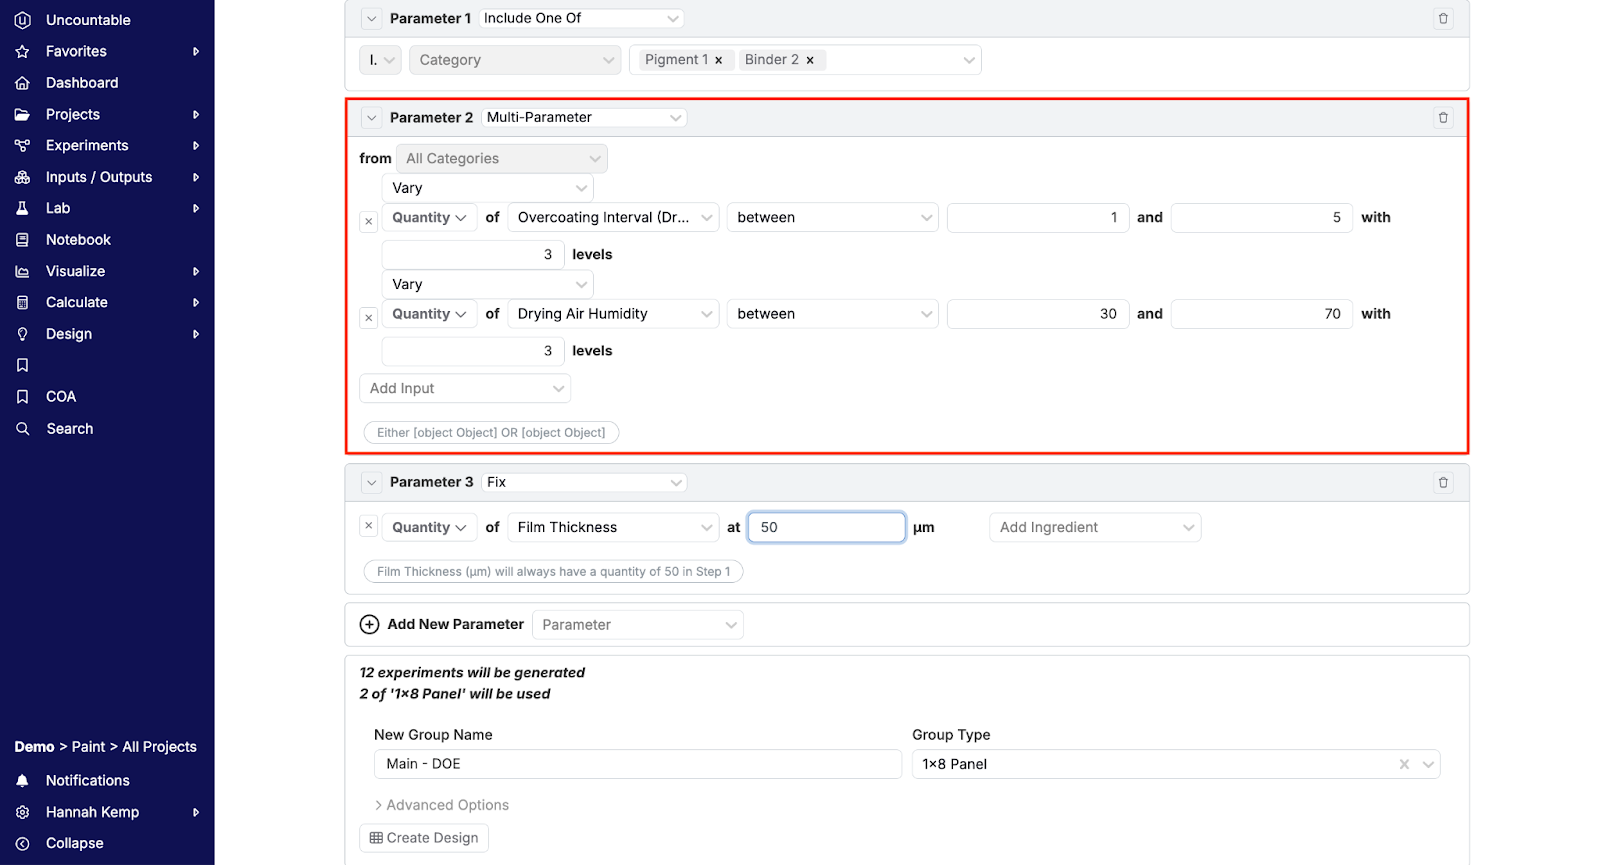
First, we will design Parameter 1 to include one of pigment 1 or binder 2.

In Parameter 2, we will use a multi-parameter to vary the overcoating interval (drying time) between one and five hours and the drying air humidity between 30 and 70%, both with three steps. This means that the effects of a one, three, and five hours drying time or 30, 50, and 70% drying humidity will be examined.
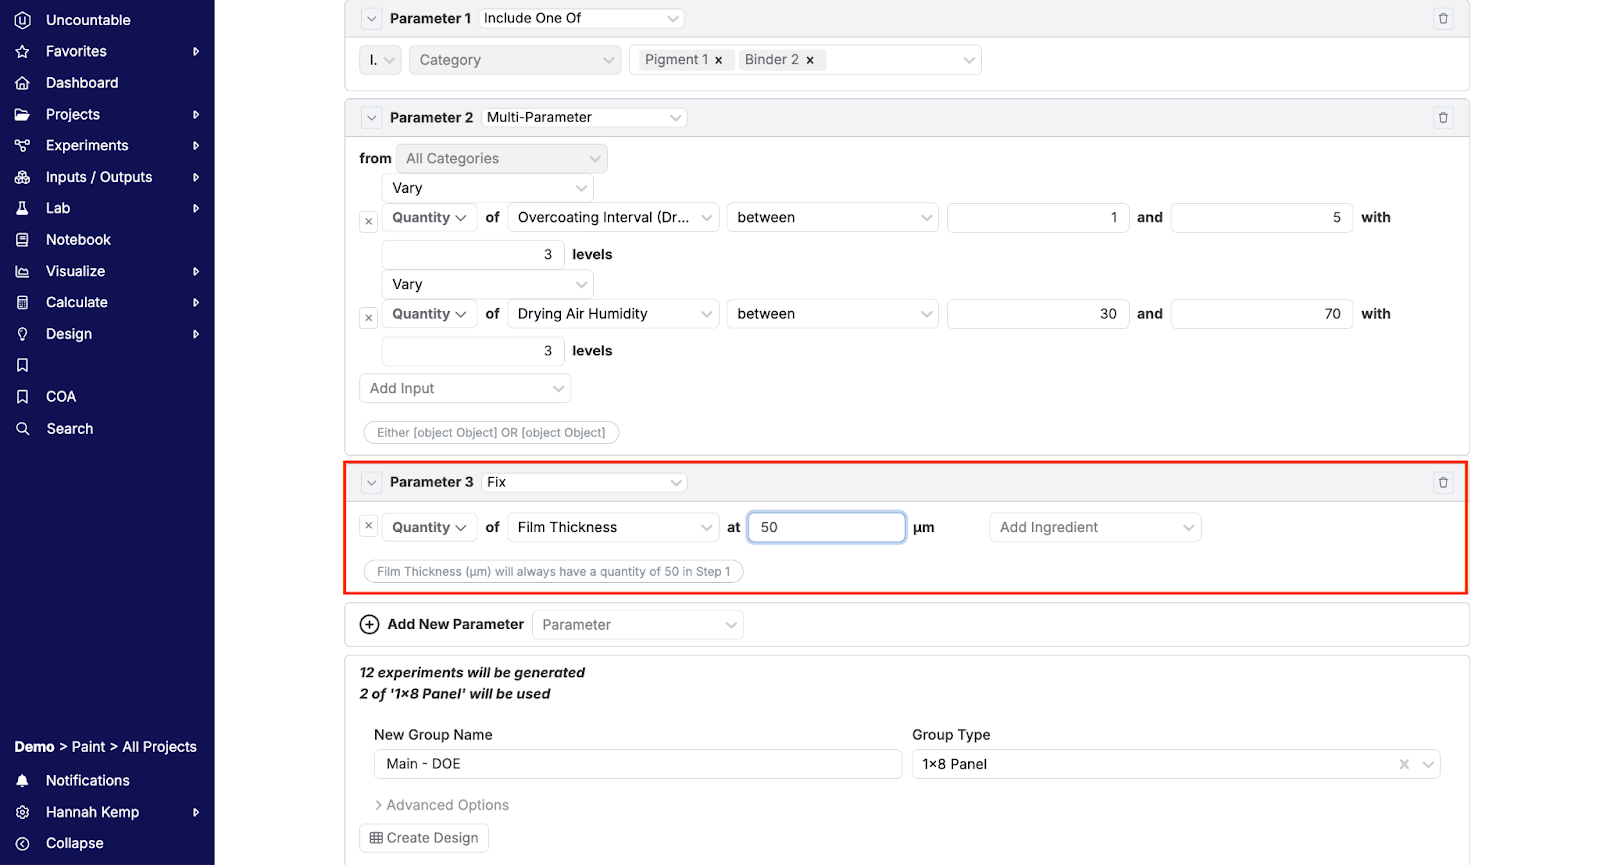
In Parameter 3, we establish a 50 µm film thickness.
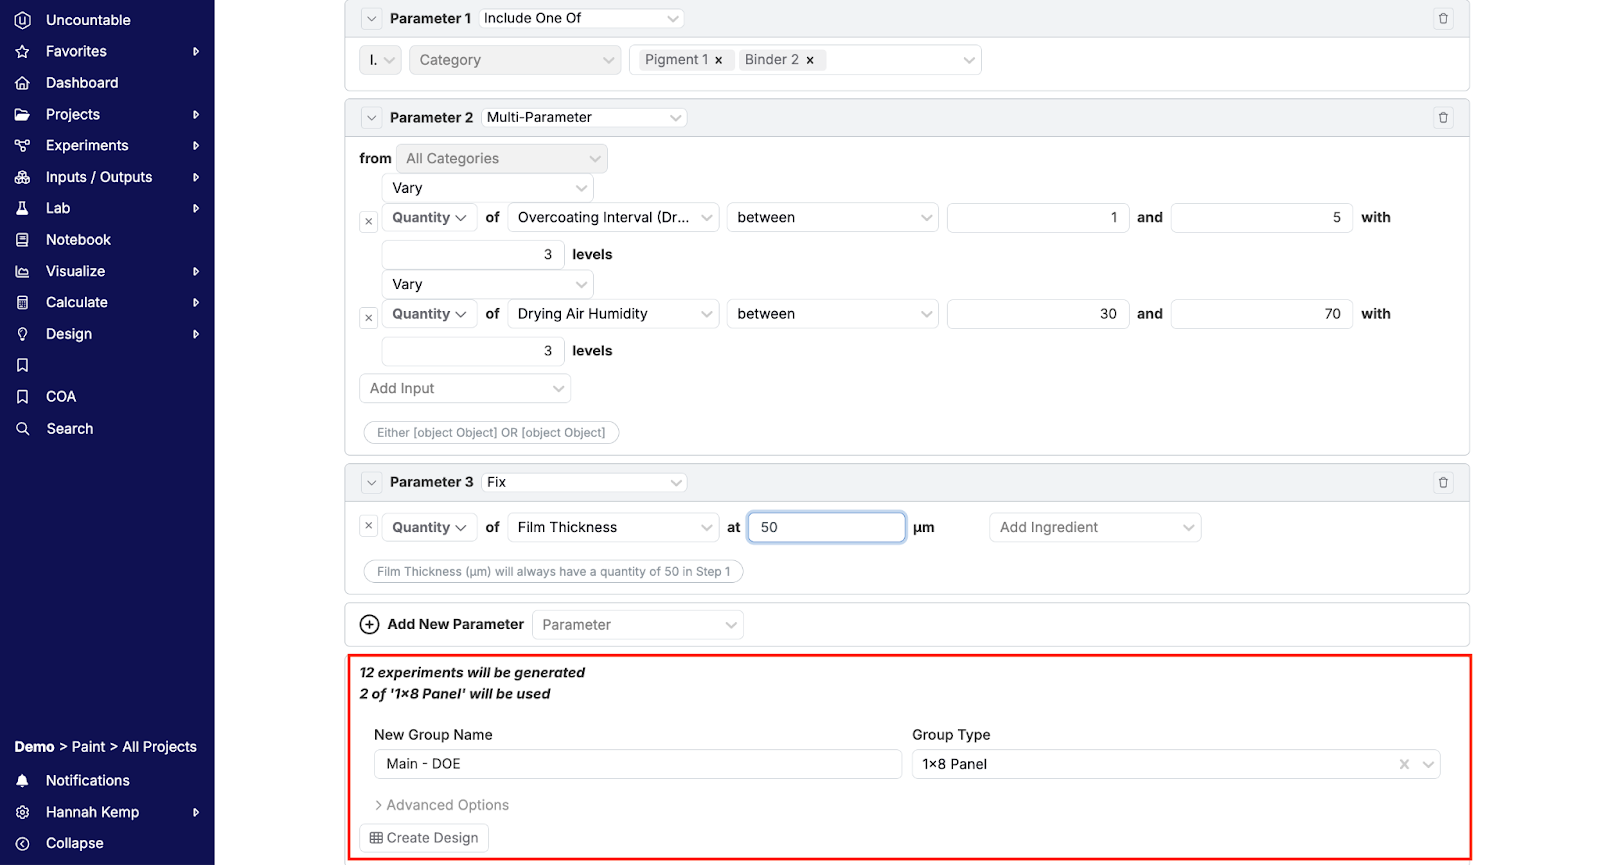
In the last step, we will establish that experiments will be generated in a 8 well plate before clicking “Create Design”.
In the images below, notice how pigment 1 is included in the first six panels and binder 2 is included in the second six panels. Drying humidity and drying time vary while film thickness is remaining fixed at 50 µm.