In Uncountable, Analytical Methods are used as a special type of Condition Parameter (CP) that allows you to store more information onto CP values. For instance, let’s say you use a Test Method as a Condition, and you want to attach a PDF or a date since the test method was active. This is where Analytical Method Condition Parameters (AMCP) should be used.
Creating Analytical Method Condition Parameters
Step 1: Create a definition
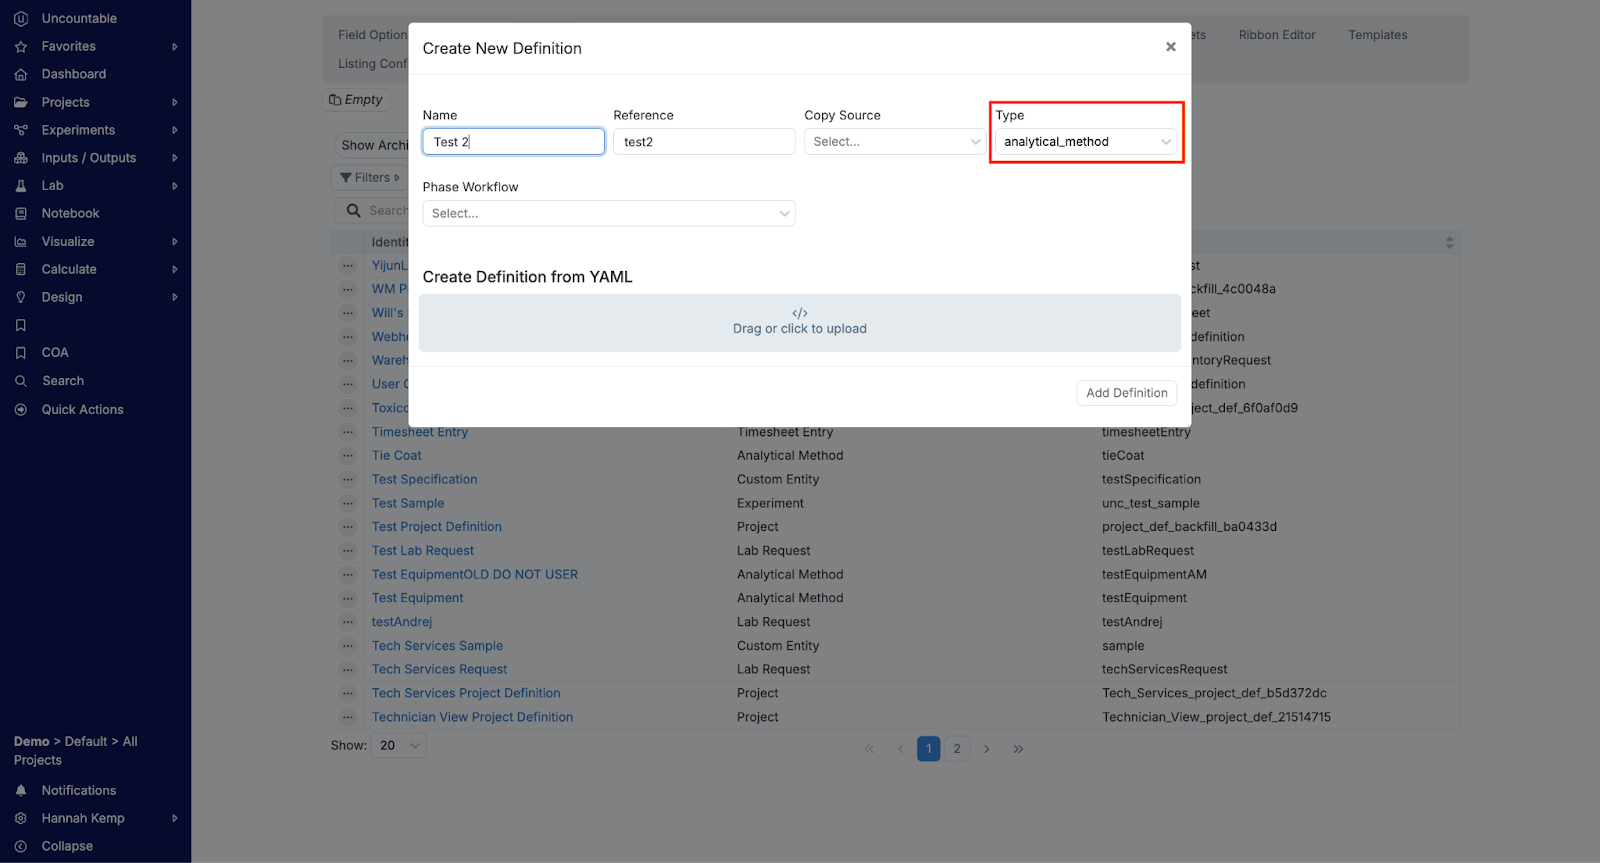
To set up a new AMCP, you must first create a new definition. To do so, navigate to the Form Admin page by pressing “Command + K” and typing “Form Admin”. If you do not have access to the Form Admin, please reach out to either a power user of Uncountable or your Uncountable point of contact.

From the Form Admin page, click the “Definitions” tab and then click the blue “+ Create Definition” button to open the Create New Definition Modal. Name your new definition and select “analytical_method” from the dropdown “Type” menu.
Step 2: Add necessary fields
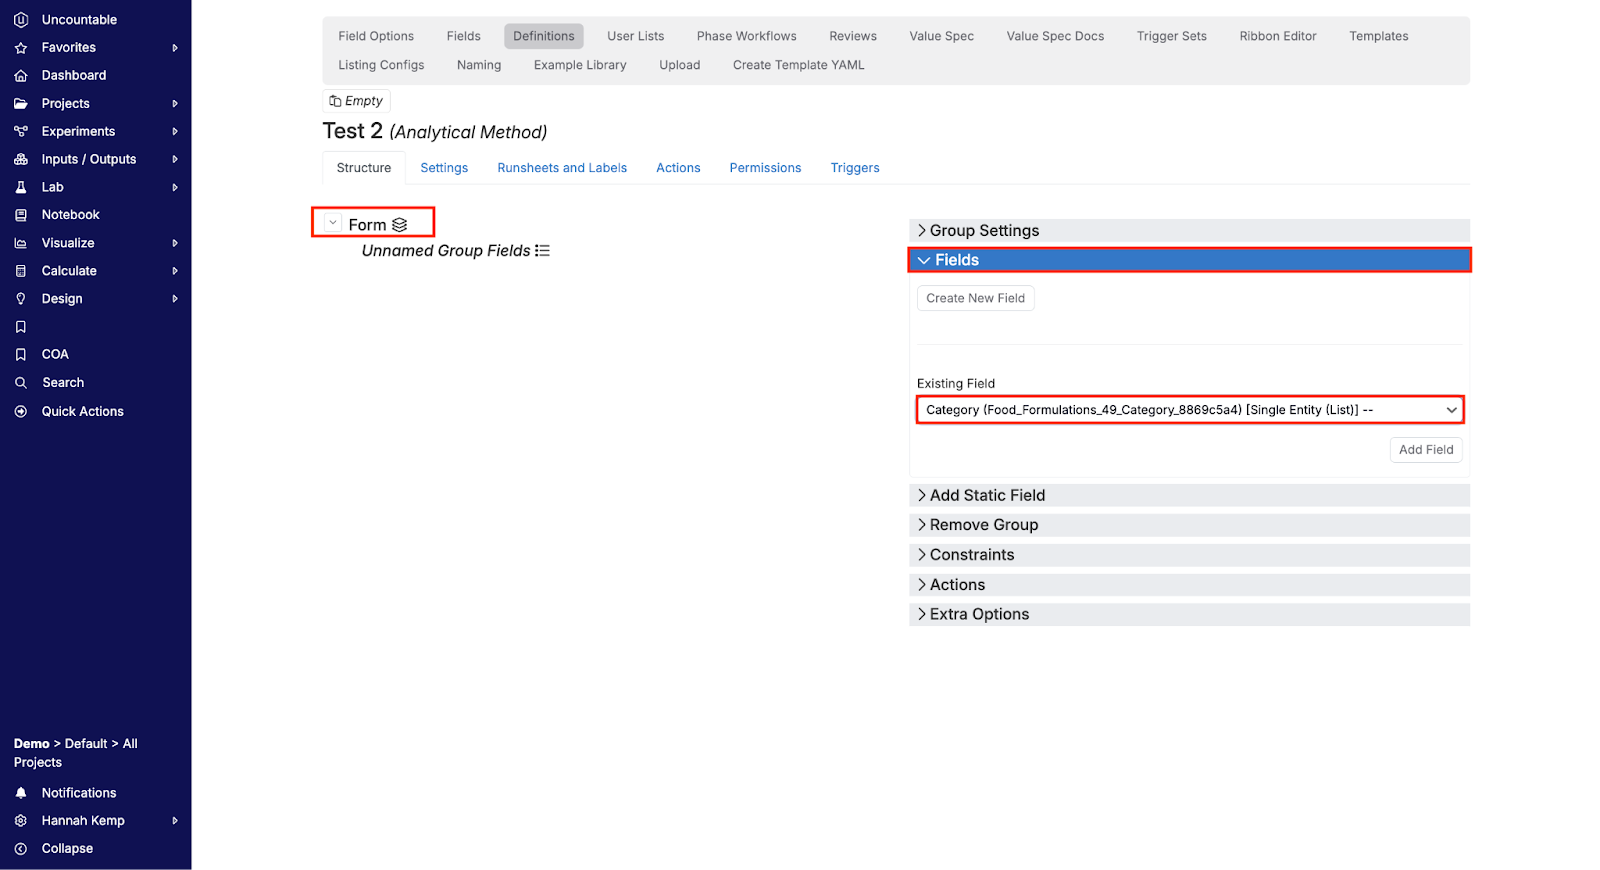
After creating your new AMCP definition, you can add fields that are used and stored in the background of the AMCP. To do so, expand “Form” and then click on the arrow next to “Fields” to expand the Fields Menu. From there, select the desired category from the “Existing Field”.
Like other Form Admin definitions, fields can be set as required, and their order and arrangement can be customized. Potential fields include files/attachments, notes, analytical workflow variant, category (useful for setting configurations later), and source experiment.
Linking a source experiment allows you to connect the AMCP with another experiment within Uncountable. This is beneficial for experiments that need to be closely associated with a Primer formula or substrates that require a more detailed description of parameters.
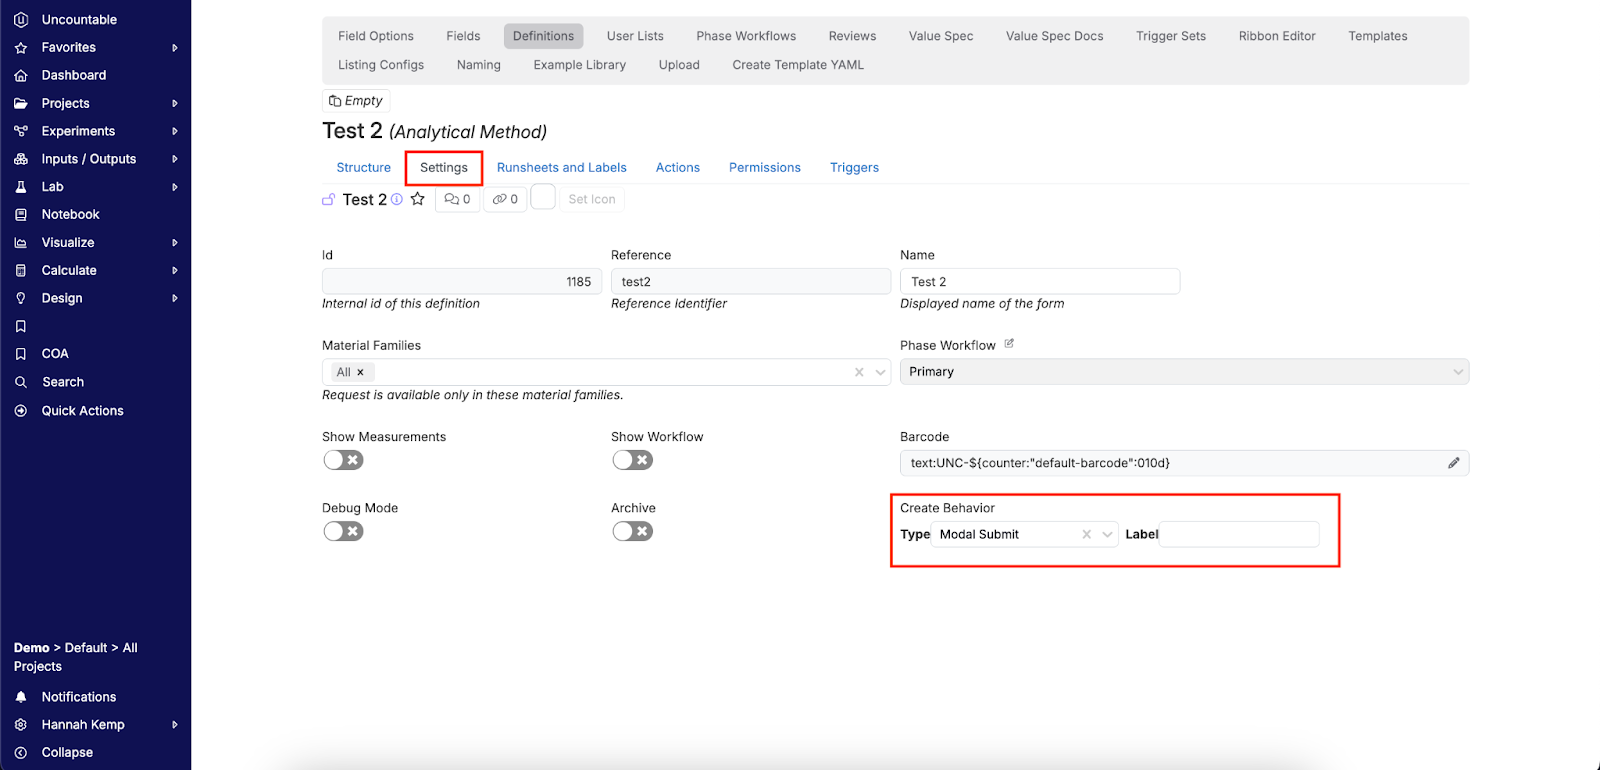
Next, ensure that the definition settings are set to “Create”. Navigate to definition settings by clicking the “Settings” tab and locating “Create Behavior” in the lowest right corner. Select “Modal Submit” from the dropdown menu.
Step 3: Create the AMCP
Once a definition is created, necessary fields added, and settings adjusted, you can start to make new Analytical Methods that belong to that definition.
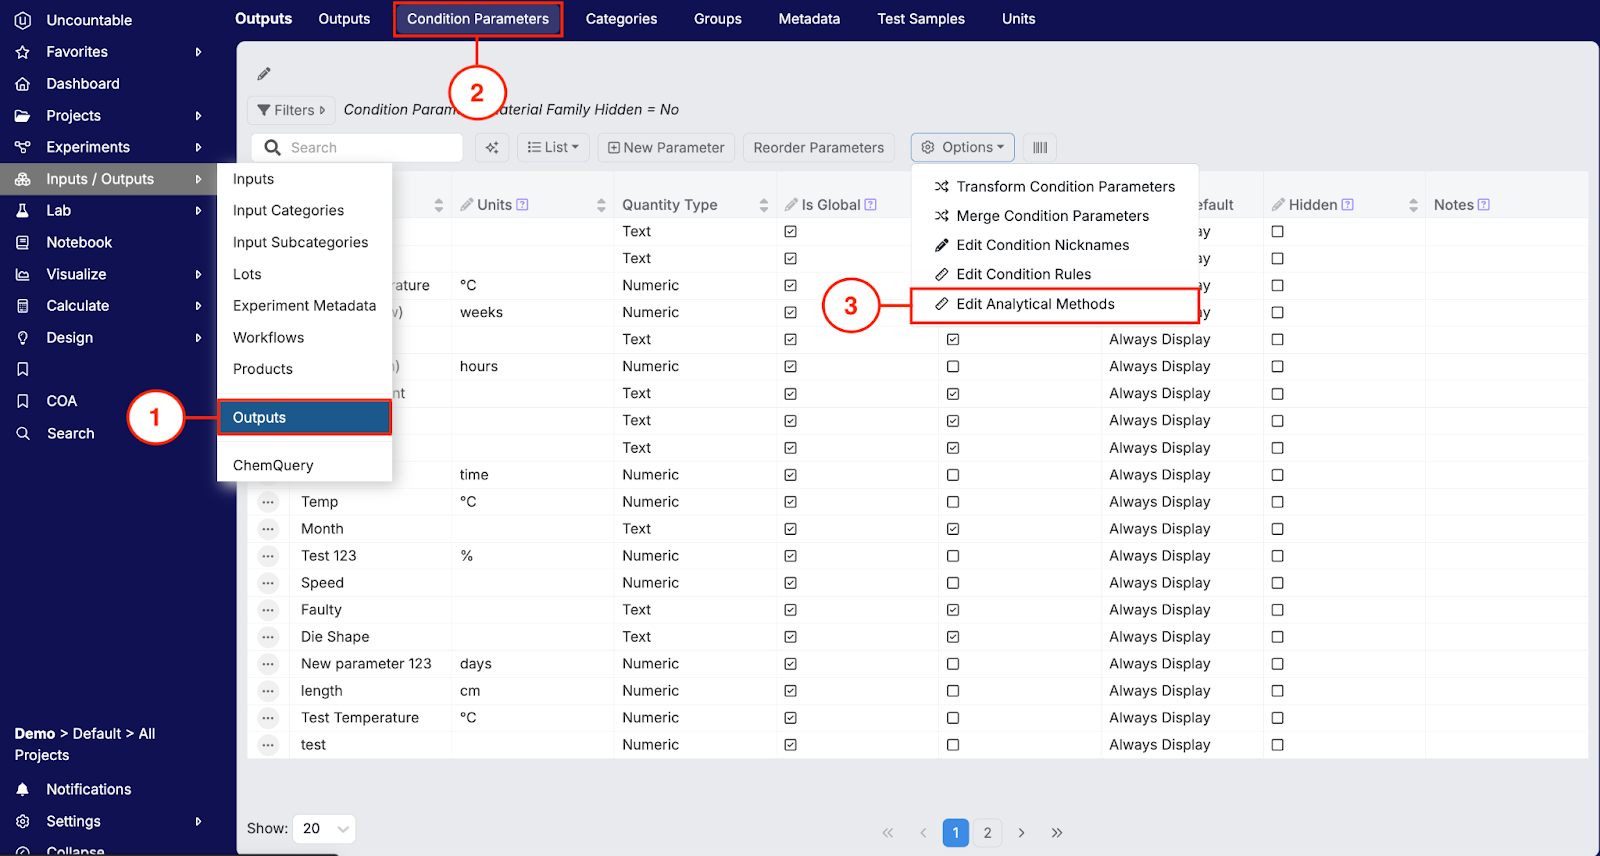
To access your analytical methods listing, navigate to the Outputs page (Object 1), then select Condition Parameters from the top toolbar (Object 2). Within the “Options” dropdown menu, select “Edit Analytical Methods”. Alternatively, use the command center (“Command” + “K”) and type “Analytical Methods”.
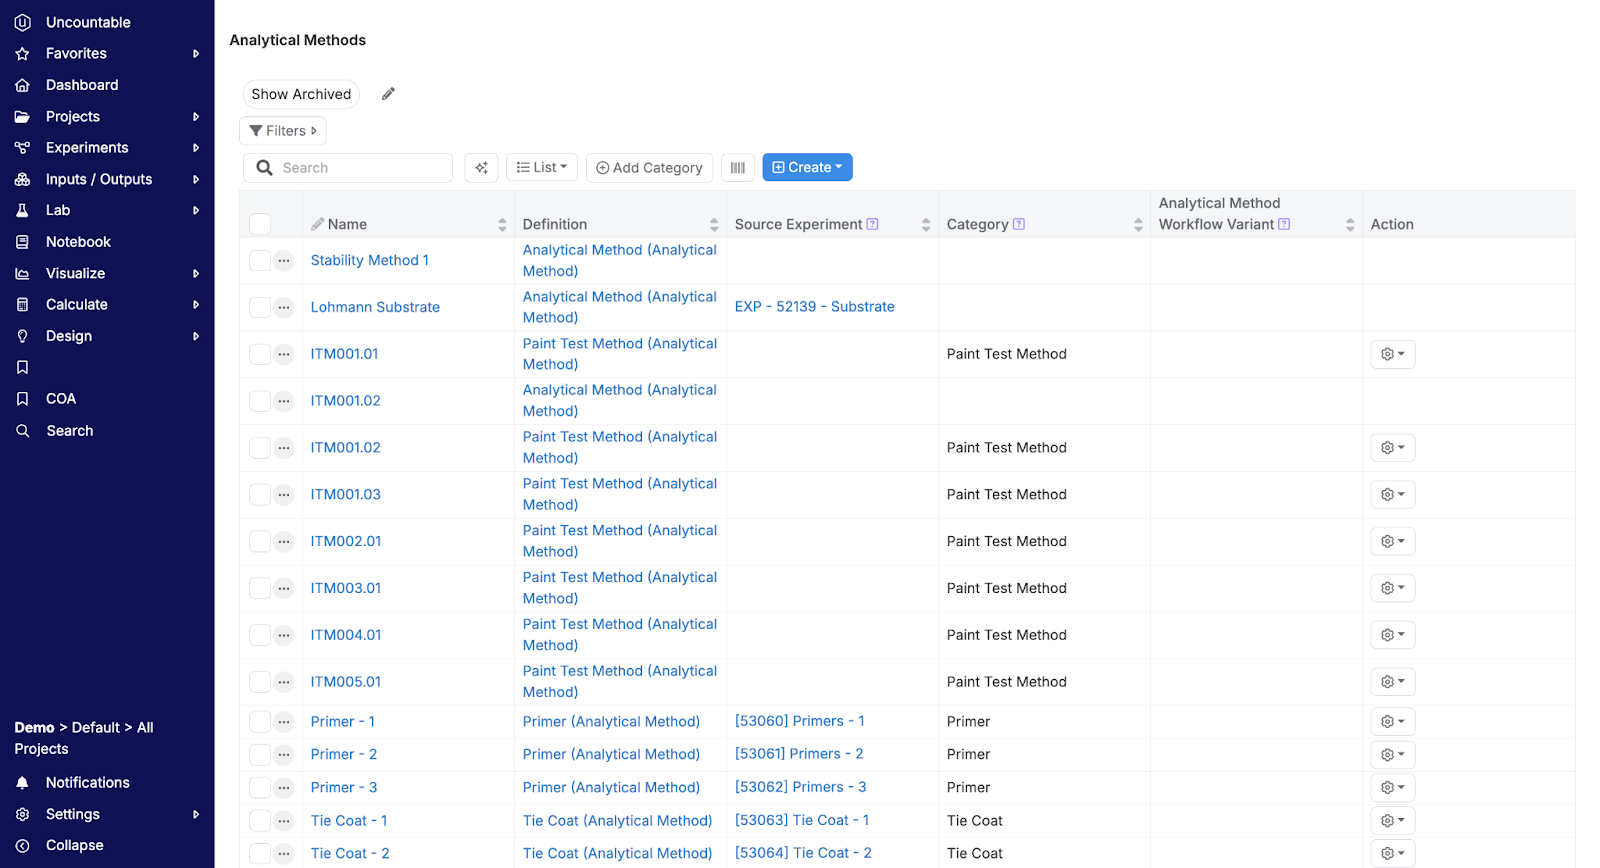
The AMCP listing table behaves like all other listing tables, meaning users can adjust the columns and filters present on the table. In addition, Admins of the system can set up presets/default columns and filters for specific user groups. You can use this table to search, filter and compare different AMCP values.
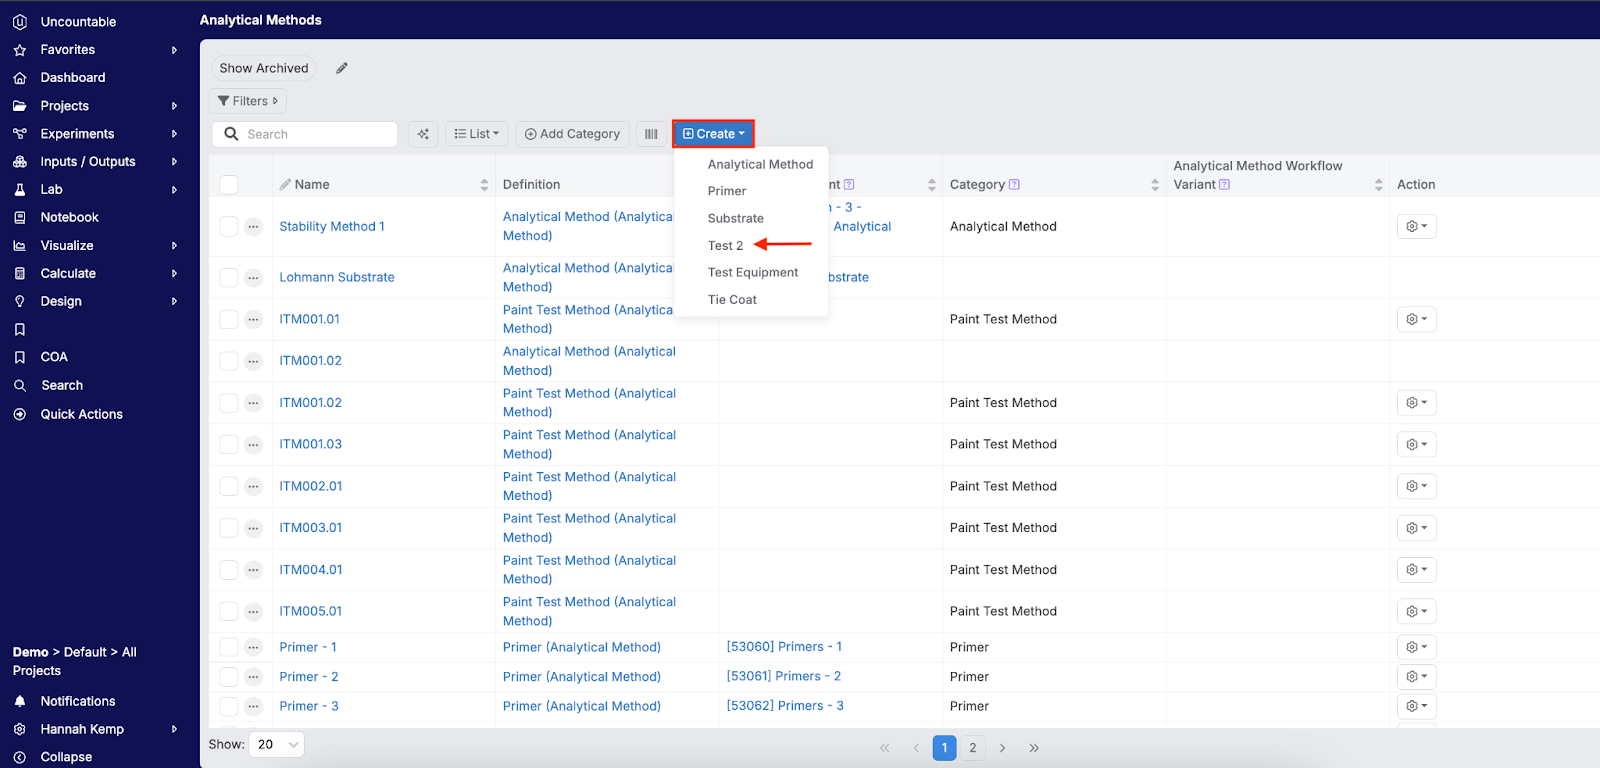
When creating a new AMCP, you can click on the “Create” button, and you will be presented with a list of all Analytical Method definitions. Select your newly created definition.
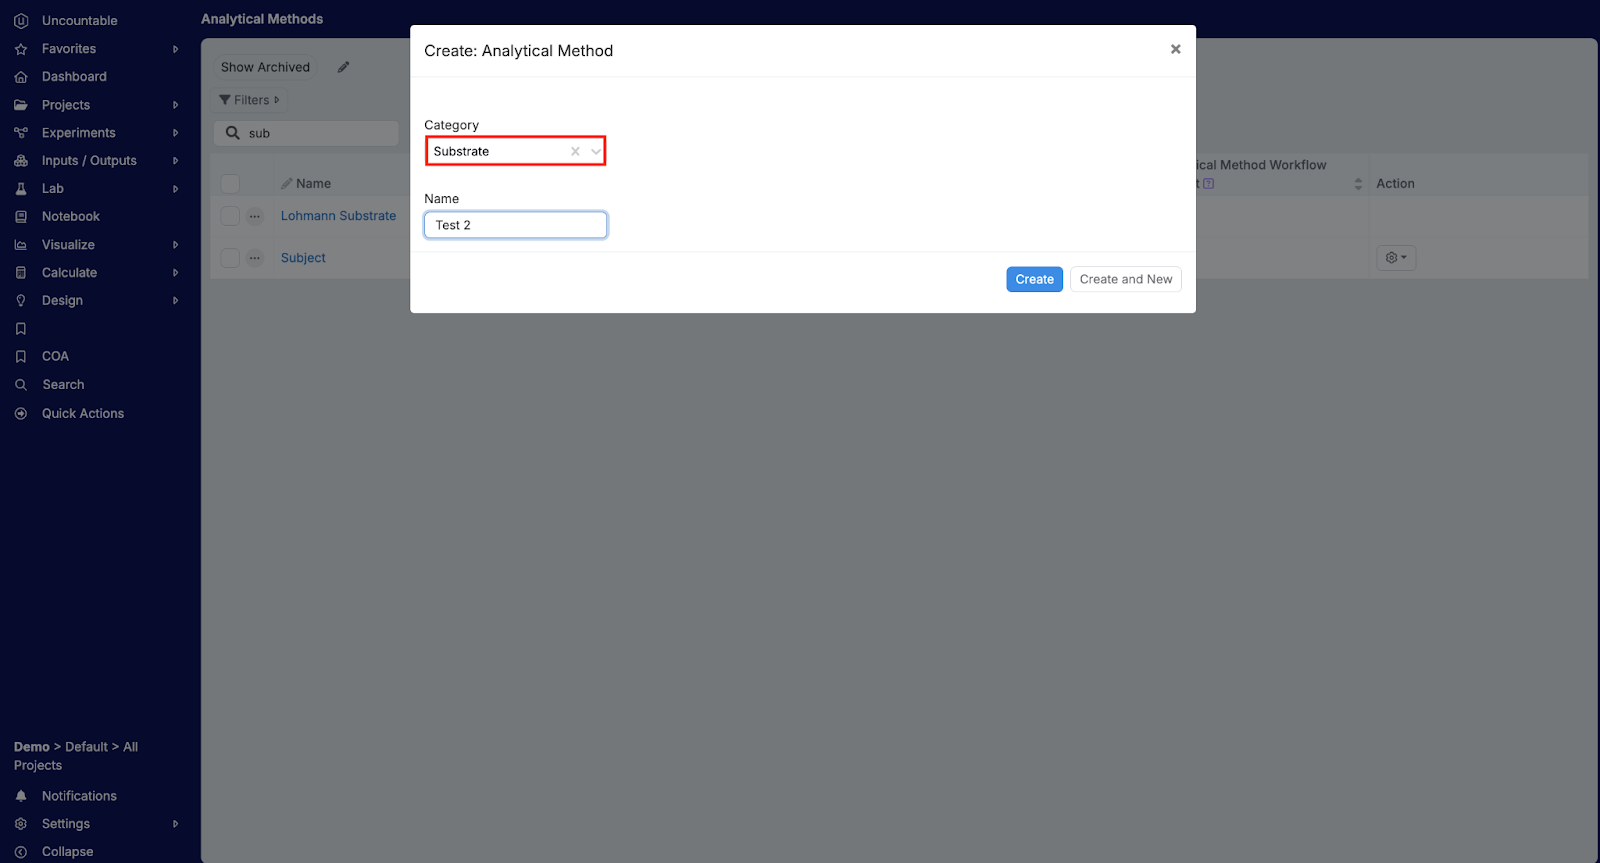
From there, a form window will appear containing the definition fields of the AM added previously. In the example below, fields added were “Category” and “Name” were added and appear in the modal.
Assign a category under which your AMCP will be created. In this example, the AMCP will belong to the Substrate category. Fill out all other necessary fields and click “Create”.
Using Analytical Method Condition Parameters
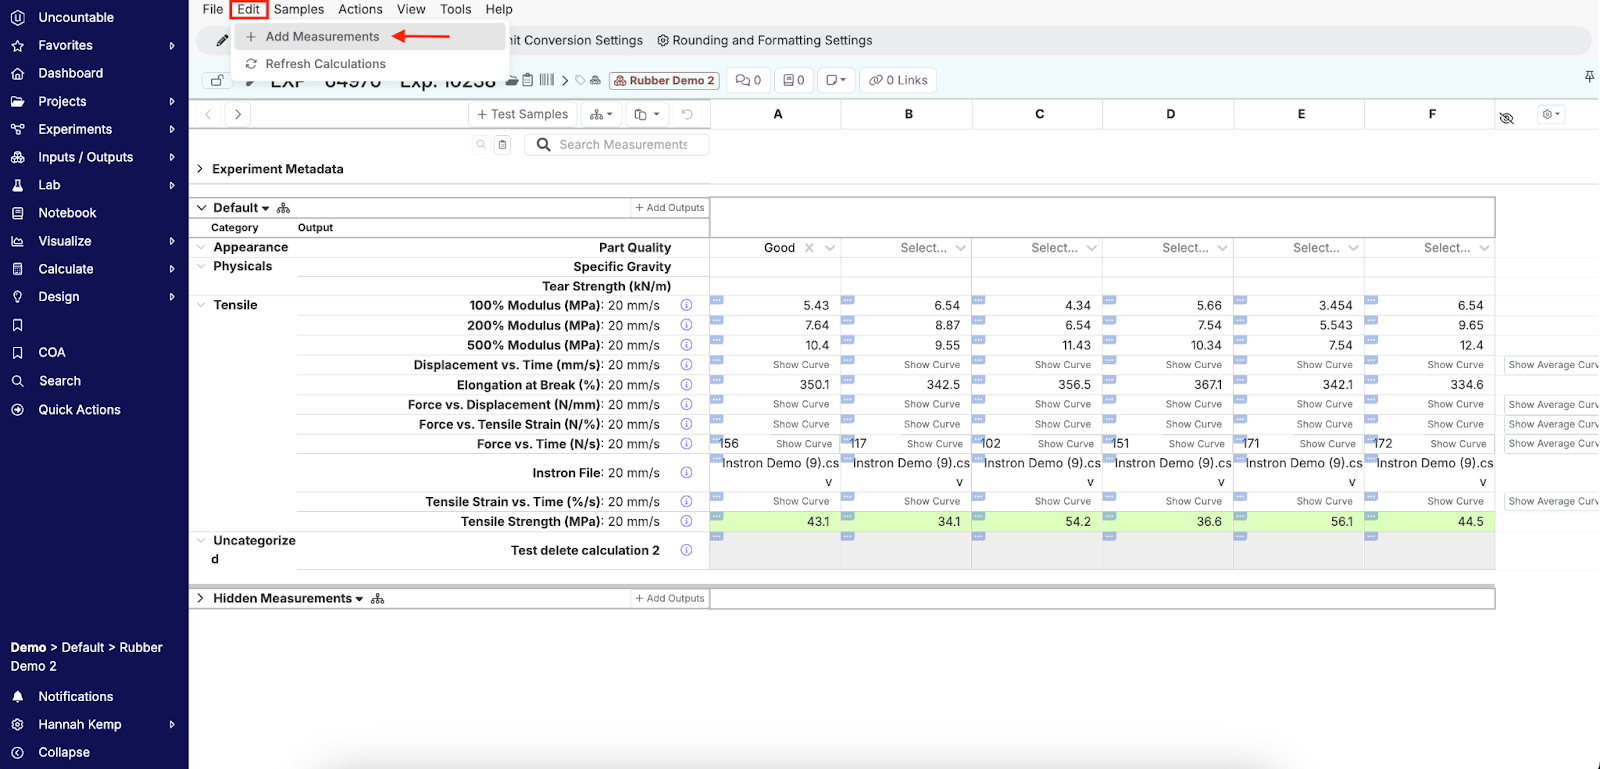
To assign an AMCP to a measurement, first navigate to the Enter Recipe. Select “Edit” from the top toolbar, and click “Add Measurements”.
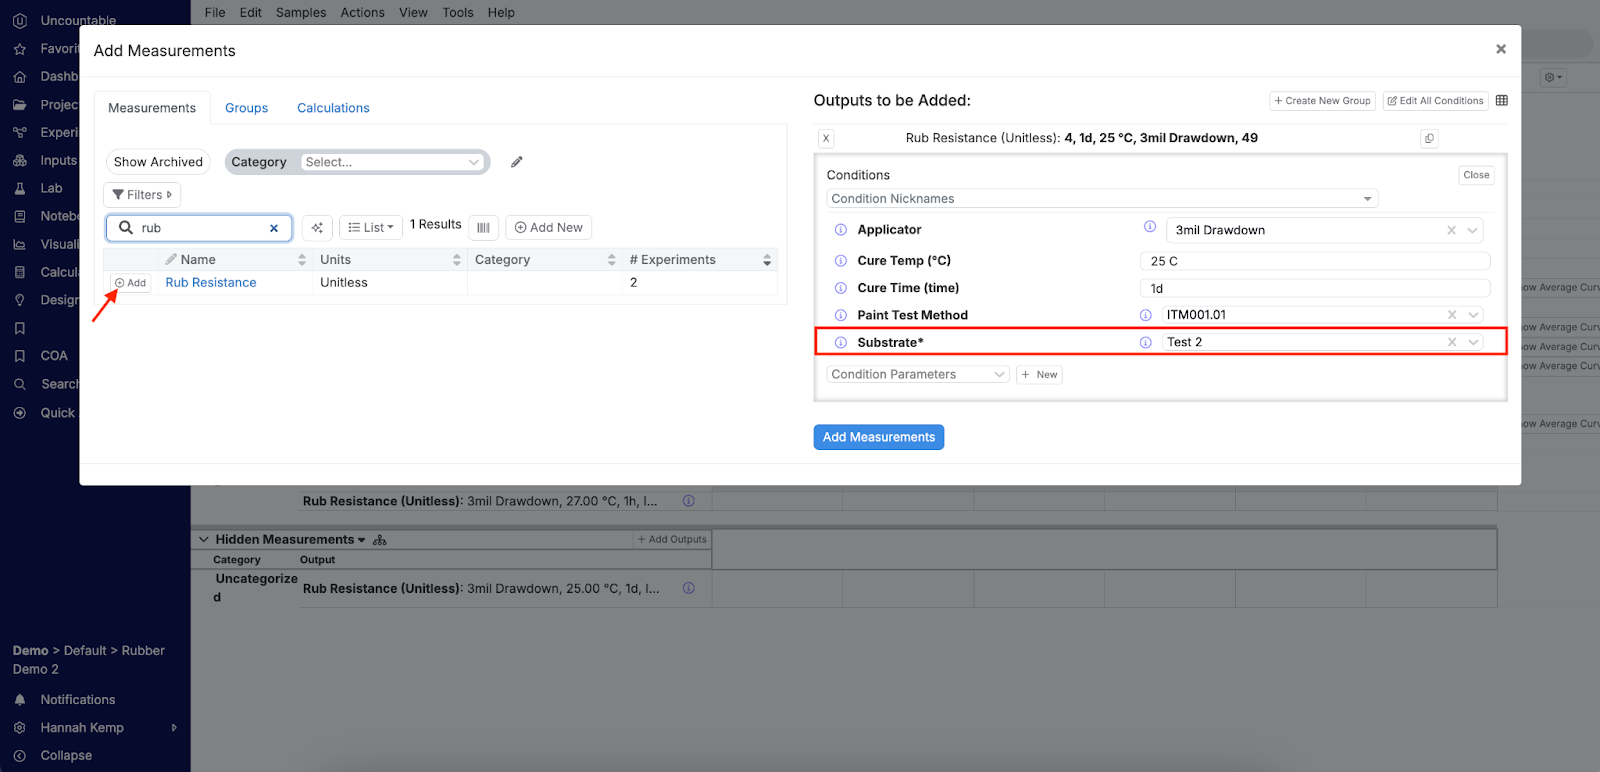
Next, select a measurement from the list and click the “+ Add” next to its name, opening a window with the measurement’s required condition parameters.
Search for your AMCP within the category that you previously assigned. You will notice that, unlike typical CPs, categories containing AMCPs will have an “Advanced Search” option within the dropdown menu.
In the example below, the “Test 2” AMCP is located within the Substrate condition parameter category. Fill out the rest of the required information for the condition parameter and click “Add Measurements”.
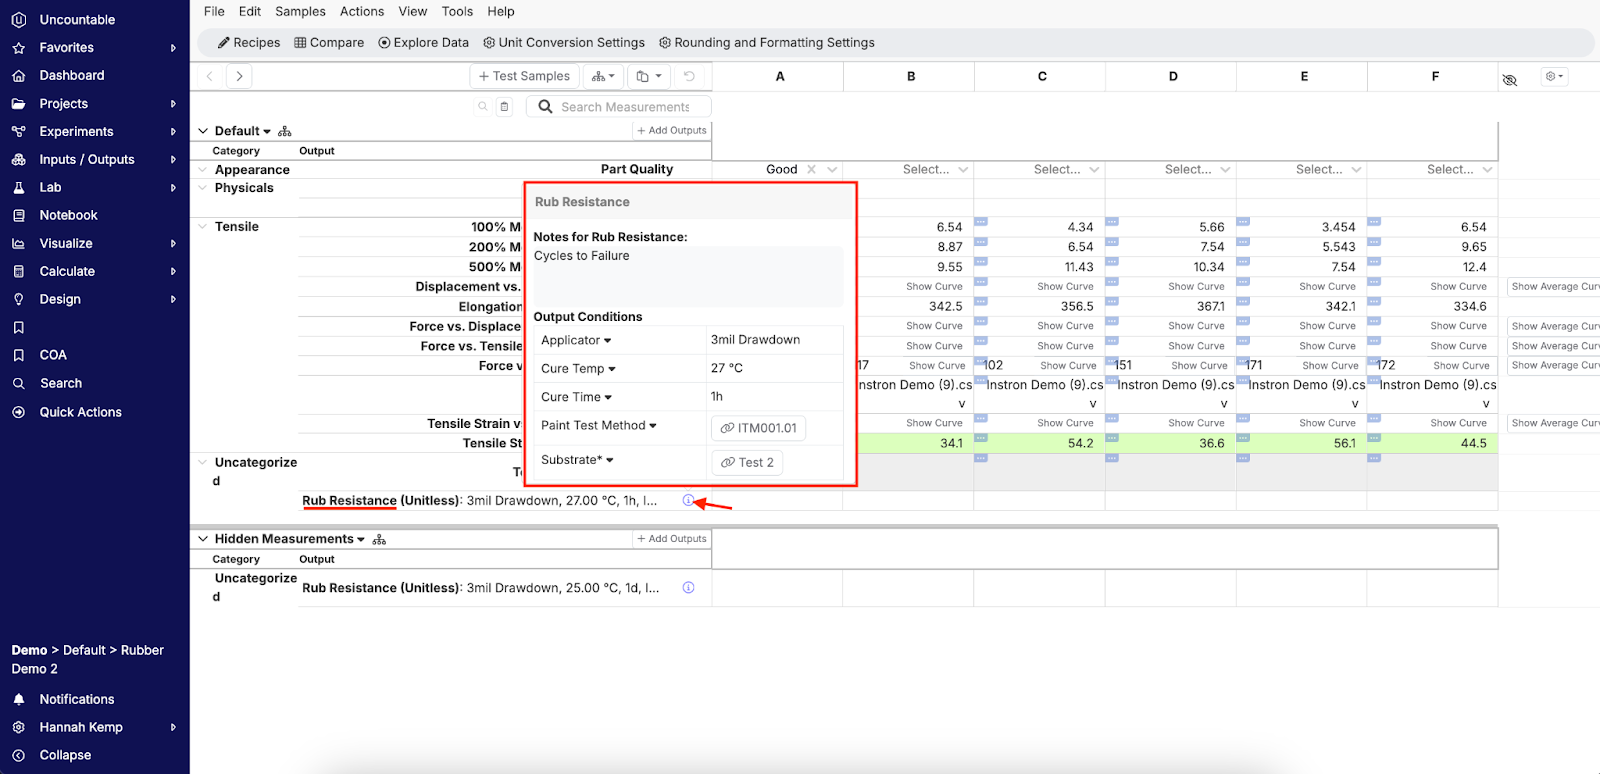
Once your AMCP has been added, it is visible from the Enter Measurements page. Click the small “i” icon next to the output to open the information. Also unlike typical CPs, you will notice a hyperlink next to each AMCP. In this example, both the Paint Test Method and Substrate have associated AMCPs.
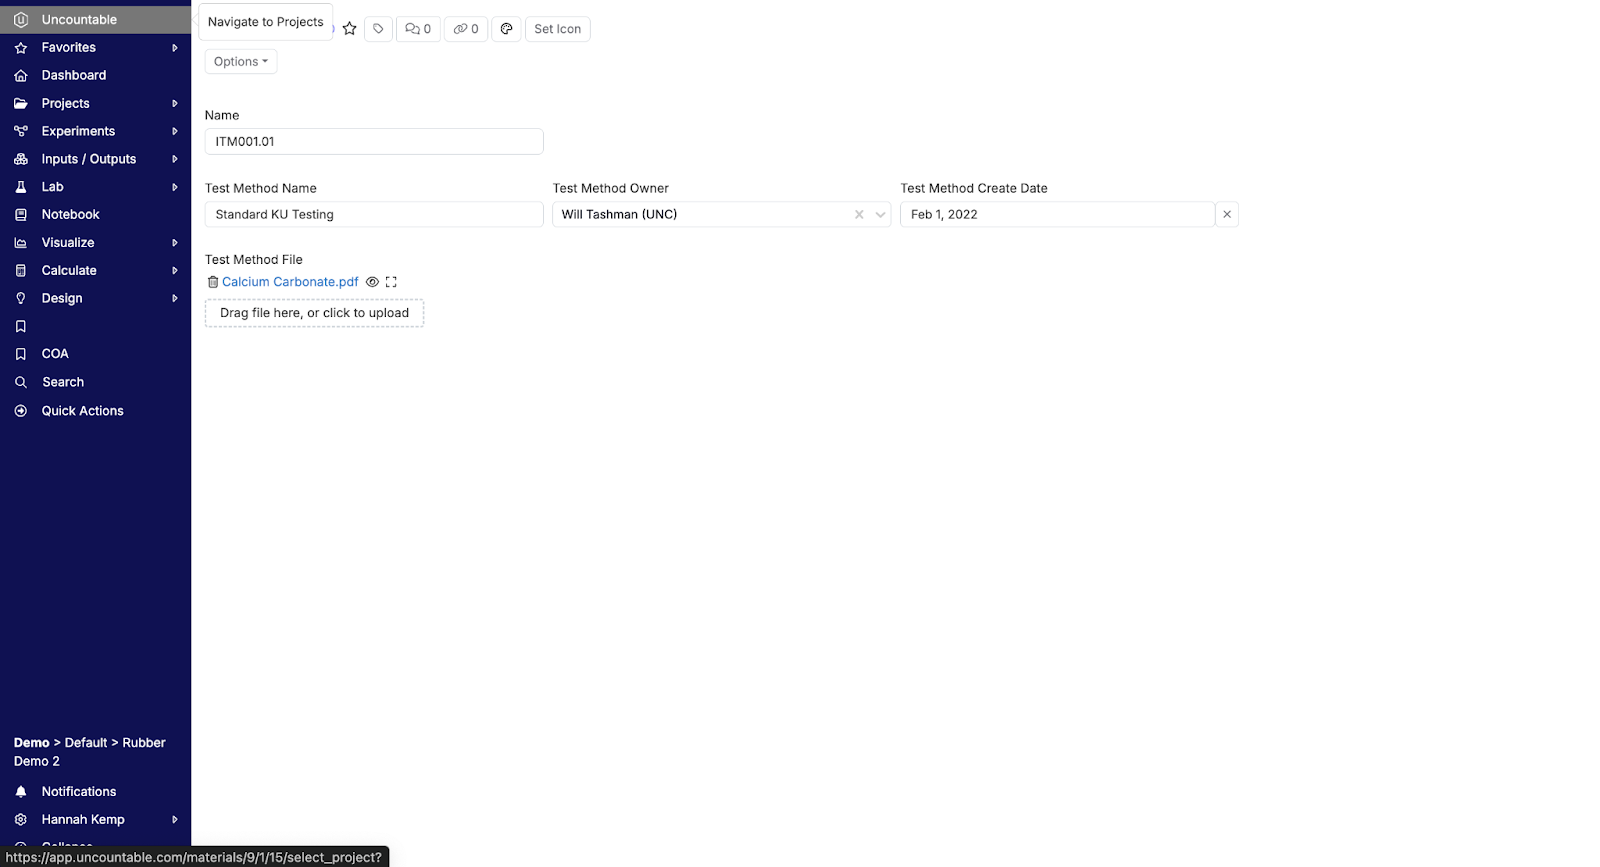
Clicking on the hyperlink will bring you to a definition page for that AMCP value, such as this paint test method value below, which has a link to a PDF. This page could also have a link to an existing recipe or any other information stored.
In the example below, Lenata 3A is an AMCP with an associated source formula. On its definition page, you will see a link to the source formula.

Configuring AMCPs
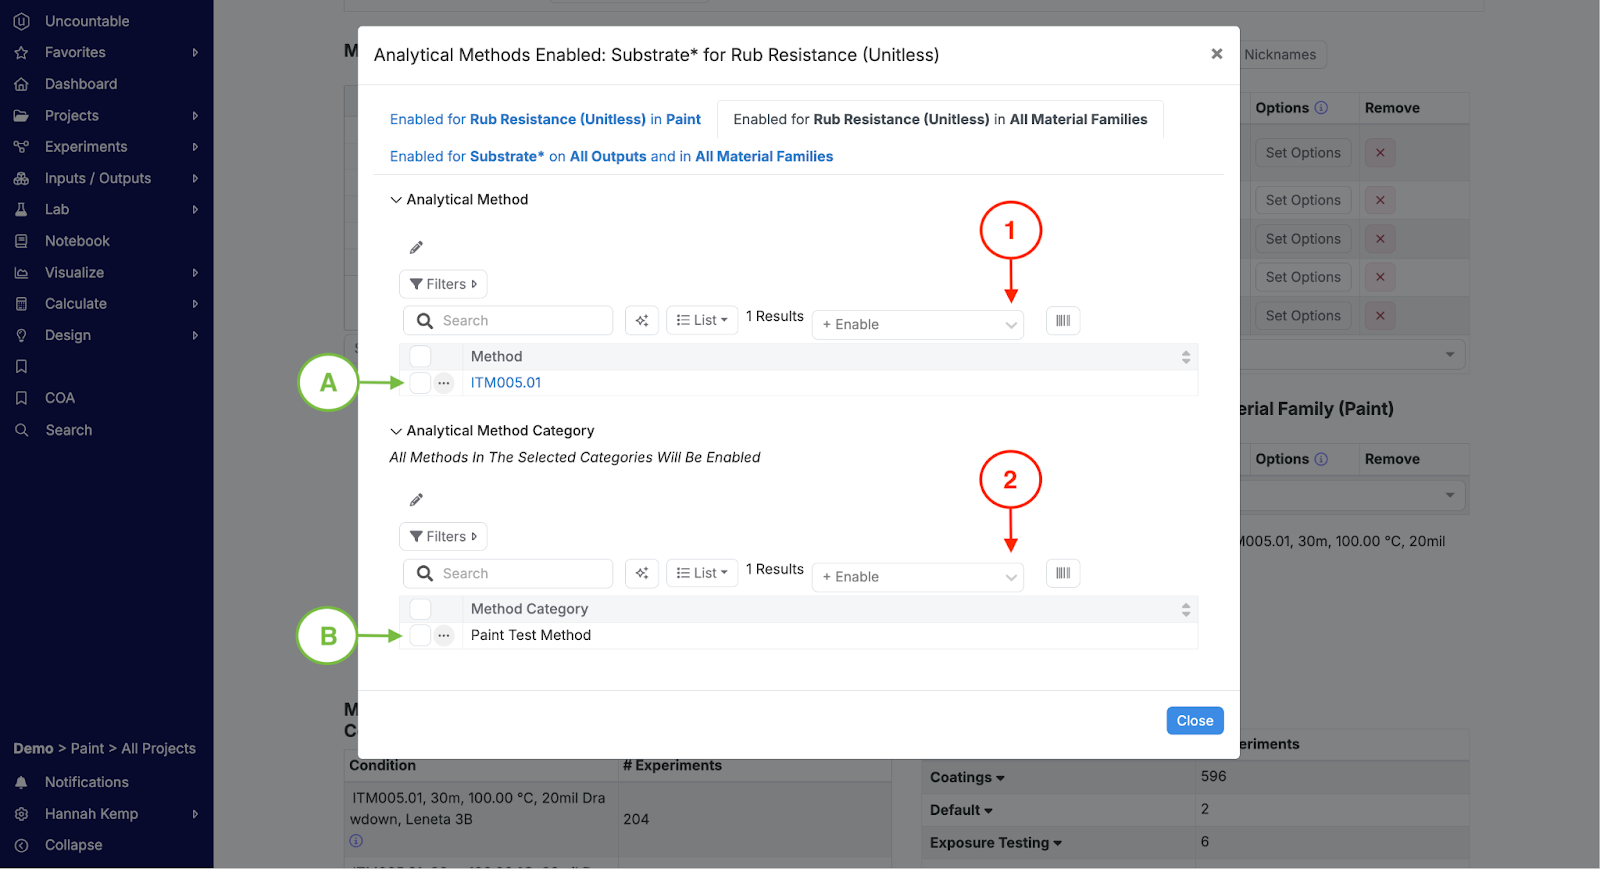
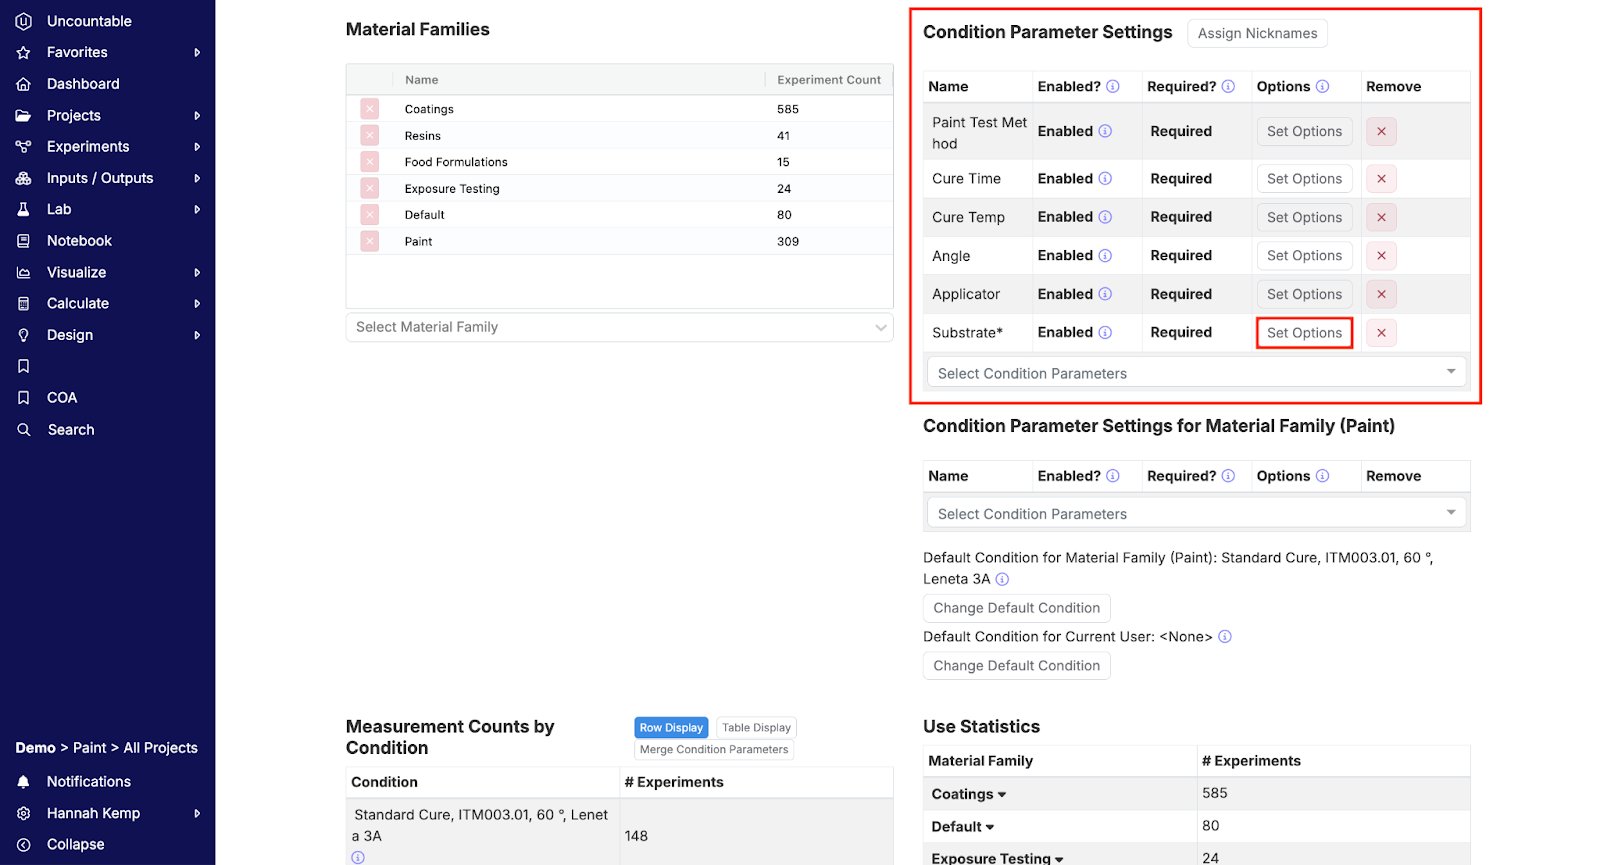
Configuring the available options for an AMCP on outputs also operates slightly differently. When you are on the output details page and you click on the “Set Options” button in the Condition Parameter Settings, the configuring of available options window will pop up.
In the modal, you will be able to add individual AMCP values, or categories of values (an AMCP value can only belong to one category).
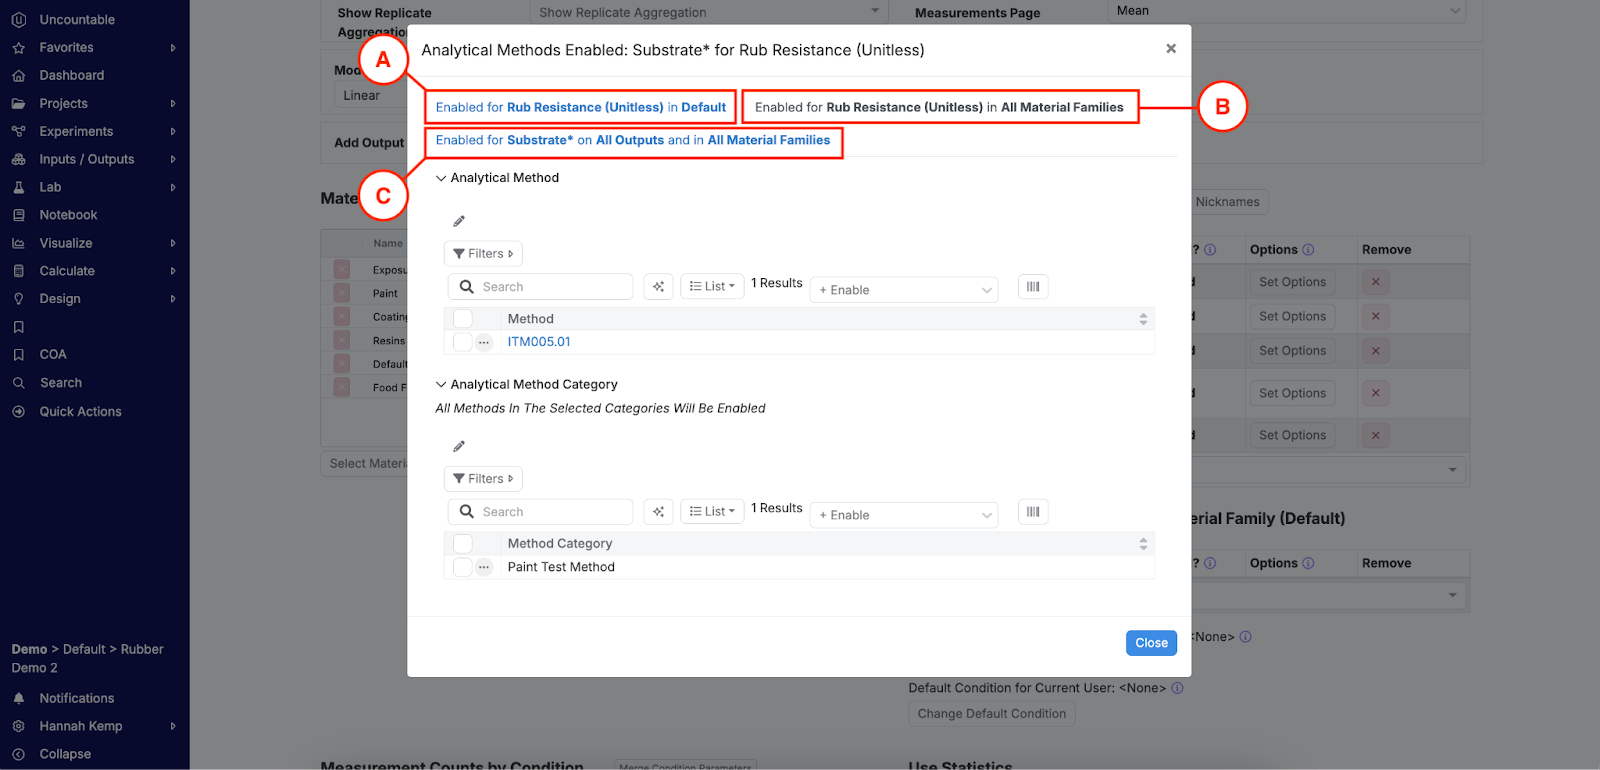
First, note the three tabs at the top of the modal. These tabs enable AMCPs in different contexts. “Enabled for (Output) in Default” activates the AMCP options for the given output in the current material family. “Enabled for (Output) in All Material Families” activates the AMCP options for the given output across all material families. “Enabled for (Condition Parameter) in All Material Families” activates the AMCP options across all material families across all outputs.
These tabs are also additive, meaning that settings in one tab combine with settings in the others.
Add individual AMCP values to the available options by selecting them from the first dropdown menu (Object 1). Add all AMCP values in a category by selecting the category from the second dropdown menu (Object 2).
However, when there is a set up like below, with options in A and B, both will be available in the dropdown. Therefore, in order to limit the available options to just one or a few AMCP values, remove the category from section B, and only have options available in section A.