Experiment Metadata summarizes basic information about the formulation. This can include Experiment ID, creation date, responsible person and many more options of the descriptive information, which can help users to filter and find a right experiment quickly.
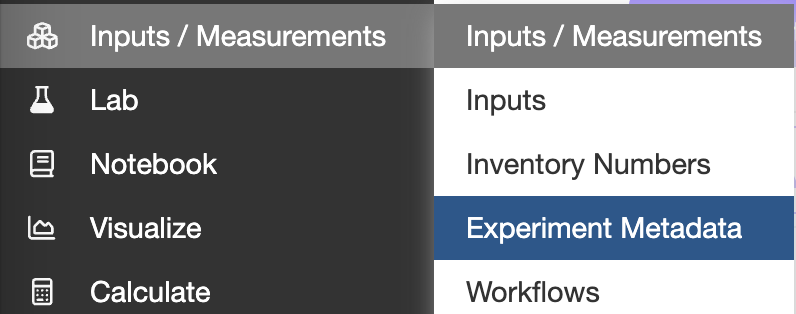
To set Experiment Metadata fields you need to use the main toolbar menu on the left of the page. Then use the Inputs/Measurements option and Experiment Metadata.
To create a new metadata field you need to click on “add a field” and select what type of fields you want to have. There are several options:


Text and Numeric refer to free text and numeric value fields. Categorical is a dropdown menu with a list of predefined options.To create options you can use the button Edit Options next to a newly created field.

With Date you can register any date related fields like creation date, production date, etc or you can use Timestamp if you need to register the exact time. With a Files you can attach any type of file which will be downloadable or you can add a Hyperlink with any source of information.

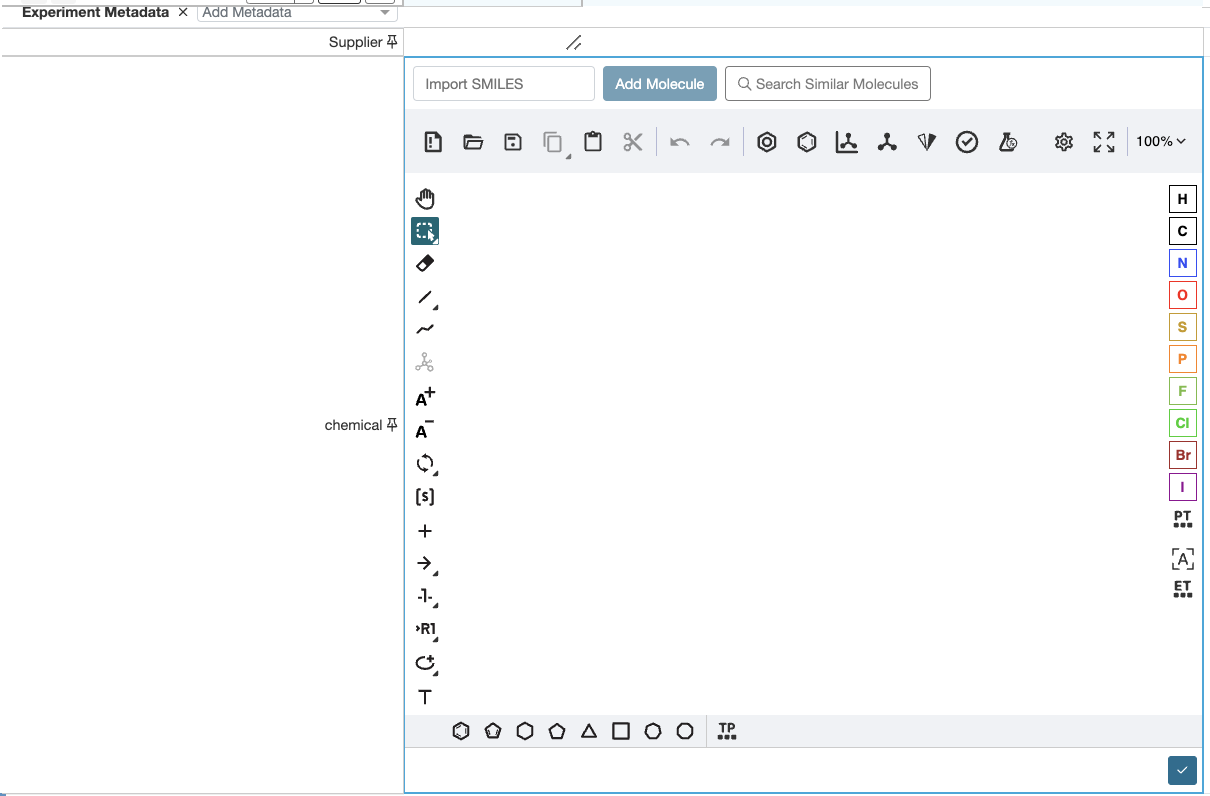
Chemical Structure gives an option to open a chemical structure editor where you can create it yourself.
Another type of categorical metadata could be Fixed List (Single) for one option selection and Fixed List (Multiple) for selection of multiple options.
Unlike Categorical, Fixed List gives more flexibility and can be used in the approval or request processes later on.
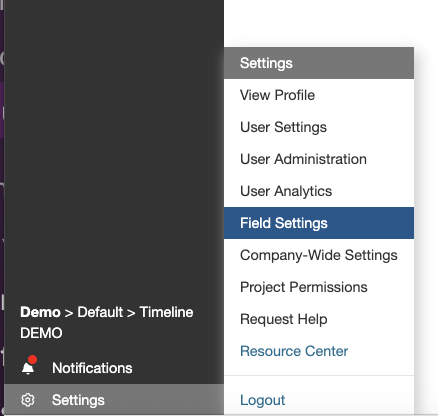
However, creating a Fixed List takes extra actions when setting up a system. You will first need to create a list in our Field Settings tool. You can access Field Settings from Settings in the main toolbar.
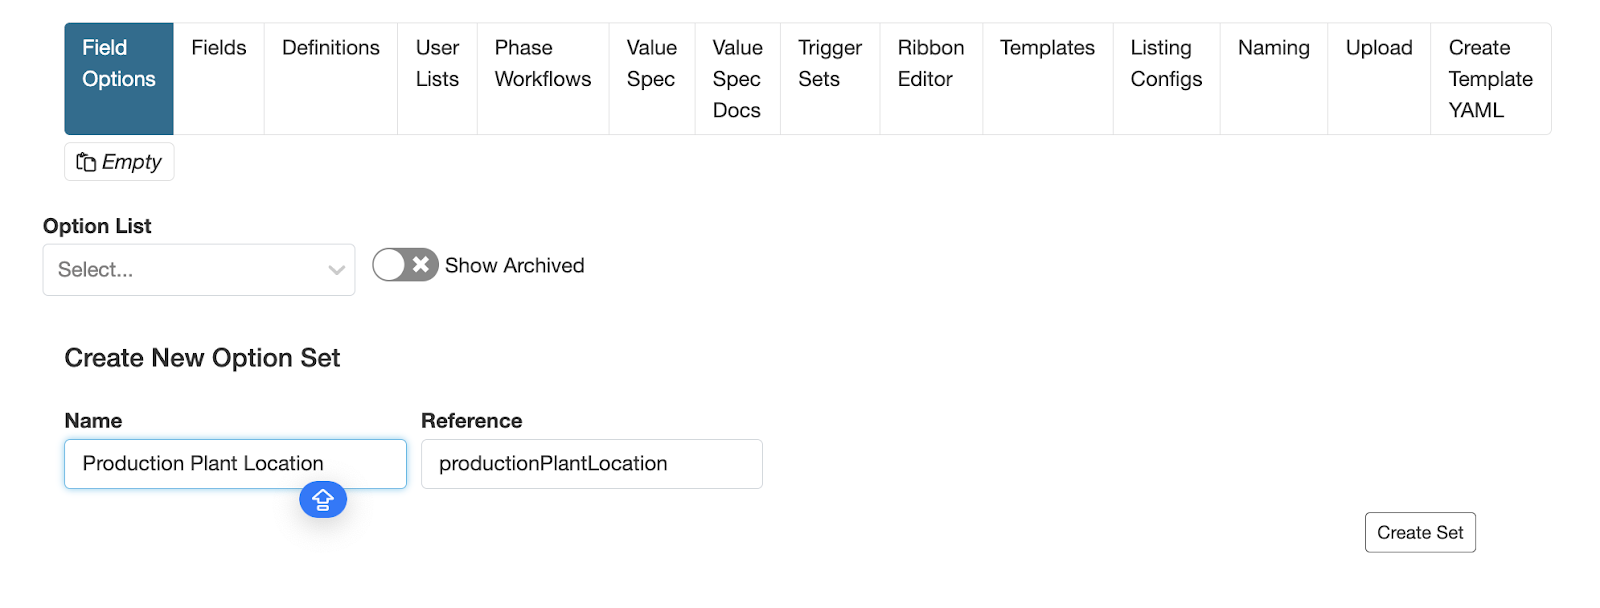
Then under the tab Field Options you create a new list by giving it a unique name and clicking Create Set.
Then you start adding options:

You can either do it manually by typing the name (1) of the option and clicking Add Option (2) or you can import a CSV or XLSX file which will create a list automatically. To check how the format for the uploaded file should look like, it’s recommended to create a couple of options manually and then use the Export XLSX button (5) or to ask a dedicated Account Manager. All the options can be deleted or edited (4).
Once you are finished with the creation of the list of options, you can connect this list to the Experiment Metadata Field.
To do that you add a new Experiment Metadata Field, give it a name and select either Fixed List (Single) or (Multiple). Then you click on the pencil button under the ID Source. The field will be connected to the list.
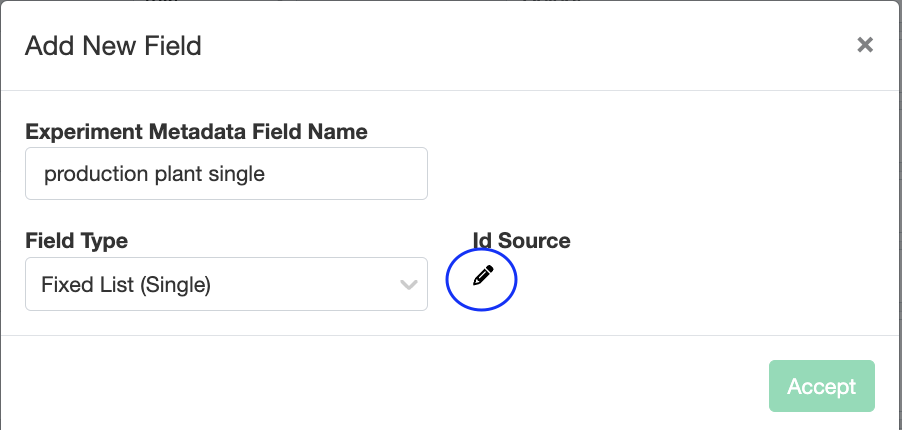
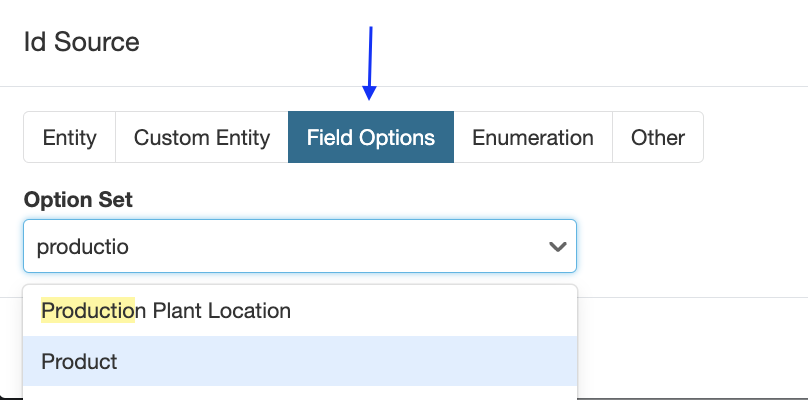
Then you need to navigate to the Fields Options tab in the newly opened window and select the name of the list which you just created and click Accept.
Fixed lists are also useful in the sense that you create this list once but can later reference it to other fields under different entities like Lab requests or Approvals.
Once you set up all the necessary fields in different formats you can also set up additional functionality for better visibility of the created fields. Under the column Settings you can find a list of options to select where you want Metadata fields to appear:
- Hide on inputs – hide field on Enter Formulations page. This field will be hidden on the recipe page, but visible on the page where you enter test results.
- Hide on outputs – hide field on Enter Measurements. This is the opposite of Hide on inputs.
- Display on dashboard list – show field on items on the Dashboard list. You will see this field under each formulation in the list of formulations in the project. For example: it’s important for you to see a creation date or status.

- Hide in Summary – hide field in the compare view where you can see the whole formulation with recipe and measurements parts. This could be used to economize space on the page.
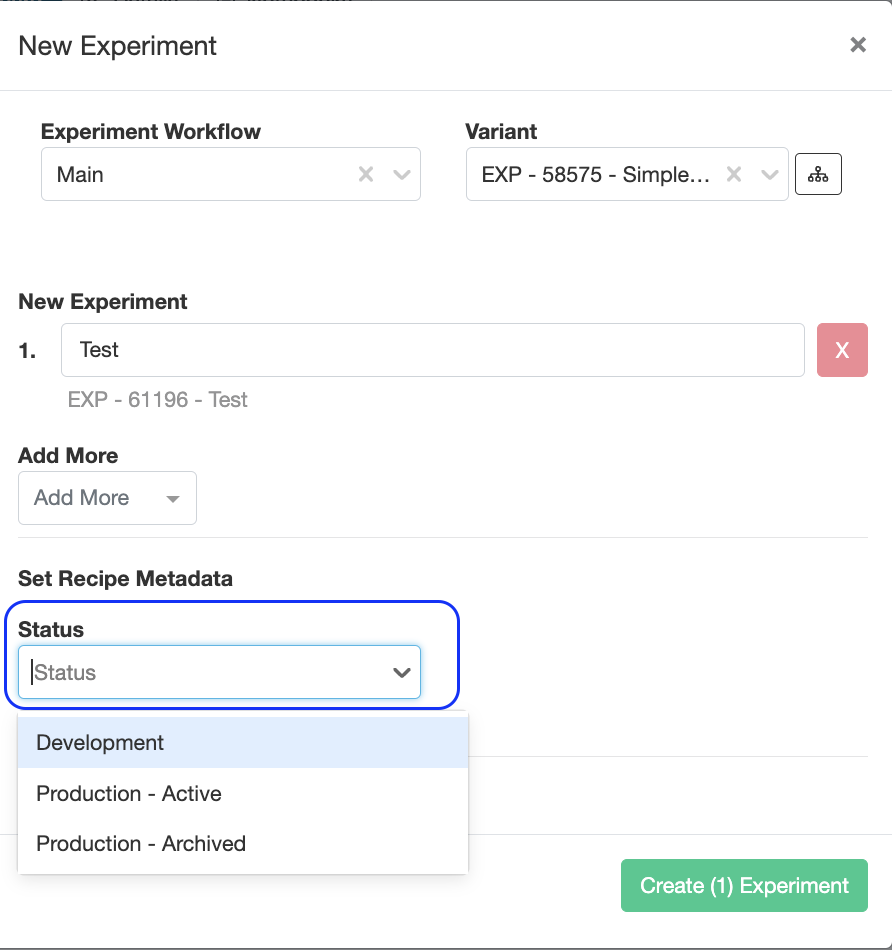
- Show in recipe modals – show field when creating a recipe or copying an existing one. See the example with Experiment metadata field “Status”.
- Inherit from Parent Experiment – include field in child experiments created based on the parent
- Show for Experiment when Blank – show field on Enter Recipe/Measurements page even if there is no value
- Show for Lots when Blank – show field in Ingredient Lots Table. For example: Lot Status, Manufacturing site.
- Make field read only – disable editing of the field for other users
- Required for Naming – field value will be used for generating recipe name
- Don’t copy with Experiment – when copying experiment, don’t carry over this field to a new experiment
- Add on creation – when creating an experiment this field will appear on the Add Lot window. This field is used in combination with Show for Lots when Blank.

Short version of each option is available with ‘i’ icon next to the Settings column:

With the column Notes a power user can add a description on the field which could be helpful for other users.
Default name – value spec