New “Condition” Filter Type
We’ve introduced a new “Condition” filter type that lets you filter for conditions on a specific output. Previously, the Condition Parameter filter applied only at the experiment level, meaning it returned experiments where the condition appeared on any output.
For example, if Aging Time is a condition on Viscosity in one recipe and Tensile Strength in another, using the Condition Parameter filter when plotting would include both recipes. Now, with the new Condition filter, you can narrow your visualization to show only experiments where Aging Time applies to a specified output (i.e. Viscosity).


To filter Explore Data experiments at the output level, follow these steps:
- First, plot the output that you are targeting for your condition (i.e. Viscosity).
- Access the Add Filter dropdown menu.
- Select “Add Experiment Outputs List Filters.”
- Choose “Condition” as the filter type.
- Select the specific condition to filter by and define its criteria (i.e. exists, equals, greater than, less than, does not exist, etc.).


New “Recipe Output” Filter Type
Platform users can also now filter experiments based on recipe output fields stored on experiment outputs using the new “Recipe Output” filter type.
This change is part of a broader shift away from output metadata toward output fields. Output fields are stored directly on outputs and can be defined via its Measurement Details window. Additional fields can also be configured in Form Admin.
If a measurement has output field values associated, you can now filter experiments to show only those that contain a specific field. For example, if you have a Batch Size field defined on a Tensile Strength output, you can filter your project to include only experiments where Tensile Strength has a Batch Size value.

To add a Recipe Output filter to your Project Dashboard, take the following steps:
- Add an Outputs filter (i.e. Tensile Strength).
- In the “Listing Filters for [Output]” tab, click Filters.
- Select Recipe Outputs as the filter type and choose the field to filter by (i.e. Batch Size).

New “Accept Optimal Inaccurate Solutions” and “Tolerance Percent” Solver Features
Two new options have been introduced to the Solver/Locks sidepanel which improve the Solver’s ability to find solutions while offering more control over how constraints are applied.
- Accept Optimal Inaccurate Solutions: Previously, attempting to Solve a recipe with inaccurate solutions would present an “Unexpected error has occurred” error message. By toggling on this new setting, we can enable the Solver to accept solutions previously classified as “optimal inaccurate” as valid, expanding the range of acceptable results.


- Tolerance Percent: This new Solver/Locks field allows you to add a buffer of ± the specified percentage to all fixed-values, allowing for more flexibility in meeting those constraints.

New “Ingredient Ratios” Solver Constraint
A new Ingredient Ratios constraint type in the Solver feature now allows users to enforce specific ingredient ratios in a recipe. This ensures that when one ingredient is adjusted, all others scale automatically to maintain the defined proportion.
To set one up on your recipe, take the following steps:
- Open the Solver/Locks side panel.
- Add an “Ingredient Ratio” rule.
- Select the ingredients you want to link by ratio.
- Set the desired ratio (i.e. 1:1:2).
- Once applied, modifying any ingredient amount will automatically adjust the others to maintain the set ratio.


New “Beta” Tag in External API Documentation
In our external API documentation, we will now use a “Beta” tag to indicate when an API is new and may still receive additional features. This does not change our standard for API releases, the tag simply indicates ongoing development without affecting stability.

External API Updates: Field Value Selection
Using set_entity_field_values, we can now specify a field option as a field value type. When sent, the field option will automatically be set to the correct field value.
This update improves data entry and overall accuracy when updating entity fields via the API. Note that this update is also async batch compatible, meaning that it can be used with other async batch APIs.


New Options for Advanced Screening Designs Using Well Plates
When creating an Advanced Screening Design using a well plate DOE Group, several new advanced options are now available, which provide users with more control over how the design is laid out. New advanced options include:
- Fill Direction: Allows users to configure the order in which the wells on a plate are filled with the samples or conditions. Options include Left/Right, Up/Down, or Randomize.
- Replicates: Allows users to place the same experiment across multiple wells. Note that this setting differs from the “Number of Replicates” parameter, which determines how many duplicate experiments will be generated with the exact same conditions.

View Preferences for Enter Measurements
View Preferences are now available on the Enter Measurements page. Previously, this setting was only available on the Enter Recipe page. Use the search action bar to open the modal, where you can access or create new view preferences.
Currently, these preferences can be used to save sections (i.e. dataframe, inventory, experiment groups, inputs tables, recipe calculations, etc) configured in the Sections Sidepanel. For example, a user could save and load a view preference which displays only the data frame.


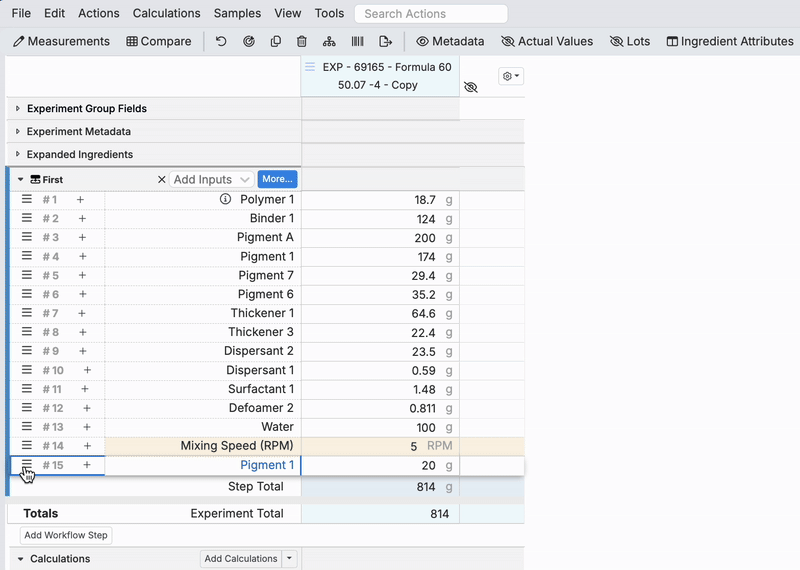
Create Stocked Workflow Steps
A new “Create Stocked Workflow Step” option is now available on the Enter Recipe page. To use it, select a workflow step, open its dropdown menu, and choose “Create Stocked Workflow Step.”
In the modal, set a scale percentage to adjust ingredient values. The data grid allows you to assign Actual Values, Lots, and Inventory Amounts, which generates a new recipe. If an Actual Value is provided, it will be used—otherwise, the Expected Value is applied.
This creates a new experiment and allows you to add it as an inventory item with the amount prefilled. The workflow step is then updated to use this new recipe instead of the original ingredients. Original totals remain in the original recipe, while scaled totals are applied to the new experiment.
This feature will be especially useful for workflows with shared steps across multiple formulations. Instead of weighing the same ingredients separately for each formulation, users can now create a large batch upfront, track it as an inventory item, and distribute it across formulations.


User-Specific Sorting on the Enter Recipe Page
Uncountable users can now configure user-specific sorting on the Enter Recipe page. This allows you to customize your personal sorting preferences without affecting other users’ views. To set this up:
- Open the Search Action bar and search for “Sorting and Organizing Options.”
- Click “Perform Partial Sort.”
- Select an item category and add a sort.
- Enable the “Modify User-Specific Sorted Order” setting to make the sorting specific to you.


Copy Lots Based on Previous Lots
A new “Copy Existing Lot” tab has been added to the Add Lot modal. This new feature enables users to create new Lots based on prior ones, improving workflow efficiency. To do so, take the following steps:
- Open the Add Lot modal.
- Navigate to the new “Copy Existing Lot” tab.
- Select a lot ingredient, enter a new recipe name, and choose an existing lot.
Once saved, the system will create a copy of the entire recipe associated with the selected lot.

Upcoming Terminology Update: Step Attributes → Step Fields
We are standardizing terminology across the platform to improve consistency. As part of this effort, ‘Step Attributes’ has been renamed to ‘Step Fields’ to align with our entity system naming conventions. This change ensures that the action name matches the modal title, ‘Select Recipe Step Field’.
Additionally, we will be updating related terms to maintain consistency:
- Clear Step Attributes → Clear Step Fields
- Clear Step Attributes (Empty Steps Only) → Clear Step Fields (Empty Steps Only)
- Clear Step Attributes All Recipes → Clear Step Fields All Recipes
- Equipment Attributes → Equipment Fields
Note that ‘Ingredient Attributes’ and ‘Autosave Ingredient Attributes’ will remain unchanged, as these correctly differentiate between ingredient fields and attributes.


Upcoming Terminology Update: ‘Test Sample Templates’ → ‘Test Methods’
We are renaming ‘Test Sample Templates’ to ‘Test Methods’ across the platform as part of a broader project to introduce support for Test Methods. This change will update the entity name, default definition, and all UI references to reflect the new terminology.
To clarify, ‘Test Samples’ will not be renamed—moving forward, Test Samples will be created via Test Methods.
Additionally, we have added an option to override this term in the Change Language section of the User Settings page.. This override will allow teams to configure their preferred terminology in advance. Learn more about terminology overrides.

Merge Recipe Step Rows with the Same Ingredient
On the Enter Recipe page, users can now merge recipe step rows that contain the same ingredient. When mix order is enabled, click and drag a row over other rows with the same ingredient and drop it to combine them and the ingredient amounts will be added together.
This update make it easier for users to consolidate ingredients in a recipe. The standard drag-and-drop UI remains unchanged when moving ingredients that do not match.
Filter Transitive Aggregates
You can now apply filters to transitive aggregates before aggregation. When adding or editing an aggregate-type column, user can filter the base type before aggregating.
For example, if a user has configured a transitive aggregate column on an experiments listing to display the GHS symbols for ingredients used, they can now apply a filter to the Ingredients Used base type to limit the displayed GHS symbols to only ingredients within a specific category.
To add a filter to an aggregate column:
- Edit an existing transitive aggregate column or create a new one.
- In the Select a Column modal, click the Filter button on an aggregate type column.
- Apply the desired filters and save.


Control Quick Editability for Workflow Phase
Previously, the Workflow Phase column on a lab request listing was always quick-editable. This allowed users to edit it directly from the listing page, regardless of the the definition’s “Quick Editable” toggle.
Now, admins can disable this quick editability by adding an editability constraint (”FieldConstraintEditable”) to the definition:
- Access the lab request definition on the Form Admin page.
- Select the Workflow Phase field.
- In the Constraints section, add a FieldConstraintEditable constraint.


Vertical Text Alignment in Notebook Tables
We can now vertically align text within table cells in Uncountable Notebooks. Three new options have been added to the top toolbar:
- Top Align: Positions text at the top of the cell.
- Middle Align: Centers text vertically.
- Bottom Align: Positions text at the bottom of the cell.
This update mirrors the functionality found in Google Docs and Word, providing greater control over table formatting.


Scale All Recipes at Once
A recent update enables users to scale all recipes in view on the Enter Recipe page in a single action. To do so, take the following steps:
- Access the Scale Recipes modal.
- Enter a scale percentage (i.e. 50%).
- Select the new “Scale for All Recipes” button to adjust all ingredient amounts accordingly.
This update makes it easier to adjust batch sizes consistently across multiple recipes, reducing manual edits and ensuring proportional scaling.


Improved Inventory Tracking on Set Inventory Page
Actions taken on the Set Inventory page are now recorded and displayed in the Reason column on the Inventory History listing page. Whenever inventory is adjusted using any action button, a message will be logged to reflect the update.
This enhancement provides better traceability and accountability, making it easier to track inventory changes, troubleshoot discrepancies, and maintain accurate records of inventory.


Expanded Date Querying and Expression Support in Equations
We have recently enhanced equation functionality for listing columns, enabling better filtering and data extraction. In the Select Columns modal, users can now add equation columns using the following components:
- Date Extraction Functions: Filter data by specific date components using date extraction functions, such as
MONTH(),DAY(),YEAR(), andWEEKNUM(), in equations. - Boolean Expressions: Allow equations to return
TRUEorFALSEbased on conditions. - IF functions: which enable conditional logic within equations (i.e.
IF(value > 10, "High", "Low")).
These updates make it easier to filter and categorize column data, improving efficiency when working with large datasets.


New Feature: Import Notebooks
A new feature has been added to the Uncountable notebooks page. Using “Import Notebooks”, users can now integrate other notebooks, including all elements and cells (text, graphs, files, images, etc). To use this feature:
- Select “Import Notebook” from the File menu on a notebook page.
- In the modal, choose a notebook and click “Import”.
- The selected notebook will be fully integrated into your new notebook, preserving all of its contents.


