In Uncountable, custom labels allow users to tailor information display to meet specific needs, from tracking inventory to organizing recipes. This guide walks you through the process of creating and configuring custom labels, whether by duplicating an existing one or building one from scratch.
Creating a Custom Label
Custom labels are created within the Templates tab of the Form Admin. It is generally easier to create a new custom label by copying an existing one. However, you can also create a new label template from scratch.
Creating a Custom Label by Duplicating
Users can create a new label by clicking “+ Add Label” and paste the JSON code of the existing label to copy into the Content section. Alternatively, follow these steps:
Under the Options column, click the cog icon and select “Duplicate Label”.

Add a name and submit.

Creating a Custom Label from Scratch
Click “+ Add Template”.

From this modal, name your label and use the following configuration:
- Namespace: label
- Field: layout
- Content Type: JSON Variables or Card Label

Configuring a Custom Label
Navigate to the Label Editor, located in the Templates section of the Form Admin. Within the Options column, click on the Card Label template cog icon (i.e. “HannahTest3-card”) and select “Go to Label”.

Within the Config tab of the Label Editor, select which entity to associate the label with by selecting an Entity Type and then an existing entity (i.e. Experiment).
Note: This doesn’t mean that the label is only linked to that specific entity, we are selecting an example to test how the label will look like, so feel free to change the chosen entity example to check how it varies with different attribute/metadata values.
However, not all value spec items are available for all entities, (i.e. ref:recipe is only available on recipes, and not on inventory amounts or other entities). This can be resolved by using ref:fields where available, or creating duplicate labels with the appropriate value spec loaders.

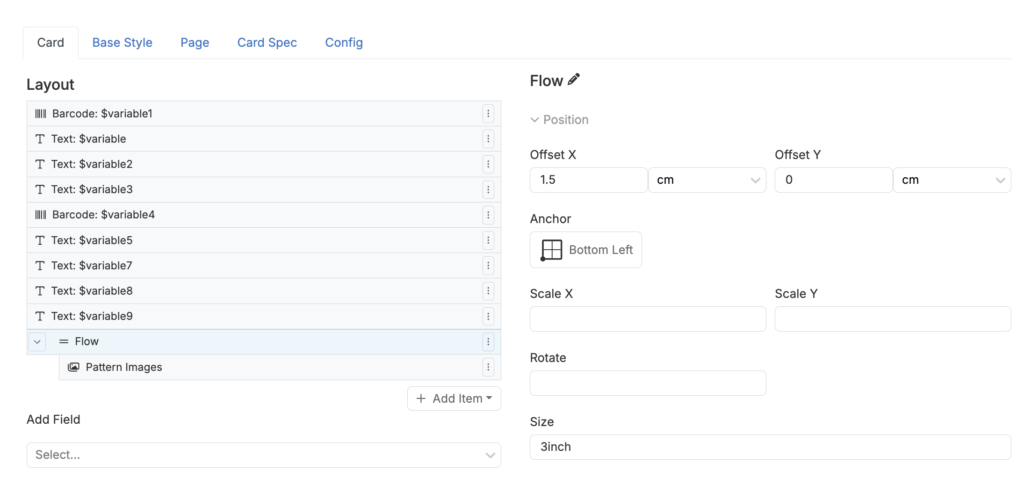
Within the Card tab, add and delete the items that appear on the label. These can be images, text, spacers, barcodes or item containers (Flows or Stacks). When clicking on one of these items you’ll be able to change some of its properties such as the size, position or style.

Within the Base Style tab, modify the general style settings of the label. Here you can change font style, size, weight, and color.

Within the Page tab, configure a label page printouts.
- Set page dimensions (Width and Height).
- Determine how many labels to include per page (Grid X and Grid Y).
- Access other formatting properties such as card bleed (ensures that the background color or graphic extends past the label border, so that the final printed label has no gaps) and padding (distance from label barriers).

Within the Card Spec tab is the full configuration of this label in a JSON format. When editing any fields this JSON code will be edited as well, so feel free to modify the label from the JSON Editor.
Linking a Custom Label to an Export
Once you have created a label template, it can be linked to an export from the Form Admin page.
From the Definitions tab on the Form Admin, select “+ Create Definition”.
Select the appropriate definition type. Definition type and the label entity must match— a “recipe_export” definition for a recipe label or an “inventory_amount” definition for an inventory label.

Fill out all required fields and add the definition.
Navigate to the “Runsheets and Labels” tab of the newly created definition and click “Add New Runsheet”.

Configure your new runsheet by adding a label name, setting Type to “label”, and type the right value for Template according to the template you’ve previously configured (i.e. “HannahTest3-card”).

After creating the new runsheet, you may further edit the label template by clicking “Go To Label” (barcode icon).

Value Spec
To make a label item pull values from the platform you’ll need to use value specs. Note that you can use the value spec editor as a no-code tool to build these expressions, and then test that they actually will work from the ‘Test’ tab.

Common Value Specs
This section contains some common value specs you may want to copy-paste:
For Recipes
recipe_name: text:${ref:recipe.name} or text:${ref:recipe.editable_name}
recipe_id: text:${ref:recipe.id}
recipe_metadata: text:${ref:recipe.metadata.metadata_name}
recipe barcode: text:${v:recipe.barcode}
recipe Lot ID: text:${ref:recipe.metadata.lot_id}
Ingredient within a recipe: text:${(id_source_map "entity/ingredient" ref:recipe.lotIngredientId)}
ingredient attribute within a recipe: text:${(id_source_map "fieldOptions:fieldoptionsRefName" (with_entity "ingredient" ref:recipe.lotIngredientId ref:ingredient.attributes.attributeRefName))}
For Inventory Amount
General lookup for all info: v:invAmount or ref:invAmount
title: text:${ref:invAmount.name}
barcode: text:${ref:invAmount.barcode}
lot: text:${expr:(coalesce ref:invAmount.ingredientLot.name json:"No Lot")}
category: text:${expr:(coalesce ref:invAmount.ingredient.category.name json:"Uncategorized")}
Lab: (ref:invAmount.lab.name)
Location type: text:${v:invLocalLocation.type.name}
Location within the lab: text:${expr:(join ref:invLocalLocation.path_names text:>)}
Metadata from the inventory’s lot: text:${expr:(coalesce ref:recipe.metadata.MetadataRefName json:"")}
For Inventory Location
General lookup: v:invLocalLocation or ref:invLocalLocation
For Ingredients/Inventory
name: text:${ref:ingredient.name}
attribute_value: text:${ref:ingredient.attributes.attribute_name}
List attribute: (join ref:ingredient.attributes.hazard_id ", ")
For Fields
i.e. Lab Requests, Custom entities, etc.
field_name: text:${ref:fields.field_ref}
For User Context
i.e. Current project, Material Family, user data when exporting, etc.
project_name: (with_entity "project" ref:userContext.project.id ref:project.name)
Configuring Ref Fields
Ref fields can be configured from the Control Panel. From the Control Panel page, scroll down and click the “Edit reference names” button.
- Select from the top left selector which reference table you want to modify (1).
- You may type values in the fields under the column names (2) to quickly filter (i.e. by “Name”).
- Once you find the field you want to add a reference name to, click on the Edit button (3).
- After you have added reference names, click “Commit” to save.
Important: Be extra careful when changing values here, as another configuration (such as custom runsheets) could be using the reference names.

Note that fields, such as the ones you could be using in a Custom Entity or in a Lab Request, get a reference name when they’re created:

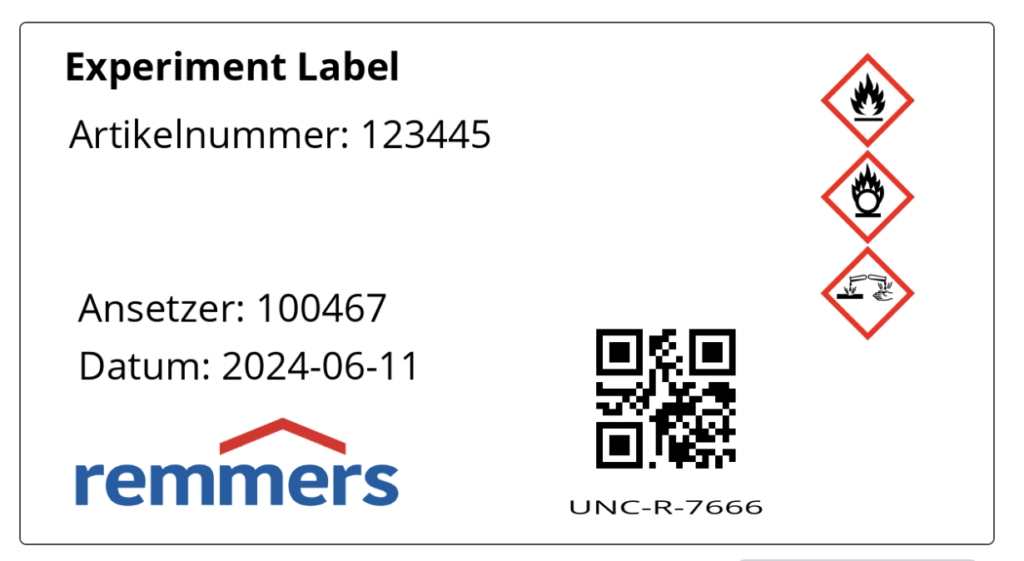
Adding GHS Symbols to a Label
GHS symbols are a special case in Uncountable because they involve loading a set of images from an ingredient attribute. To do so, users must create a new ingredient attribute, edit its reference name, and link the attribute to public data.
Step 1: Create a new GHS Symbols Attribute
First, create a new attribute with a “GHS Symbols” type.

Step 2: Edit the New Attribute Reference Name
To make the GHS symbols accessible in a label, you must edit the reference names on the newly created ingredient attributes to make them accessible via a value spec. This is done within the Control Panel, as discussed in the Configuring Ref Fields section above.
- From the Control Panel page, scroll down and click the “Edit reference names” button. We recommend the ref name be “ghs_ing_attribute” to use the value spec examples throughout this doc.
- Select “ingredient_attributes” from the dropdown menu.
- Click the pencil to edit your newly created ingredient attribute’s reference name.
Step 3: Link the Attribute to Public Data
Once you have edited the reference names to make the new attribute accessible via a value spec, you can must then link the attribute to public data.
On the attribute page, link the attribute to a public data source. Under Additional Options, select “GHS Symbols” from the Sync Attribute to Public Data Source dropdown menu.

Step 4: Add the GHS Symbol to the Label
When configuring the label, Add a Flow element as the item container in the label template and define its size to accommodate the symbols.

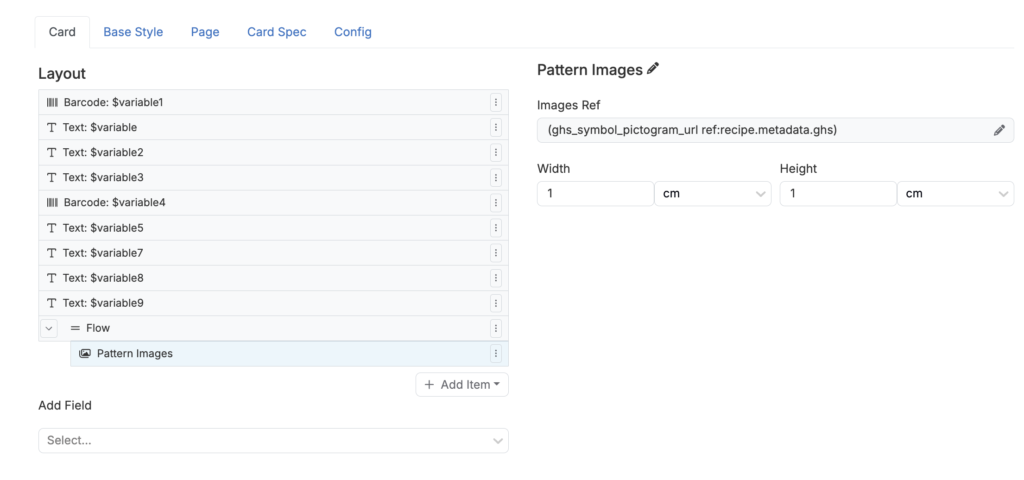
Add a Pattern Images item to the Flow element. Use the following variable to pull the GHS symbol pictograms:
expr:(ghs_symbol_pictogram_url (coalesce ref:ingredient.attributes.ghs_ing_attribute json:[]))

An shorter alternative to display GHS symbols that are stored as experiment metadata hazard on a experiment label would be:
(ghs_symbol_pictogram_url ref:recipe.metadata.hazard)Here are some commonly used operations:
- coalesce: Handles null values by providing a fallback.
- datetime: Formats dates and times.
- lower / upper: Converts text to lowercase or uppercase.
- initials: Extracts initials from text.
- if: Adds conditional logic.
- join: Joins multiple values into a single string.
- json: Handles JSON data.
- ref: References another attribute or metadata field.
- regex_match: Matches values using a regex pattern.
- round: Rounds numeric values.
- substring: Extracts part of a string.
- add / sub / mul / div: Basic arithmetic operations.
Adding a Picture or Logo to a Label
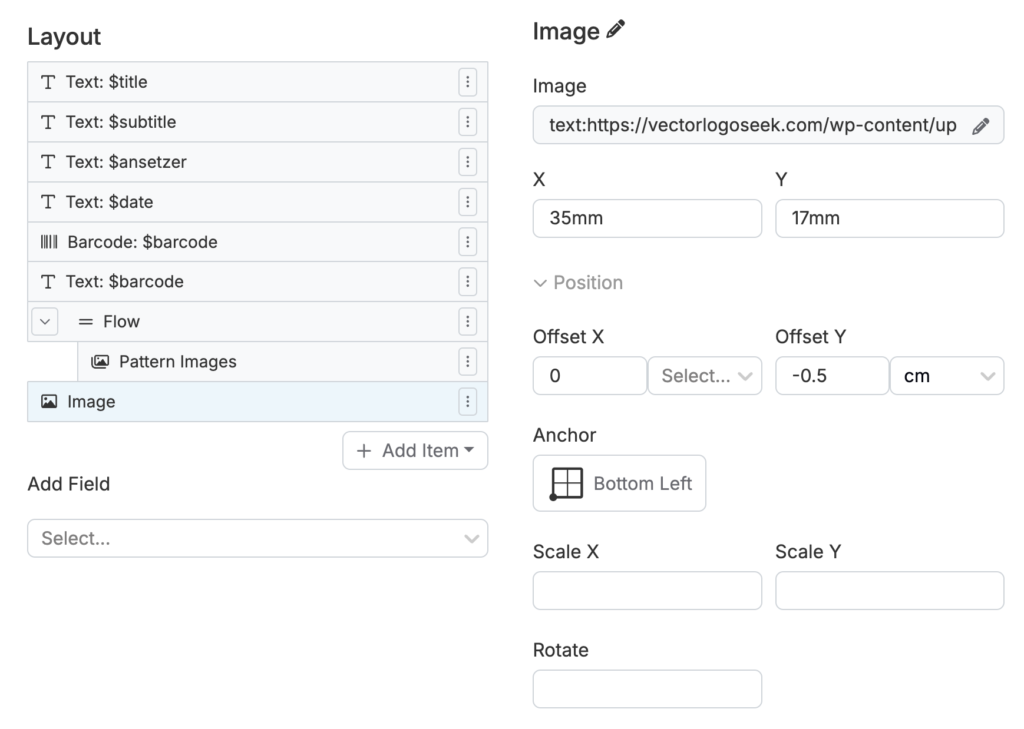
It is also possible to add a picture, such as a logo, to a label export. This can be done by directly referencing a web link to the respective image into the “Image Ref” field of the “Image” item on Card tab.
Example “Image Ref” Value Spec:
text:link_to_logo

text:<https://vectorlogoseek.com/wp-content/uploads/2019/06/remmers-vector-logo.png>


