Uncountable users have the ability to configure listings by adding, removing, and editing columns and filters to best suit their needs and preferences. Changes to the listing on the user level affect only the individual configuring. To read more about user listing configuration, visit the Listing Configurations (User) article.
This article discusses how to alter listing configurations for all users. In order to do so, the individual configuring must have admin rights enabled, which can be done by your Uncountable representative.
Listing Configurations Page
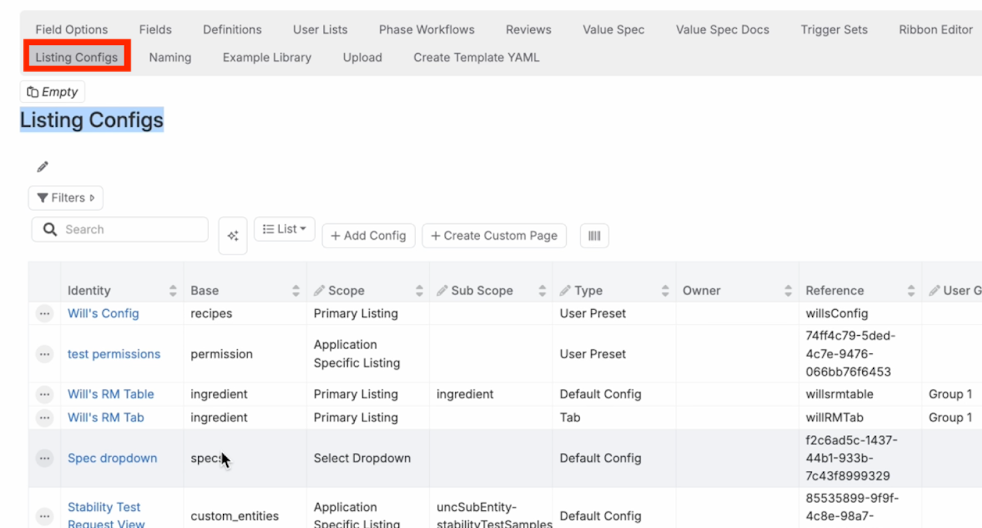
The Listing Configurations view page is located within the Listing Config tab on the Form Admin page. From here, users have access to a table of all configurations in place across all listings. The table is searchable and sortable by column header.
In this case, the “Base” column refers to entity type in the listing (i.e. recipe, ingredient, custom entities, etc) .
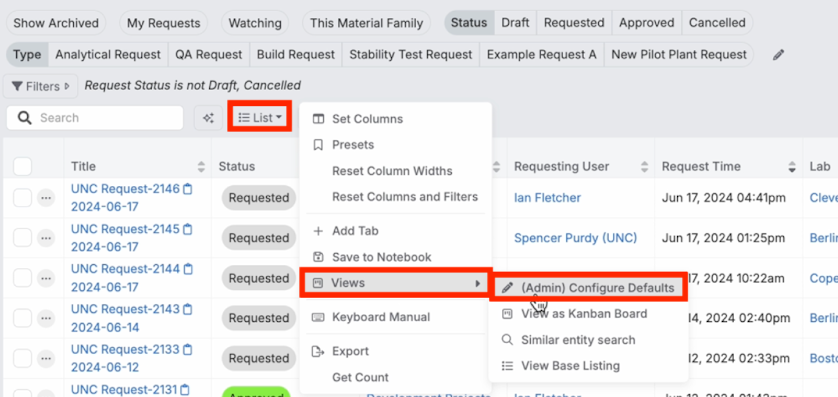
The Listing Configuration view page for an entity is also accessible from the entity’s listing page. From a listing, open the “List” → “Views” → “[Admin] Configure Defaults”.
Adding a New Listing Configuration
From this page, users can view all configurations in place for that particular entity. In this example, the page is pre-filtered down to only display configurations for the Lab Requests listing.
To add a new listing configuration, click the “+ Add Config” button at the top of the table.

Within this modal, you will add a listing configuration name and define both the type and user groups. The type refers to where this configuration will be accessible from and includes default, tab, and preset.
- Default: Adjusts the standard view (what all users see on a particular listing page)
- Tab: Adds an additional tab for all users at the top of the listing page, this tab offers an alternative configuration in addition to the default
- Preset: Makes the configuration view available under within the Presets modal
Selecting the user group determines which groups of users changes to the listing view are shared with. This is a helpful way to limit the scope of who you are setting the view for. For example, in a laboratory setting, lab technicians may require a different listing configuration than scientists.
Once these criteria have been defined, click “Submit”.

Configuring a New Listing (Admin)
Once a new listing view has been created, it can be further configured by adjusting the default columns and filters.
Quick Filters
Within the Quick Filters tab, users have the ability to add quick filters, which allow users to quickly toggle filters on and off. For more information on Quick Filters, refer to the Quick Filters section on the Listing Configurations (User).

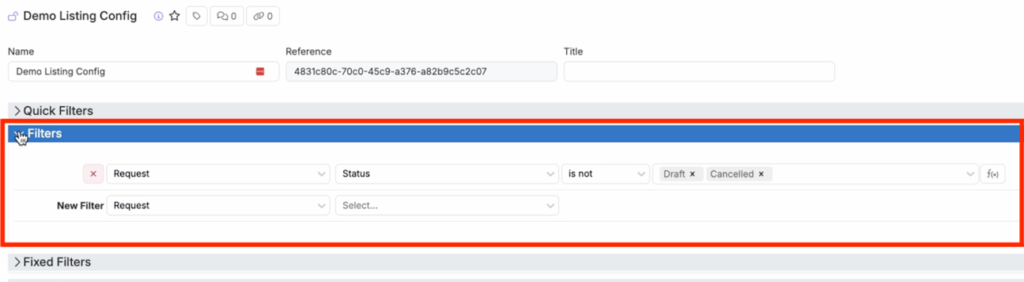
Filters
Within the Filters tab, users can determine which standard filters they want displayed.
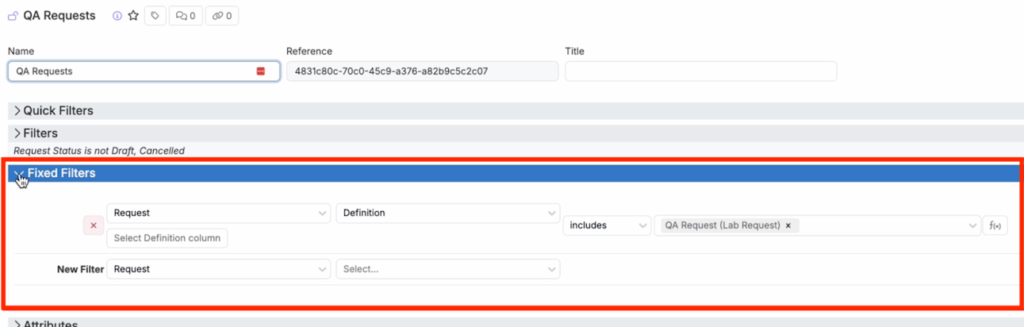
Fixed Filters
Within the Fixed Filters tab, users can add filters that are not adjustable from the listing configuration view. Instead, they pre-filter results. For example, if a user wanted to make a QA requests view, they could add a fixed filter to include only QA requests.
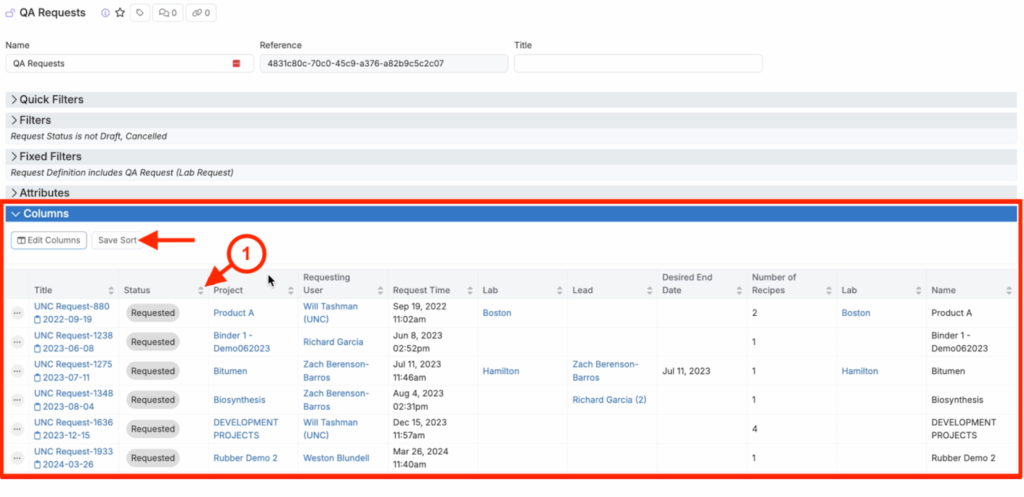
Columns
Within the Columns tab, users can determine which columns they want displayed. Click “Edit Columns” to open a modal which allows you to rename, rearrange, add, and remove new columns to the listing configuration.
Users can add information to a listing view that is relevant to the entity or other other linked entities (ones that are intrinsically associated). For example, a user might add a column that displays the project name associated with the lab request.

In the Columns tab, users can also reorder and determine the default sort for each column. Clicking the arrows associated with a column header (1) sorts that column in either ascending or descending order by default. Clicking the top arrow sorts by ascending and clicking the bottom arrow sorts by descending. Once these changes have been made, click “Save Sort”.
Once the default listing has been configured, the user can return to the listing page. From there, the new default configuration will be visible.
Note: Any changes made to the columns and filters can be reset to default by opening the “List” menu and clicking “Reset Columns and Filters”.
Resetting User Configurations
While users can freely personalize their listing views, there are times when admins may need to restore consistency across teams. The User Configs tab in Form Admin provides tools to reset individual configurations and enforce organization-wide standards.
Configure Reset User Configs
The Configure Reset User Configs button is a new method for resetting which offers a more flexible and targeted way to reset listing configurations. Instead of applying a blanket reset by entity type, this modal allows admins to filter by Base, Scope, and Subscope—enabling selective resets across different types of listings and user contexts.
To use this feature:
- Navigate to the Listing Configs tab in Form Admin. Click Configure Reset User Configs.
- In the modal, choose:
- Base (required): The entity type (e.g., recipe, lab request).
- Scope (optional): Typically refers to a broader listing grouping.
- Subscope (optional): Further narrows the target configuration.
- Select one of the following actions:
- Reset to Admin Settings – Completely removes personal listing configurations and applies the admin-defined view.
- Import Admin Settings – Merges admin-defined quick filters and tab order into the user’s view while keeping their custom filters and columns.


This feature is especially useful when rolling out new standardized listing views across different departments or correcting misaligned personal configurations.
Legacy Listing Config Reset
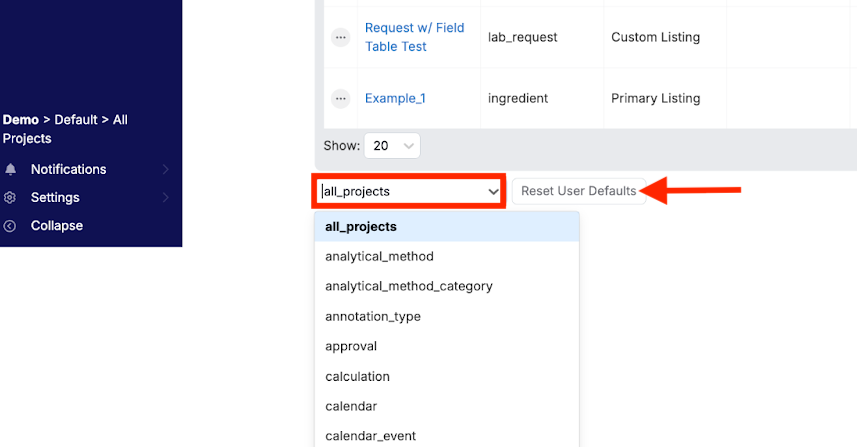
The original method, resetting by base alone, is also still available for quick resets. To use this method, take the following steps.
- Access the Listing Configs tab of the Form Admin and scroll to the bottom of the page.
- Select the base category from the dropdown list, and click “Reset User Defaults”.