A naming scheme is a structured method for automatically generating names for experiments and projects in Uncountable. Naming schemes can also be applied to all other entities in the platform, such as lab requests, inventory, or ingredients.
When creating a new experiment within a project, users may have an editable “New Experiment” field where they can modify part of the experiment name (although some companies prefer to restrict or remove this ability).
In addition to the editable field, there will also be an uneditable prefix automatically added at the beginning of the name. This prefix is created based on metadata (single select, dropdown, numeric, or text) values set when the entity is created. It also often includes a “counter” component, which increases with each new entity.
This combination of prefix and editable field is the naming scheme and is defined for the experiment within the Form Admin “Naming” page.
Naming schemes reduce user error, automate workflows, and make it easier to search the platform. By enforcing consistent naming, we can also improve collaboration by ensuring everyone refers to entities in the same way.

Creating an Experiment Naming Scheme
When setting up a naming scheme for experiments, users typically want to include both project and experiment details, such as the project identifier and the experiment’s sequence within that project. For example:

To implement this, we need to store project and experiment details as metadata. This involves configuring the metadata settings and value spec to include a counter component which increments numbers automatically (i.e. Project 1, Project 2, Experiment 1, Experiment 2, etc.).
The setup for creating a new experiment naming scheme in this way involves:
- Configuring project metadata fields
- Configuring experiment metadata fields
- Creating the naming scheme
These steps are walked through in detail below. Note that this is just one example—naming schemes can be customized to include different metadata using the same approach.
Configuring Project Metadata Fields
First, add and configure a new project metadata field which will be used to record the project identifier.
Step 1: Adding Metadata Fields to a Project
The easiest way to add a new project metadata field is directly on the project definition.
- Navigate to the Definitions tab on the Form Admin page.
- Select your Project Definition (definitions are created per material family—for example, in the “Hannah Test” material family, edit the “Hannah Test Project” definition).
- In the Fields tab, add or create a new metadata field such as “Project Number”.

Step 2: Adding a Counter to the Project Metadata Field
Next, configure the metadata field value spec to include a counter.
- Select the new metadata field in the Project Definition.
- Copy its reference name (i.e. “projectNumber”). Note that value spec is case sensitive.
- Go to the Field Overrides tab.
- In the Default field, click the pencil icon to open the value spec editor.
- Configure the value spec:
- To use a simple counter which increases for each project added (i.e. 1, 2, 3), enter the following value spec: counter:”projectNumber”
- To include text (i.e. P1, P2, P3), use the format: text:P${counter:”projectNumber”}
- In the value spec modal, use the Evaluation Sample Preview to test how the metadata value will populate.


Step 3: Configuring Project Metadata Field Settings
Once the new metadata field has been created, ensure the correct settings are enabled.
- Navigate to the Select Project page.
- Click the cog icon and select “Edit Metadata Fields” to access Edit Project Metadata Fields.
- Ensure the following options are enabled on the new metadata field:
- Add on Creation: Automatically adds this field when a new project is created. This ensures every project has a unique number, filled in based on the Field Overrides.
- Include in Recipe Metadata: Includes the value in Recipe Metadata (required for the next step).


Step 4: Test
Now, when creating a new project, the configured project metadata field should be automatically populated for each new project. To verify:
- Create a new project.
- Open the Project Details page.
- Confirm that the field has been auto-filled.
- Repeat these steps for a second project to confirm that the value increments.


Configuring Recipe Metadata Fields
Next, we will add and configure a new experiment metadata field which will be used to record the experiment’s sequence within its project.
This metadata field will also include a counter. However, unlike the project metadata field (which we wanted to continuously increases for all projects), the experiment metadata field needs to reset **for each new project. To achieve this, we need to create a unique counter for each new project.
Step 1: Creating a New Recipe Metadata Field
Experiment metadata fields are defined on the Edit Experiment Metadata page.
- Access the Edit Experiment Metadata Fields page.
- Click “Add Field” and add a new Numeric field such as “Version”.
- Ensure that the Add on Creation setting is enabled for this new field. This ensures that every new experiment will automatically have this field added.

Step 2: Assigning Reference Names
Next, we need to configure the value spec. To create an experiment counter which resets for each new project, we will need to include both the experiment and project metadata fields in that value spec which requires that both fields have reference names.
- Create a new blank experiment. This essential first step adds your project metadata field to the recipe metadata based on the “Include in Recipe Metadata” setting enabled previously.
- Access Edit Reference Names.
- Use the dropdown menu to select “recipe_metadata_fields”.
- Search for the recipe metadata field you want to include (”Version” and “Project Number”).
- Assign reference names for both (”version_counter” and “projectNumber”) and hit the “Enter” key.
- Click the blue “Commit” button to save changes.


Step 3: Adding a Counter to the Experiment Metadata Field
Once reference names have been assigned, edit the metadata field value spec to include a counter which resets for each new project.
- On the Edit Experiment Metadata Fields page, locate the field you are configuring.
- Open the value spec editor by clicking the pencil icon in the Default Name field.
- Use the following value spec format: (counter (text “version_counter” ref:recipe.metadata.projectNumber))
- In the value spec modal, select an Entity to use the Evaluation Sample Preview and test how the metadata value will populate.


Step 4: Test
Now, when creating a new experiment, the metadata field should now be automatically populated for each new experiment and the counter should reset for each new project. To verify:
- In a project, create two or more experiments.
- On the Enter pages, display Experiment Metadata.
- Verify that the new metadata field value (i.e. “Version”) increase for each new experiment.
- In a second project, create two or more experiments.
- Verify that the new metadata field value (i.e. “Version”) resets to 1 and then increase for each new experiment.


Creating the Naming Scheme
Once all relevant metadata fields have been configured and tested, you are ready to create a new naming scheme. Naming schemes are created and managed in the Naming tab on the Form Admin page.
Step 1: Creating a New Naming Scheme
- Navigate to the Naming Schemes tab of the Naming page.
- Click “+ Add Naming Scheme”.
- Add a reference name (i.e. “hannah_test”).
- Enable switch statements. These function as a sequence of “if” statements, each defining a specific condition and its corresponding outcome (if this, then that).
- To apply consistent naming in all cases:
- Under switch, click “+ Add”.
- In the modal, fill out only the result_vs field, referencing whatever information you want to pull. For this example, we will use the format: (text ref:recipe.metadata.projectNumber “-” ref:recipe.metadata.version_counter “-” ref:recipe.editable_name)
- To add a series of switch statements, click “Add” and provide the fill out all fields.
- Save changes.
Note: It is important to note that this is just one possible example of a naming scheme configuration. Naming schemes be made to include any information or metadata desired.


Step 2: Enabling the Naming Scheme for a Material Family
Once the new naming scheme has been created, it must be enabled it for a material family using its reference name.
- Access the Manage Material Families tab on the Company-Wide Settings page.
- For the desired material family, edit the Default Recipe Display name.
- Use value spec to reference the new naming scheme using the following format: text:${ns:hannah_test}.


Step 3: Test
Once saved, the new Naming Scheme will be active within that material family. To test, create a new experiment within a project.

The experiment name “P2-5-Experiment 5” reflects the NS configuration:
- P2 indicates that the experiment was created in second project within that material family.
- 5 indicates that this new experiment is the fifth created within that project.
- Experiment 5 is the Editable Name, manually entered in the New Experiment modal.

Default Recipe Names without a Naming Scheme
There are also situations where users may want to make simple adjustments to their recipe name format. In this case, a naming scheme is not required. We can simply edit the Default Recipe Display Name for the material family using value spec.
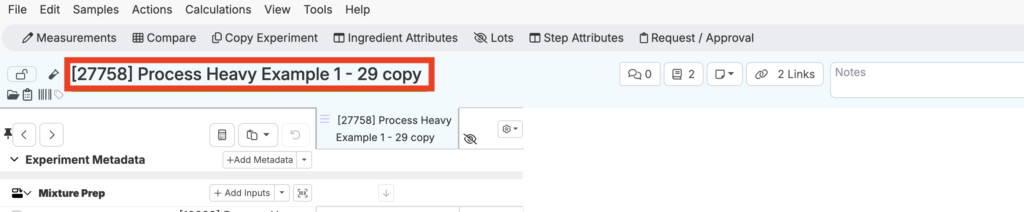
For example, companies will commonly want to display the recipe ID as a bracketed prefix before the Editable Name. This can be done by taking the following steps:
- Access the Manage Material Families tab.
- For the material family, edit the “Default Recipe Display Name”.
- Use the following value spec: text:[${v:recipe.id}] ${v:recipe.name}
Note: It is important to note that this is just one possible example. Default recipe names can be made to include any information or metadata desired.

This will result in a recipe name like the one pictured below, where the recipe ID appears in brackets in front of the Editable Name.
Refreshing Experiments with Naming Schemes
Recipe names don’t change automatically when you add or modify a naming scheme. In order to update, we have to manually refresh. This can be done on individual recipes or across a material family.
Bulk Refreshing Names Across a Material Family
- Navigate to the Manage Material Families tab of the Company-Wide Settings page.
- For a material family, click the refresh icon within the Default Recipe Display Name tab.

Refreshing Names from the Enter Pages
On the Enter pages, use the search actions bar to find “Refresh All Recipe Names”.

Editing Experiment Names with a Naming Scheme
Once a naming scheme has been configured and recipes refreshed, the formatting applies to all experiments across the entire material family.
If the naming scheme configuration contained an Editable Name component, users with appropriate permissions can still adjust that field at any point. This can be done by on either Enter page, by hovering your mouse over name in the top left cover, click the pencil icon, and typing directly into the field.
On the data grid, you can also select the “Rename Experiment” option from the recipe column dropdown menu.

However, any additional formatting hardcoded into the naming scheme will apply to all experiments and cannot be removed easily. If you need to remove this formatting, contact your dedicated Uncountable representative.
Manually Resetting Naming Counters
In some situations, users may need to manually reset a counter or skip ahead in the sequence. This can be done within the Naming tab on the Form Admin page.
- Access the Naming Counters tab on the Naming page.
- Search for the Naming Counter.
- In the “Next” column, you will see what number is next in the naming sequence.
- Click the pencil icon to manually adjust this value to.
